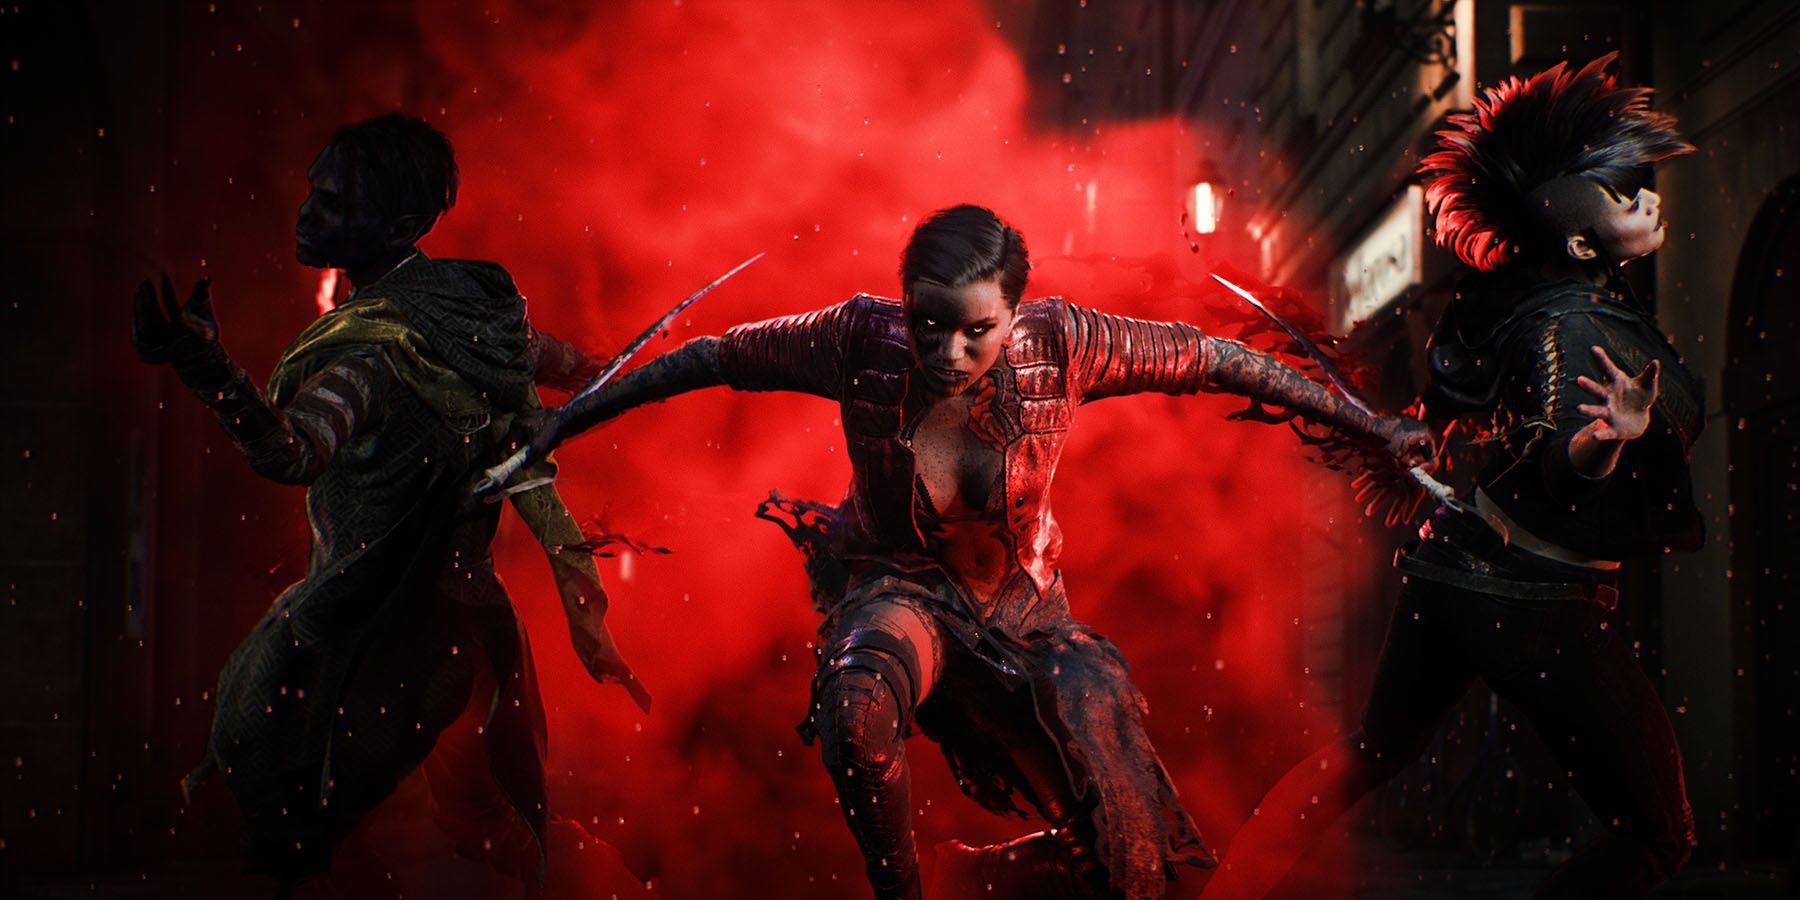
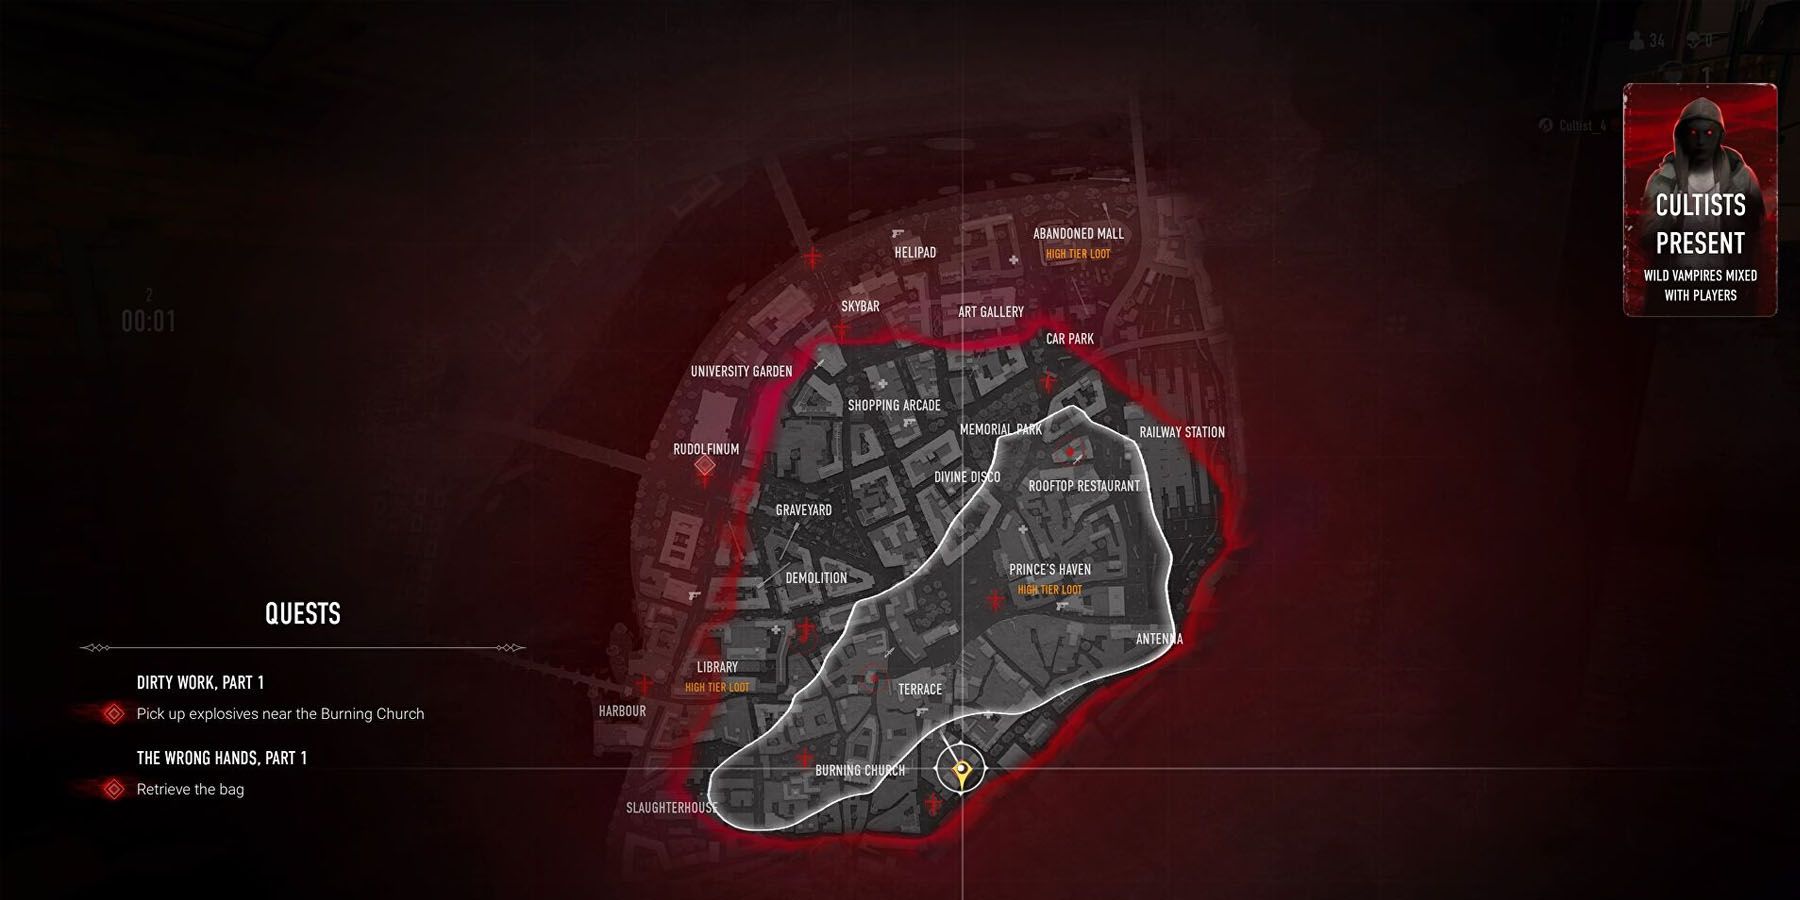
Set during a bloody battle royale after the Second Conclave of Prague, vampires of Vampire: The Masquerade - Bloodhunt must use their unique gifts to outlast each other or meet the Final Death. And, while players can enjoy abilities and concepts lifted from Vampire: The Masquerade, Bloodhunt devs Sharkbomb seemed to spare no expense giving players a backdrop worthy of the bloody conflict.
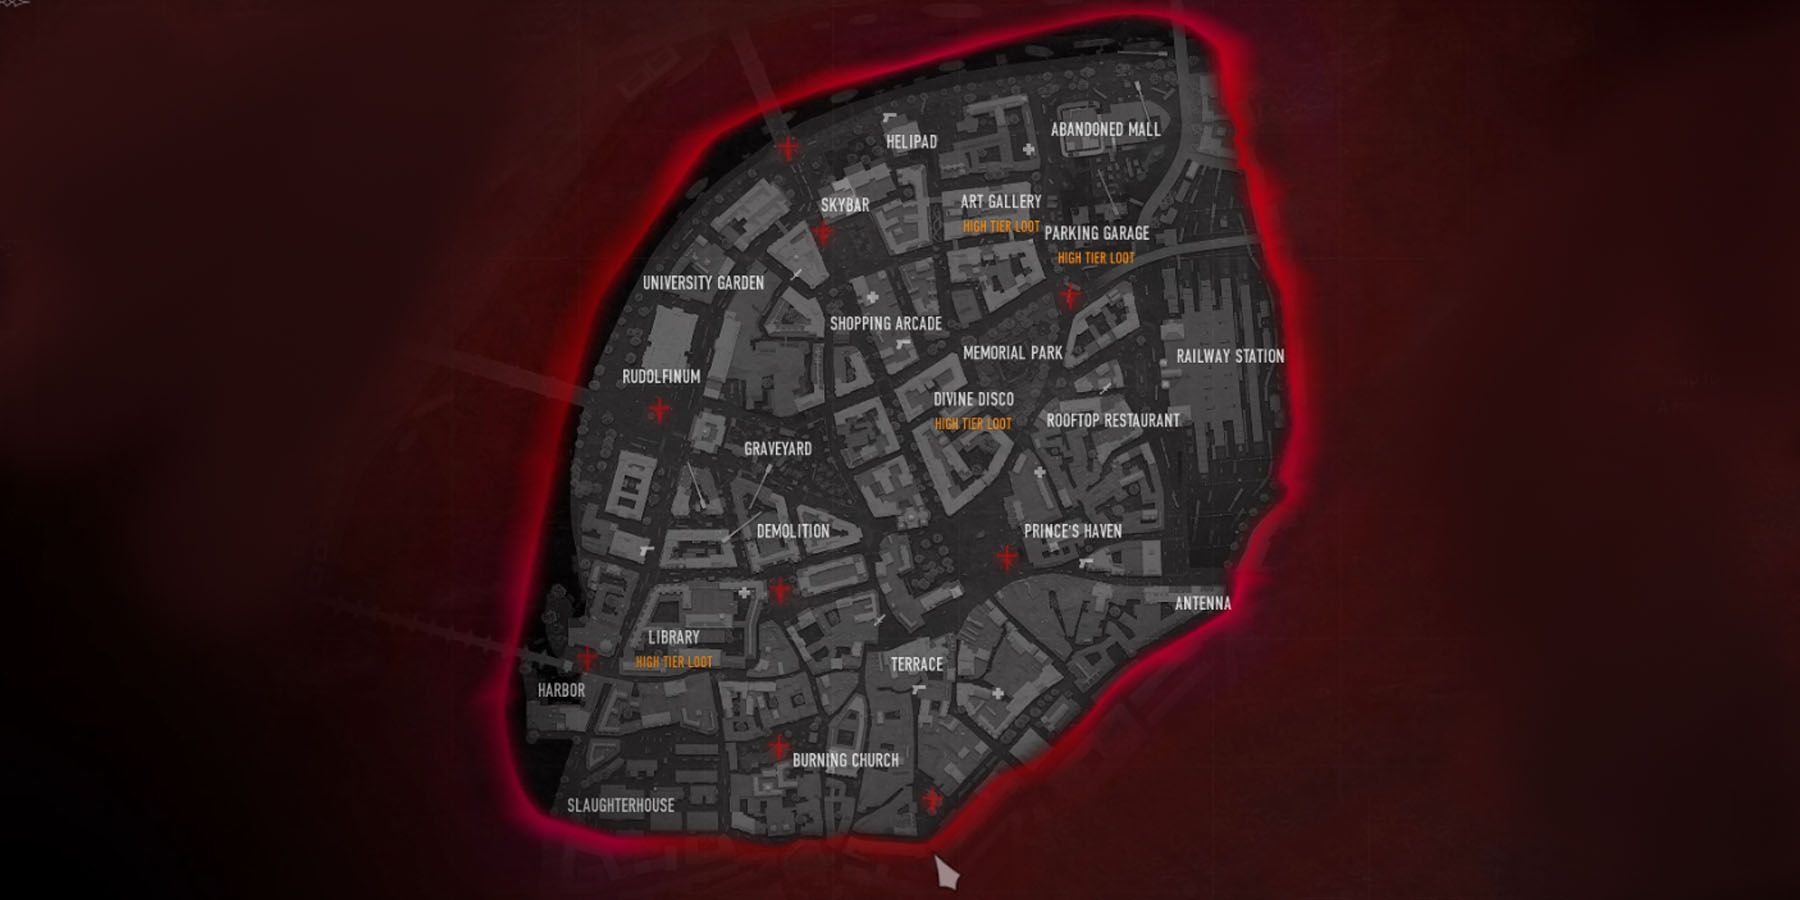
When players look at Bloodhunt’s map of Prague, it seems apparent that Sharkbomb devs took time to make the map as realistically appropriate for the Vampire: The Masquerade battle royale as possible. Interestingly, players who familiarize themselves with the map enough won’t just get to know Prague more intimately - but rather gain the upper hand in each Bloodhunt match.
Memorize Map Elements First
Before vampires can master moving around in Prague in Bloodhunt, it helps to first understand the many intricacies involving the map in the first place. The sooner players understand how these elements mix with each other, the faster they’re going to be able to navigate Prague knowing exactly what certain symbols mean.
Equippables, Consumables
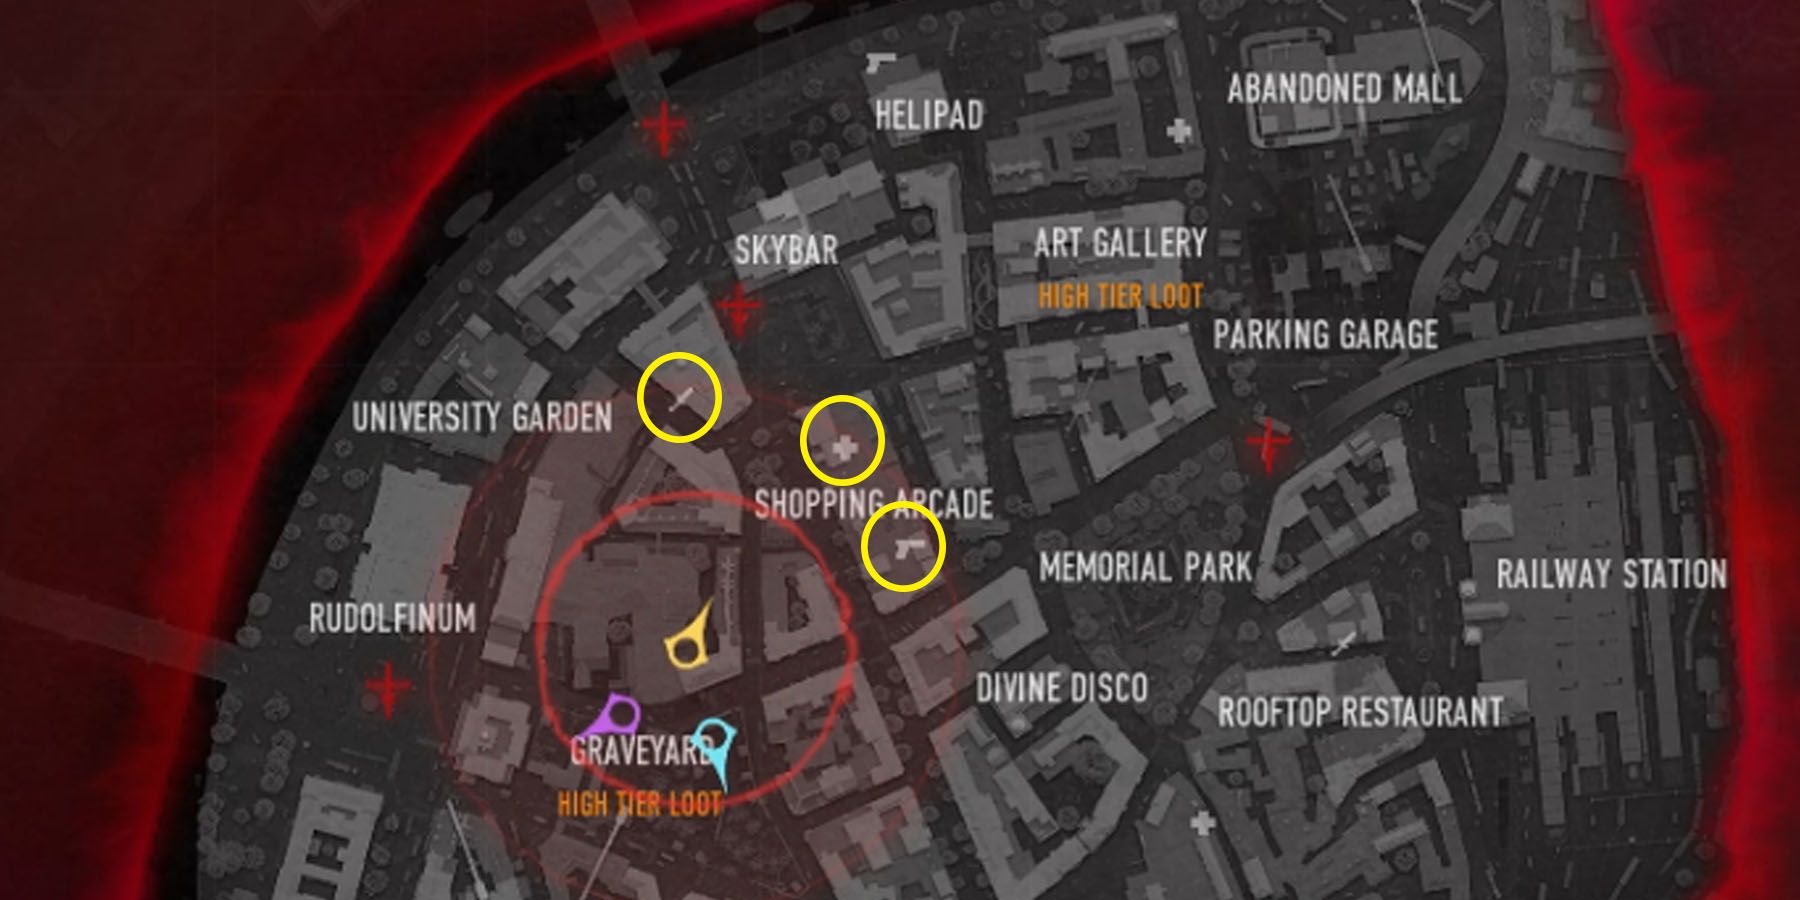
One of the first things players can notice on the map are symbols denoting consumables. Marked by white symbols, players can easily detect which areas are likely to spawn certain kinds of loot. Here are those relevant symbols:
- Cross (Health): Places with a Cross are locations with medicinal items and other accessories that can aid the Kindred in terms of consumables. Players who want to get a headstart regarding must-have accessories should get to these locations first.
- Pistol (Weapons): Denoting a spot for weapons, areas of the map with Pistols are locations of weapon caches that may or may not contain Rare Weapons. These tend to be desirable weapons not always found on the map, so players on the offensive should look out for these.
- Sword (Melee Weapons): Players who have a soft spot for face-to-face combat will appreciate melee weapons, almost always located within weapon caches marked by a Sword.
Special Symbols
Aside from the symbols above are special symbols denoting areas of particular interest that players may or may not be interested in traveling to. While they’re not always places of interest, players should keep these in mind:
- The Red Gas: The equivalent of the other battle royales’ map-shrinking mechanic, the Red Gas is a poisonous colored gas released by the Entity that specifically targets Kindred. Staying inside areas of Red Gas will slowly turn the Kindred to ash, almost always ensuring defeat after some time.
- The Entity: Perhaps the deadliest foes of vampires aside from themselves (in the game, anyway), the Entity represents the secret agency of the church, equipped with both the training and the firepower to take down vampires. These are marked by the Red Crosses around the map.
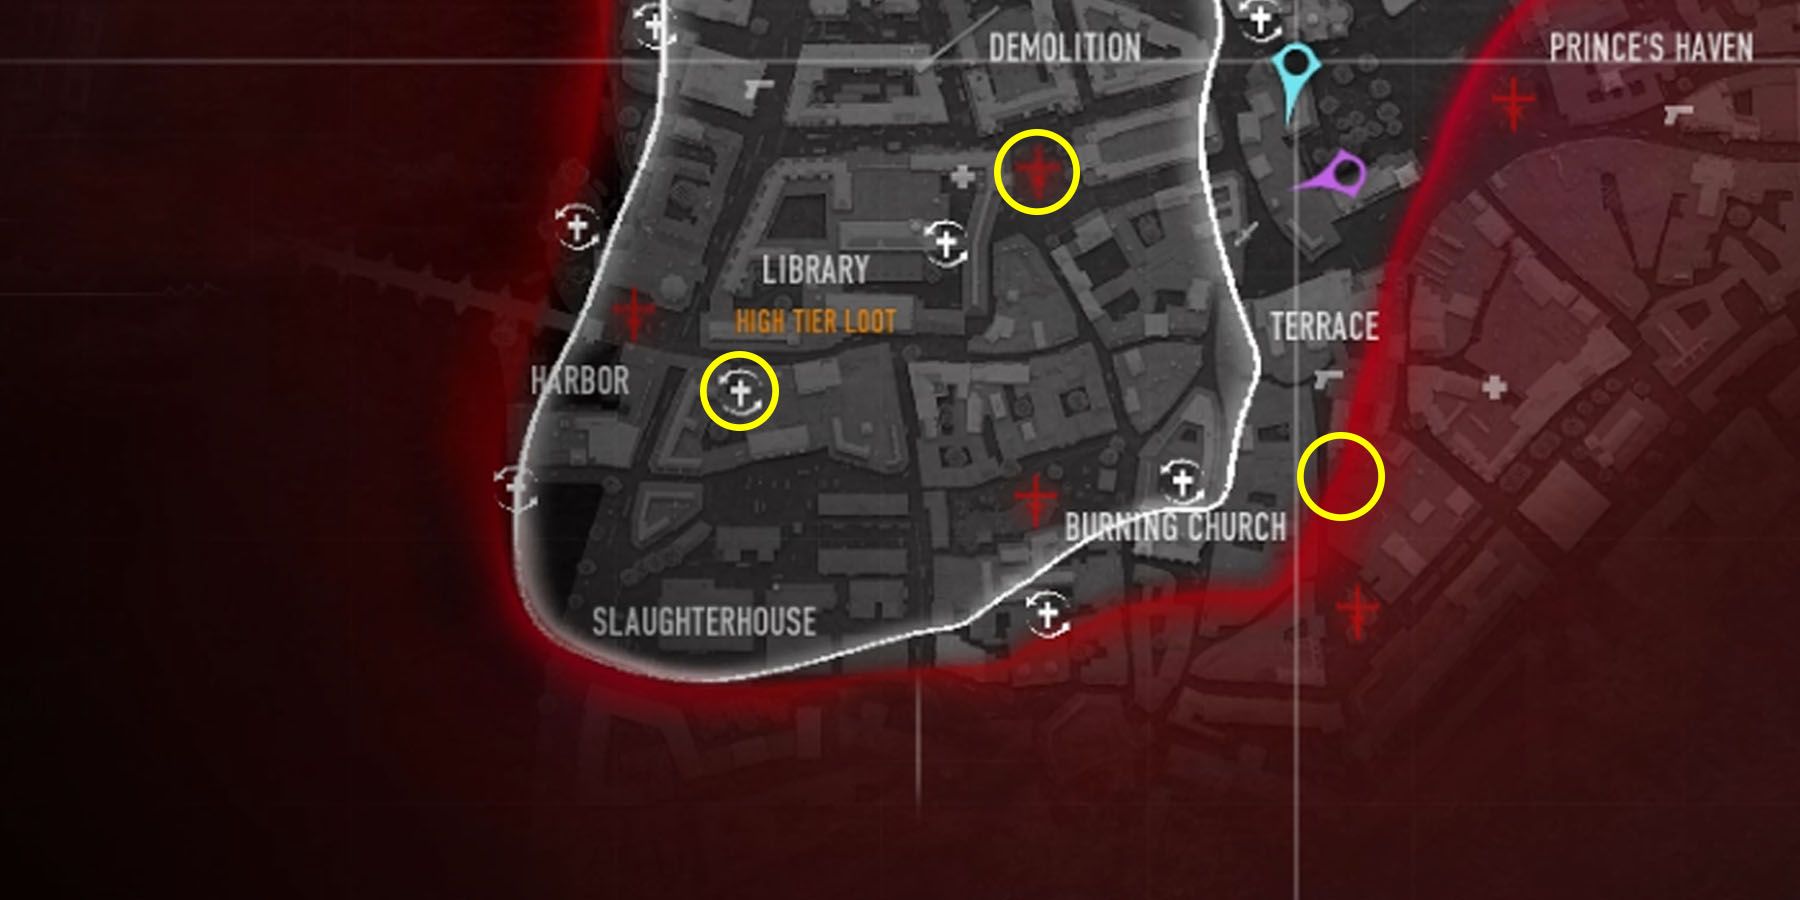
- Respawn Zones: While not present on the map prior to the match, there are special crosses with the cycle symbol scattered around the map during the match. These denote areas where players can respawn their allies who have died.
Split Into Three
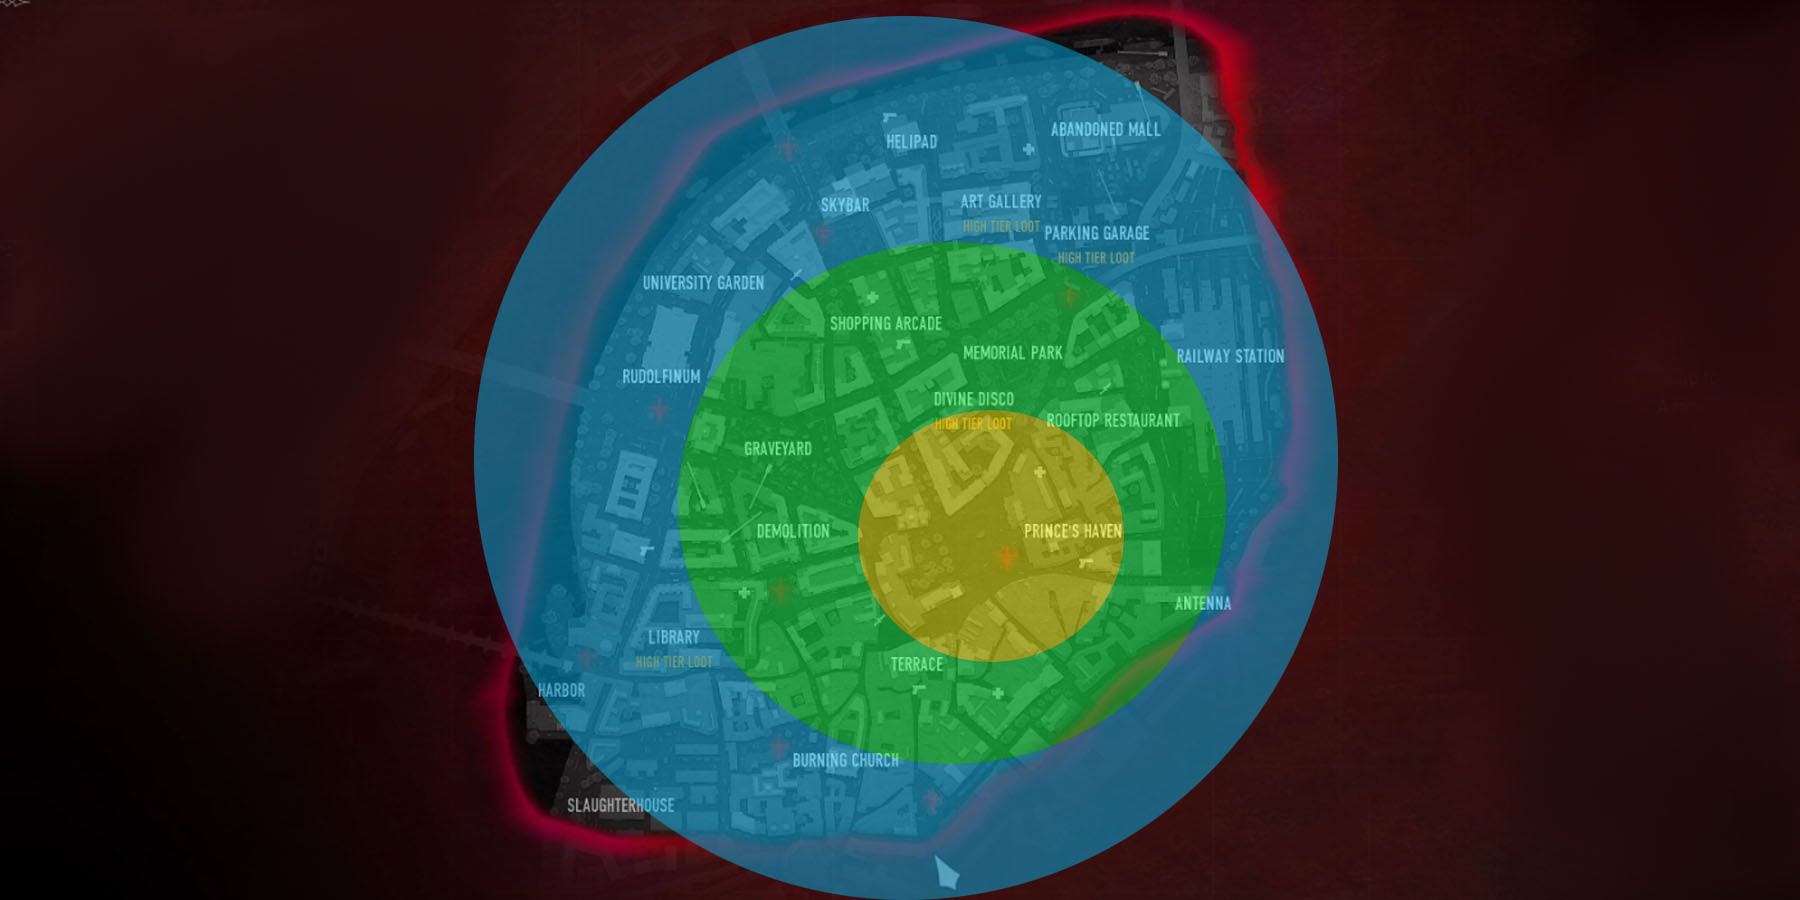
One of the best ways to approach Prague as a map in Bloodhunt is to divide its rather odd shape into three major components, with the common point being the center of the map. That way, players can understand the many different things happening in each layer of the map should they arrive there, as these locations often give not just different atmospheres but also locational discrepancies:
Center Is Always Below Ground
The center point of the map is located to the left of the Prince’s Haven and just above the Terrace. This is a relatively open area surrounded by a couple of buildings, as well as main roads that stretch to the left, right, and center. Traversing these areas generally leads to smaller but still open areas. Players need to mind going around here, as these can leave them open for enemies to attack from above ground.
Central Space Is Easily Traversable
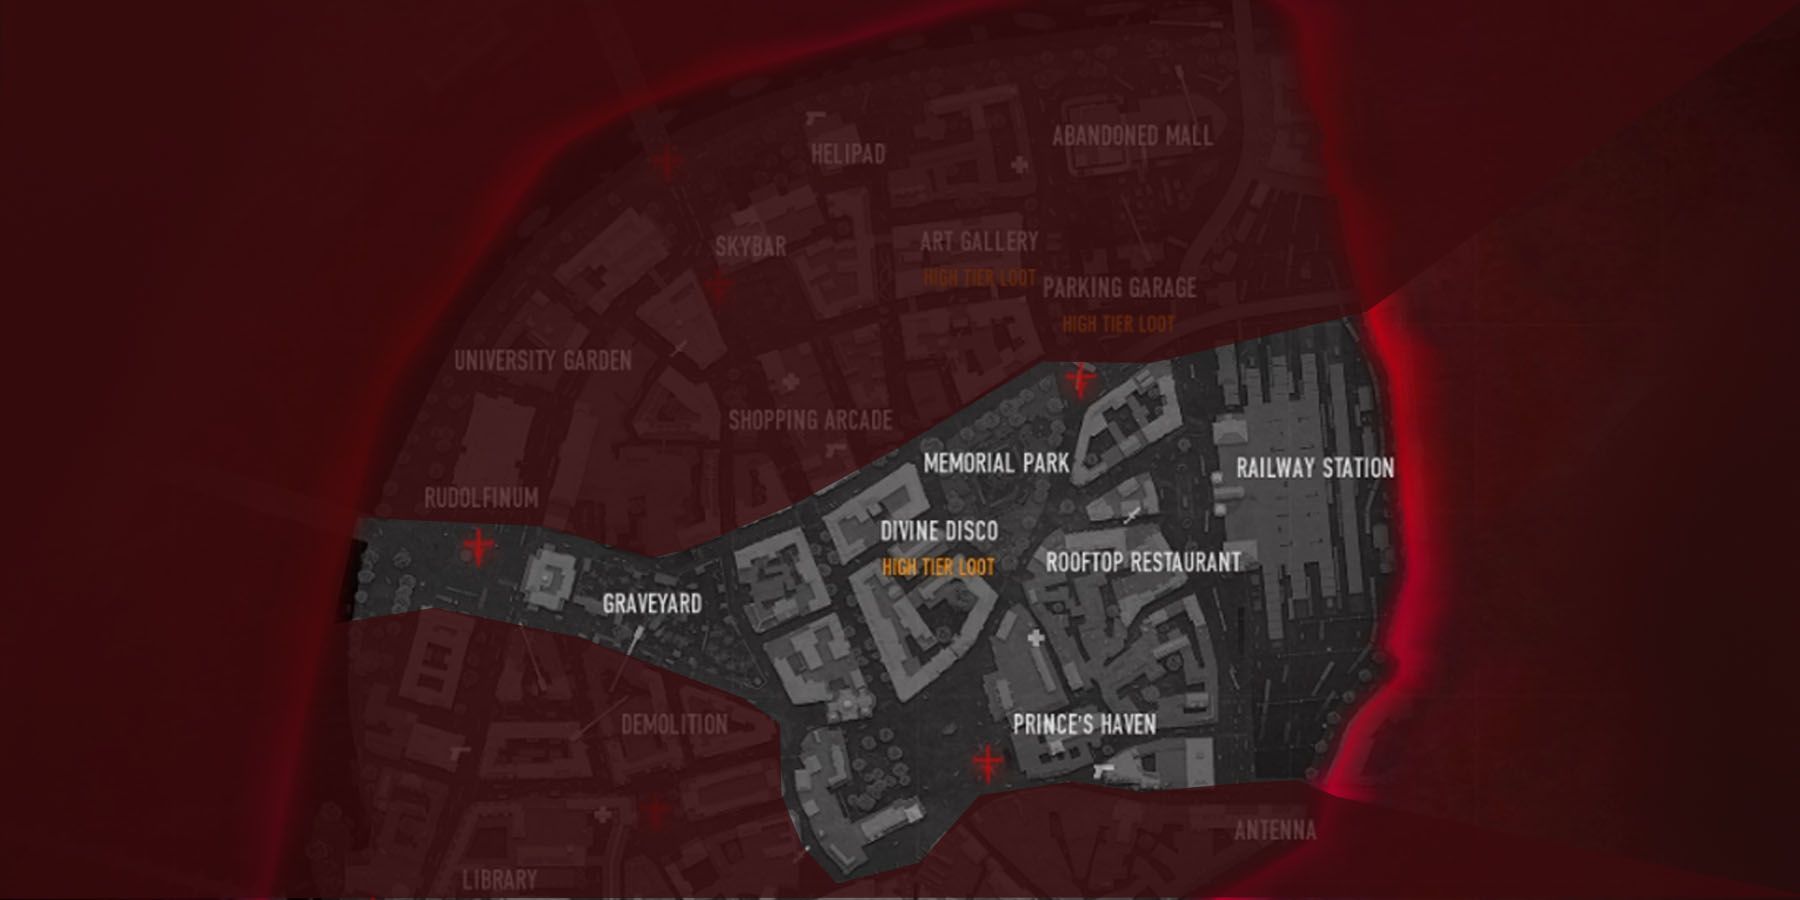
The first major area in Prague may be best located along the building clusters near the center. These areas (Divine Disco, Rooftop Restaurant, Prince’s Haven) are isolated enough around the middle-right and stretch onto their own harbor area. Here are a few areas of interest:
- Prince’s Haven: Close enough to both a Cross Symbol and a Pistol Symbol, players who begin here can have easy access to both weapons and consumables. They need to be careful, however, as the Entity is often close by.
- Rooftop Restaurant (High-Tier Loot): Given its social status, the Rooftop Restaurant often contains High-Tier Loot. This makes it a hot zone for players to grab items quickly.
- Divine Disco: Perhaps the most isolated area from the center of the map, the Divine Disco is surrounded by open space on all sides - open areas to its east and south, and major roads to its west and north. Fights that happen here often stay here.
- Memorial Park: An open area to the right of the Divine Disco, there are not a lot of surfaces to climb here, but a lot of mortals tend to flock to this location.
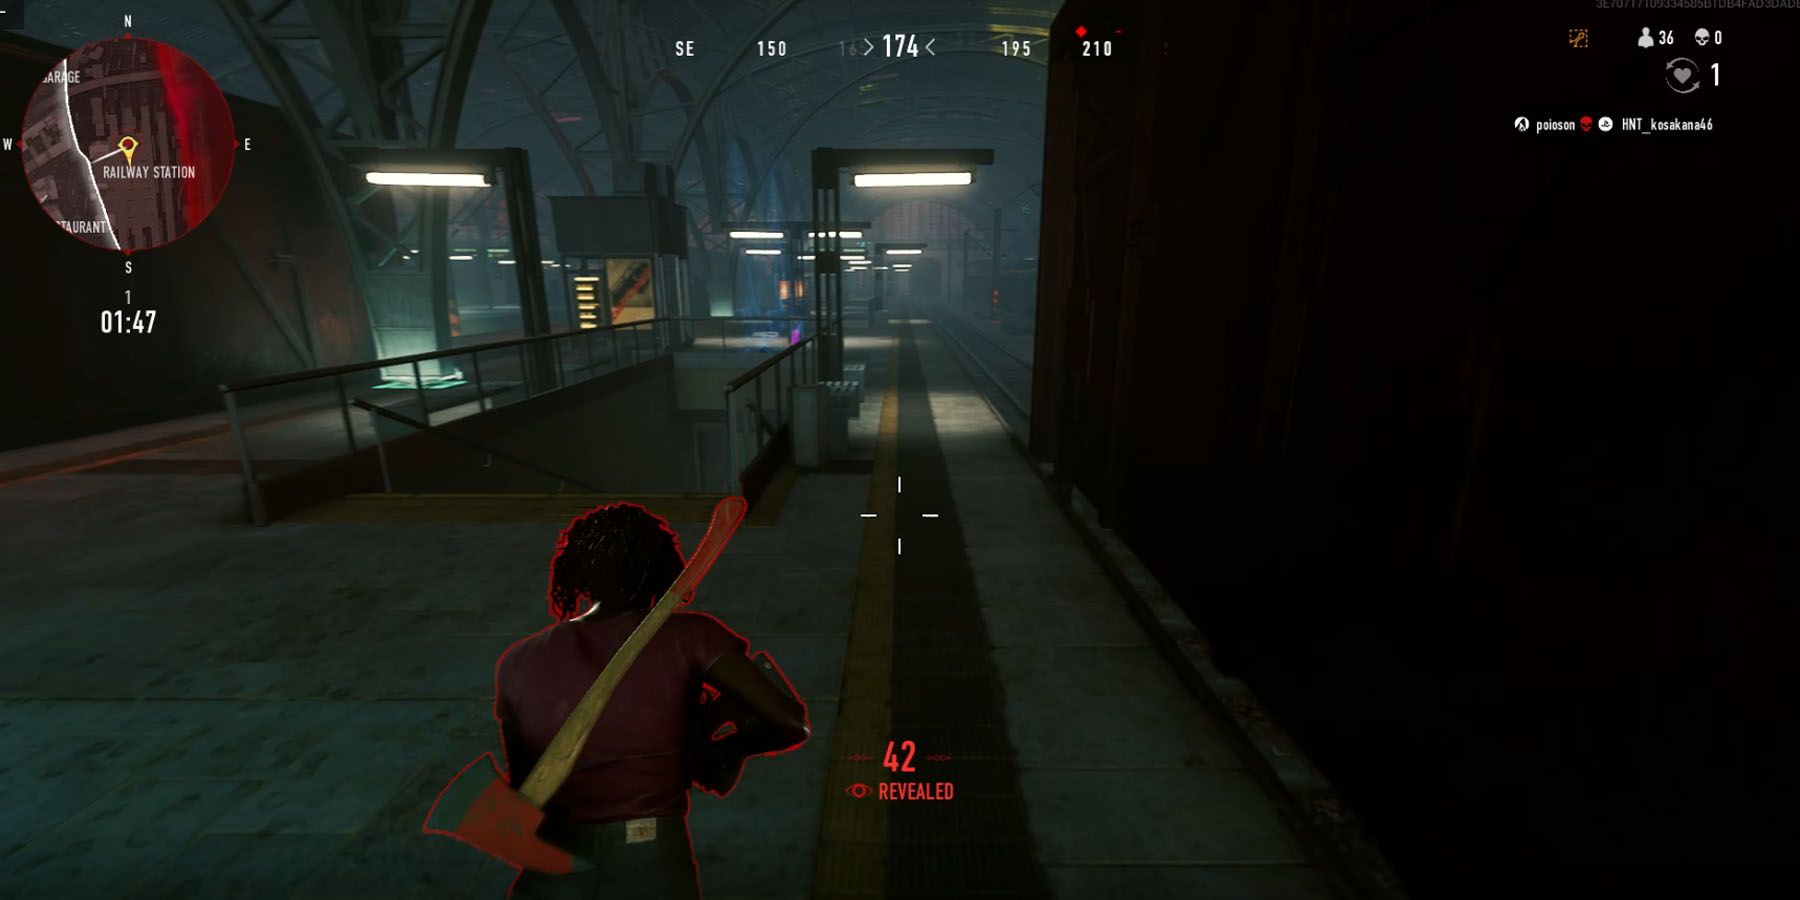
- Railway Station: Directly below the Construction Site is the Railway Station, a large subway station and open space dedicated to various vehicles. It has a lot of Weapon Vehicles and other loot, and its proximity to the Red Gas makes it far from ideal for a lot of players to use as a starting area.
Upper Cluster Remains Isolated
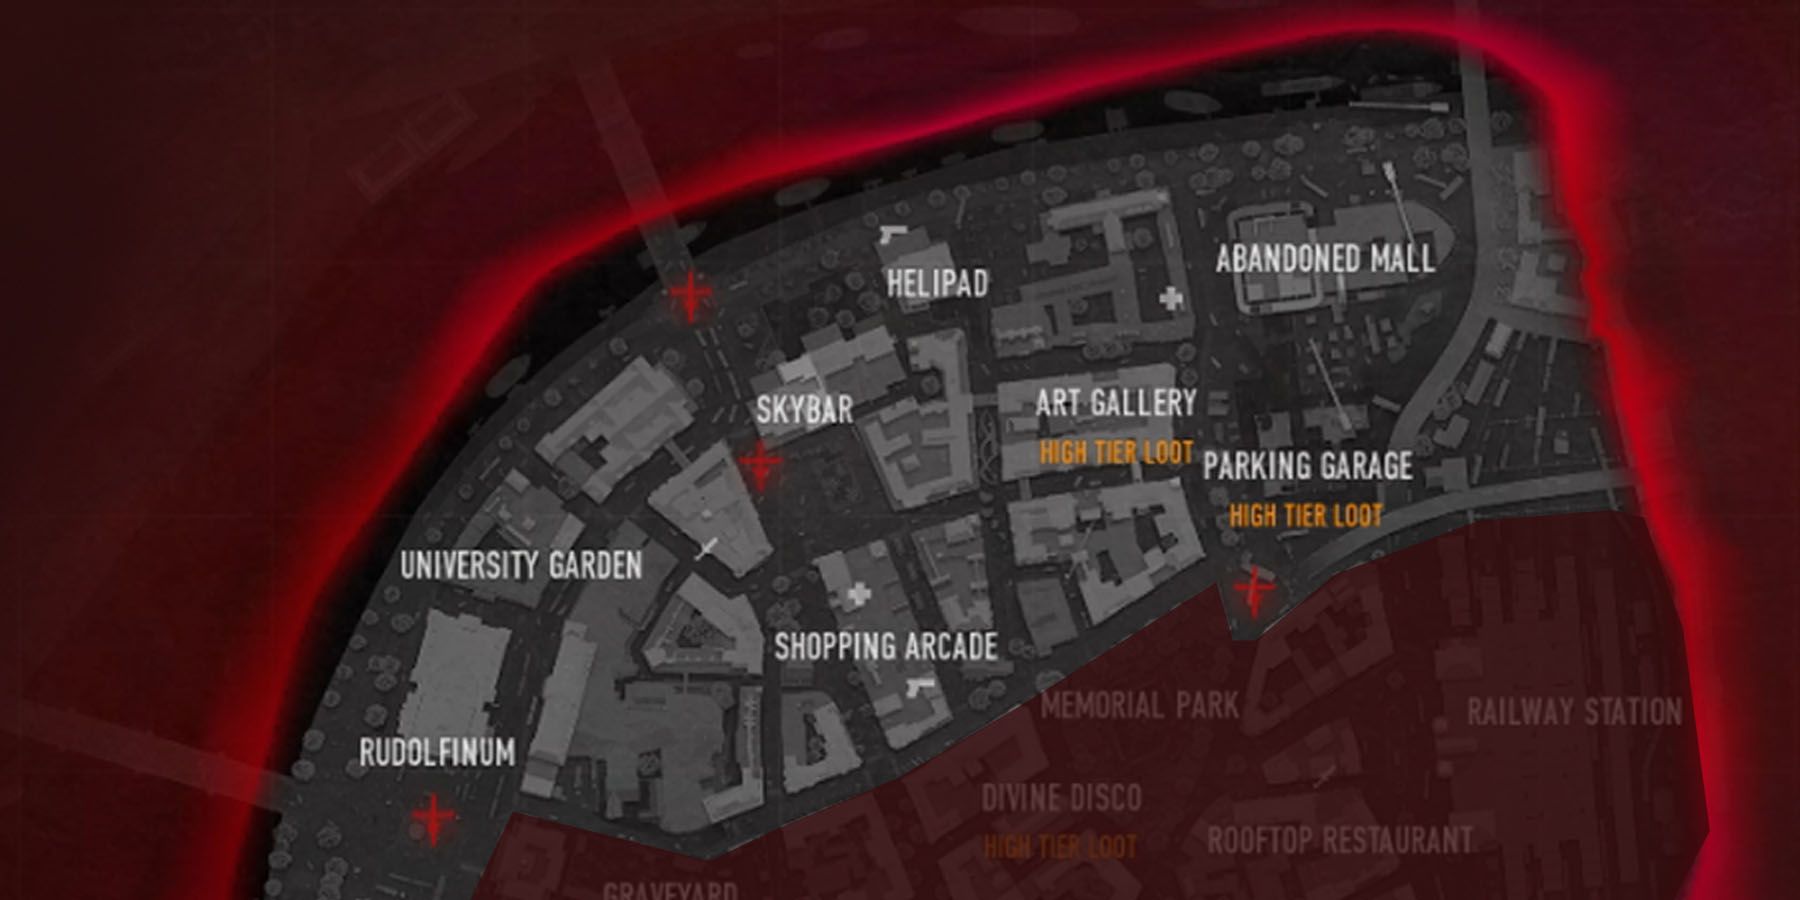
Due to the prevalence of major roads in the upper cluster, this second area is more characteristic of its buildings and skyscrapers separated by long road stretches. There’s the added difficulty of longer falls downward or longer climbs upwards, making it harder to transition from ground fighting to rooftop fighting. There are certain areas of interest here, however, starting from the left:
- The Rudolfinum (High-Tier Loot): Close enough to the harbor, the Rudolfinum is Prague’s home of the arts, and is a large-enough building to contain high-level loot. Its proximity to an Entity gathering and proximity to open spaces makes it a tricky place to loot, as there’s not a lot of higher ground to jump to.
- University Garden: Characterized by two large buildings, the University Garden also has open quadrangles, making it a tricky spot for combat - its proximity to main roads and nooks and crannies leave it open for quick escapes.
- Skybar: One of the tallest buildings in Prague, the Skybar is characterized by its tall buildings and proximity to an Entity cluster. The Skybar also has a cluster of buildings around it, with one directly connected to the Art Gallery.
- Art Gallery: A set of two large building clusters, the Art Gallery is one of the most active rooftop combat zones in the upper cluster, due largely to its interconnected nature.
- Helipad: Perhaps one of the tallest buildings in the game, the Helipad is home to a Pistol Symbol, giving it access to weapons. The building to its right also has a Cross Symbol, providing access to consumables.
- Shopping Arcade: Directly below the Helipad and Art Gallery is the Shopping Arcade, a cluster of buildings that has access to its own Cross and Pistol Symbols. This gives players nifty access to consumables and weapons close to the center of the map.
- Graveyard (High-Tier Loot): Below the Arcade and to the right of the Rudolfinum is the Graveyard; another open area containing a lot of weapon caches. There are a lot of mortals here, but the area is within proximity to tall buildings.
- Abandoned Mall (High-Tier Loot): Close to the right edge of the map is the Abandoned Mall, a huge building with very few mortals often containing decent loot. Its empty nature and proximity to the edge make it a decent starting point.
Lower Cluster
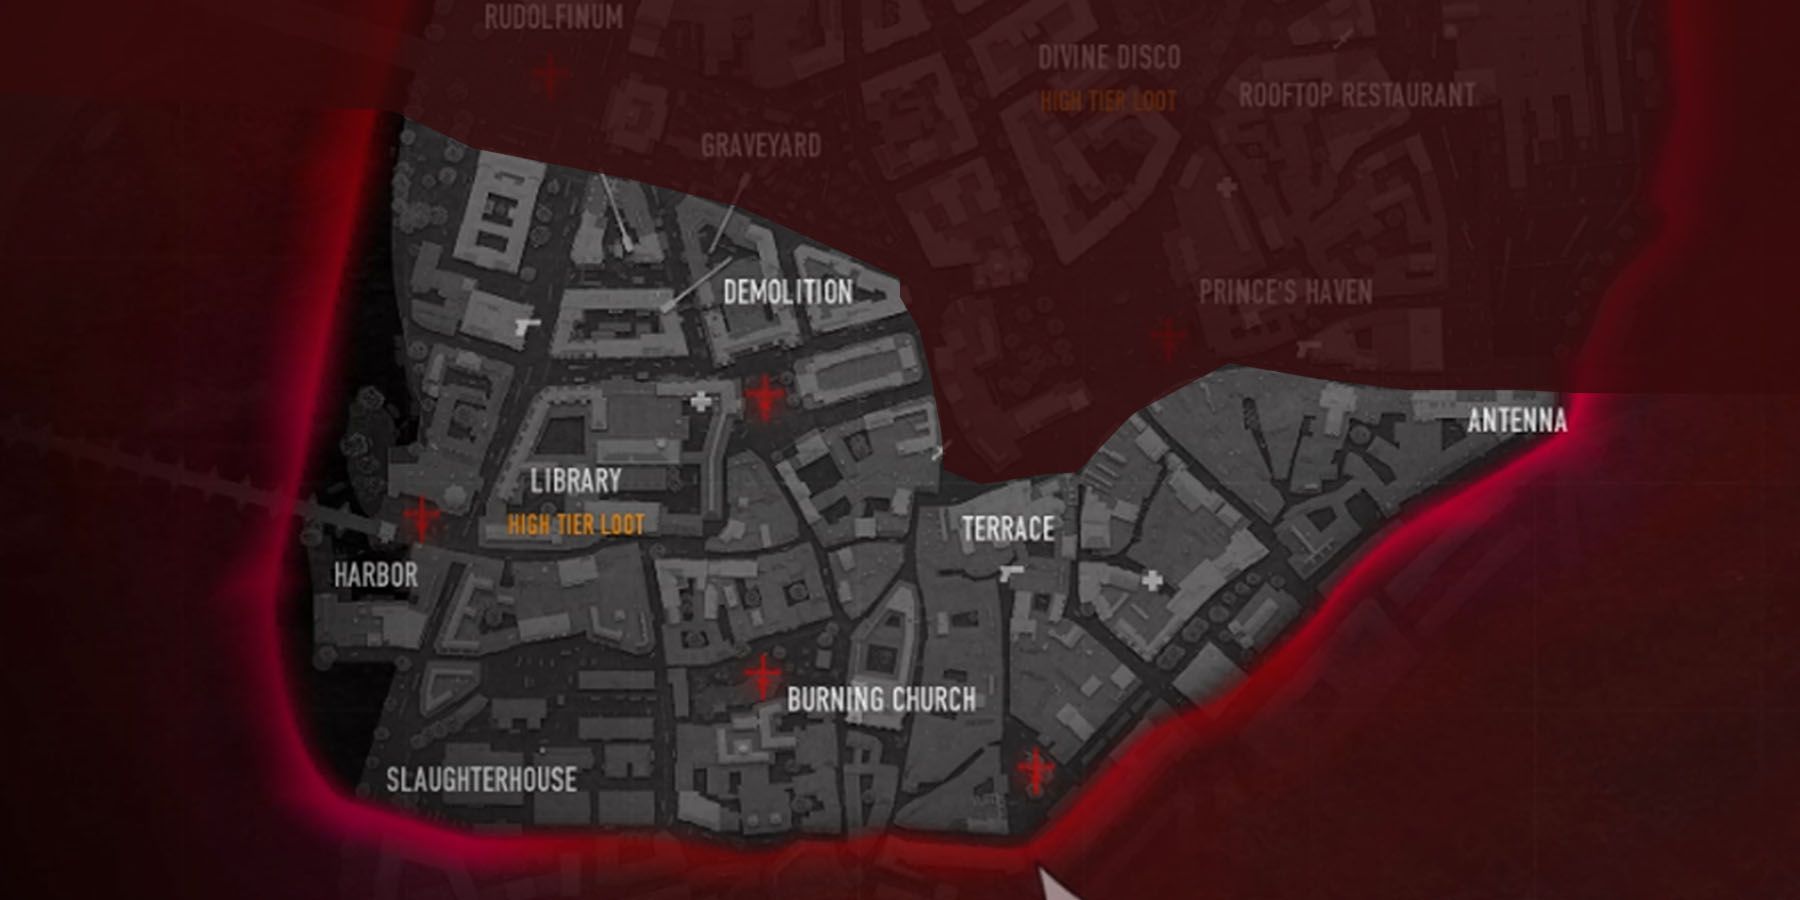
Compared to the more separated upper cluster, the lower cluster of buildings in Prague are much closer when compared to the others. Its mixture of both commercial and residential complexes also makes it a tricky spot for combat, and ideal for those who want a more action-packed experience. From the left to right, its most notable places are:
- Harbour (High-Tier Loot): Located in the left-most area of the map, the Harbour is home to high-grade weaponry and armor, making it an ideal starting spot. Players should be careful, though, as falling into the water means instant death. Its proximity to the main road makes it easy for other players to spot opponents, and there’s an Entity pack guarding the area.
- Slaughterhouse: At the very bottom of the map is the Slaughterhouse, a cluster of smaller buildings that make it ideal for beginners to explore and get a hang of the game’s mechanics.
- Burning Church: A cluster of structures and houses, the Burning Church has a large central area that is close to a cemetery. Players in firefights can find a lot of hiding spaces here, but their lack of access to major roads can make this a tricky part of the map to traverse.
- Demolition: Above the Burning Church and close to the center of the map is Demolition, a cluster of buildings with cranes. These are close enough to the center that its north is an open area, but also close enough to other building groups that directly below it is an unnamed area with a Cross Symbol, giving players access to Consumables.
- Terrace: To the right of the Burning Church is the Terrace, characterized as a huge set of buildings with small alleyways, alongside an Entity pack to the bottom of the map. On the Terrace itself is a Pistol Symbol that gives access to weapons, to its North is a Sword Symbol for melee armaments, and to its right is a Cross Symbol for consumables.
- Antenna (High-Tier Loot): To the very right of the map is the Antenna, a building set shaped like the beak of a bird or a high-heeled shoe, alongside various corners and alleyways in its center. This cluster is isolated enough from the rest of the main roads that its own battles can occur here.
Main Roads Built For Rotation
Unlike other battle royale maps that often take place in large locations with no discernible path, Bloodhunt takes place in a faithful recreation of Prague, meaning it must be treated as a city. Given that explanation, players need to use their knowledge of larger main roads properly. At its core, all main roads in cities are meant to help explore the playable area much more conveniently, meaning players can also use this to their advantage. There are two ways to rotate using the main roads:
All Roads Lead To The Mall
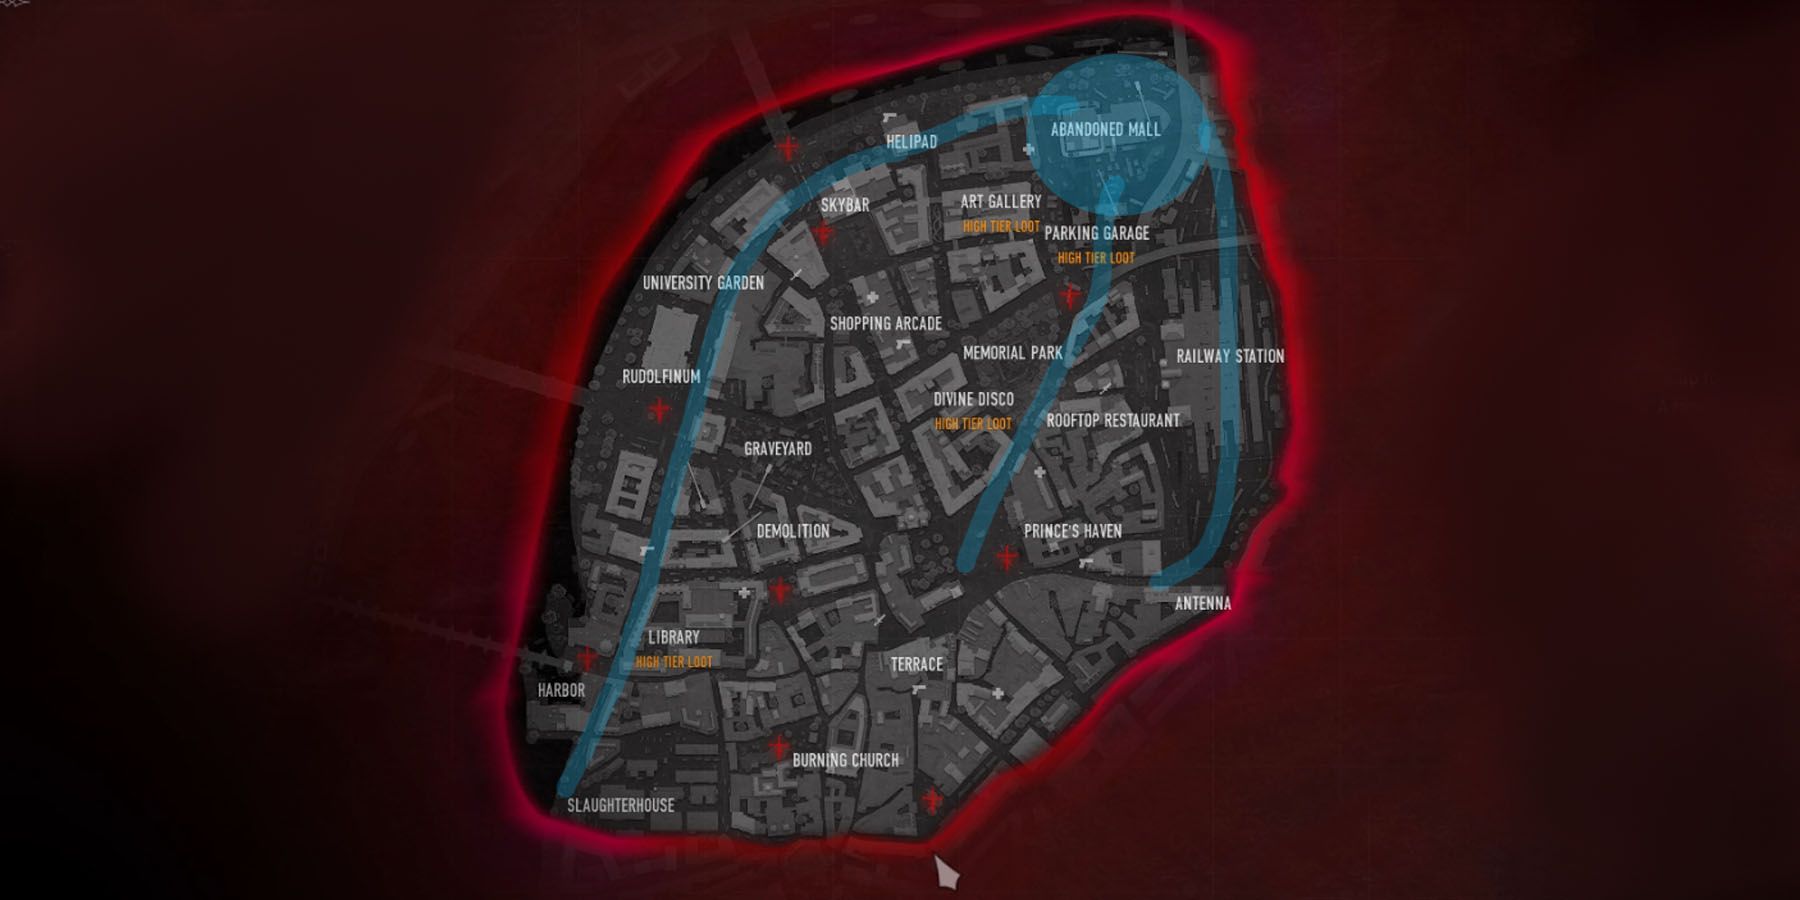
Starting from major corners on the map, all main roads lead to the Abandoned Mall. Or, to put it another way, the Abandoned Mall can help players reach almost any part of the map when used appropriately. Depending on the situation, players can head to these areas for particular rotation needs:
- Go Westward: Going westward allows players to pass the Helipad, University Garden, Rudolfinum, and go down all the way to the Harbour and Slaughterhouse. This has a straightforward main road with multiple blocks of buildings, providing players with access to skyscrapers.
- Go Eastward: Going eastward lets players access the Rooftop Restaurant and Antenna. There are “emptier” areas at the edge that may have weapon caches, while the Rooftop Restaurant is close to the Prince’s Haven, with this area containing multiple building complexes, albeit, with smaller structures.
- Go Downward: Going downward allows players to access the central portion of the map, particularly the Art Gallery, the Parking Garage, the Divine Disco, and the Terrace. There aren’t a lot of structures here for players to perch on, leaving them to most likely navigate at ground level.
Center Going Round
Another way to traverse the map using main roads has to do with starting at the center of the map, close to the Prince’s Haven or Terrace. Depending on the direction, players can start from the center and go around in a radius, approaching the map in different ways:
- Close to the Center: Staying close to the center allows players to access much taller building clusters while giving them a view of the wide opening below ground. Since main roads are easier to access anywhere, enemies are likely to appear at some point in any of the main roads surrounding the center.
- Closer to the Middle: Traversing from the center and going closer to the middle “circle” of the map gives players access to multiple building complexes with smaller structures, making rooftop combat a bit more complex due to the differences in building heights.
- Closer to the Edges: Getting further from the center and closer to the edge gives players access to more nooks and crannies of the map alongside tall buildings, giving some players the advantage when it comes to going down and using lower spaces as a means of hiding.
Get Underground
One of the more obvious facts about Prague that players don’t often take into account is how there’s an entire underground layer that exists within the map. Often accessed through the edges of the map via railway stations, the subway access points of the map actually lead to an entire underground network that lets players travel all over Prague unnoticed.
Not only that, but these underground parts also have Weapon Vehicles scattered all around them, giving players access to various weapons that can give them an advantage in combat. Players therefore need to take into account how underground travel can help them traverse the map much faster.
Be Aware of Special Conditions
There are also Special Conditions that affect the way Prague works in every part of the match. While these happen at random, these Special Conditions can have a detrimental effect on the match if players aren’t careful enough. For instance:
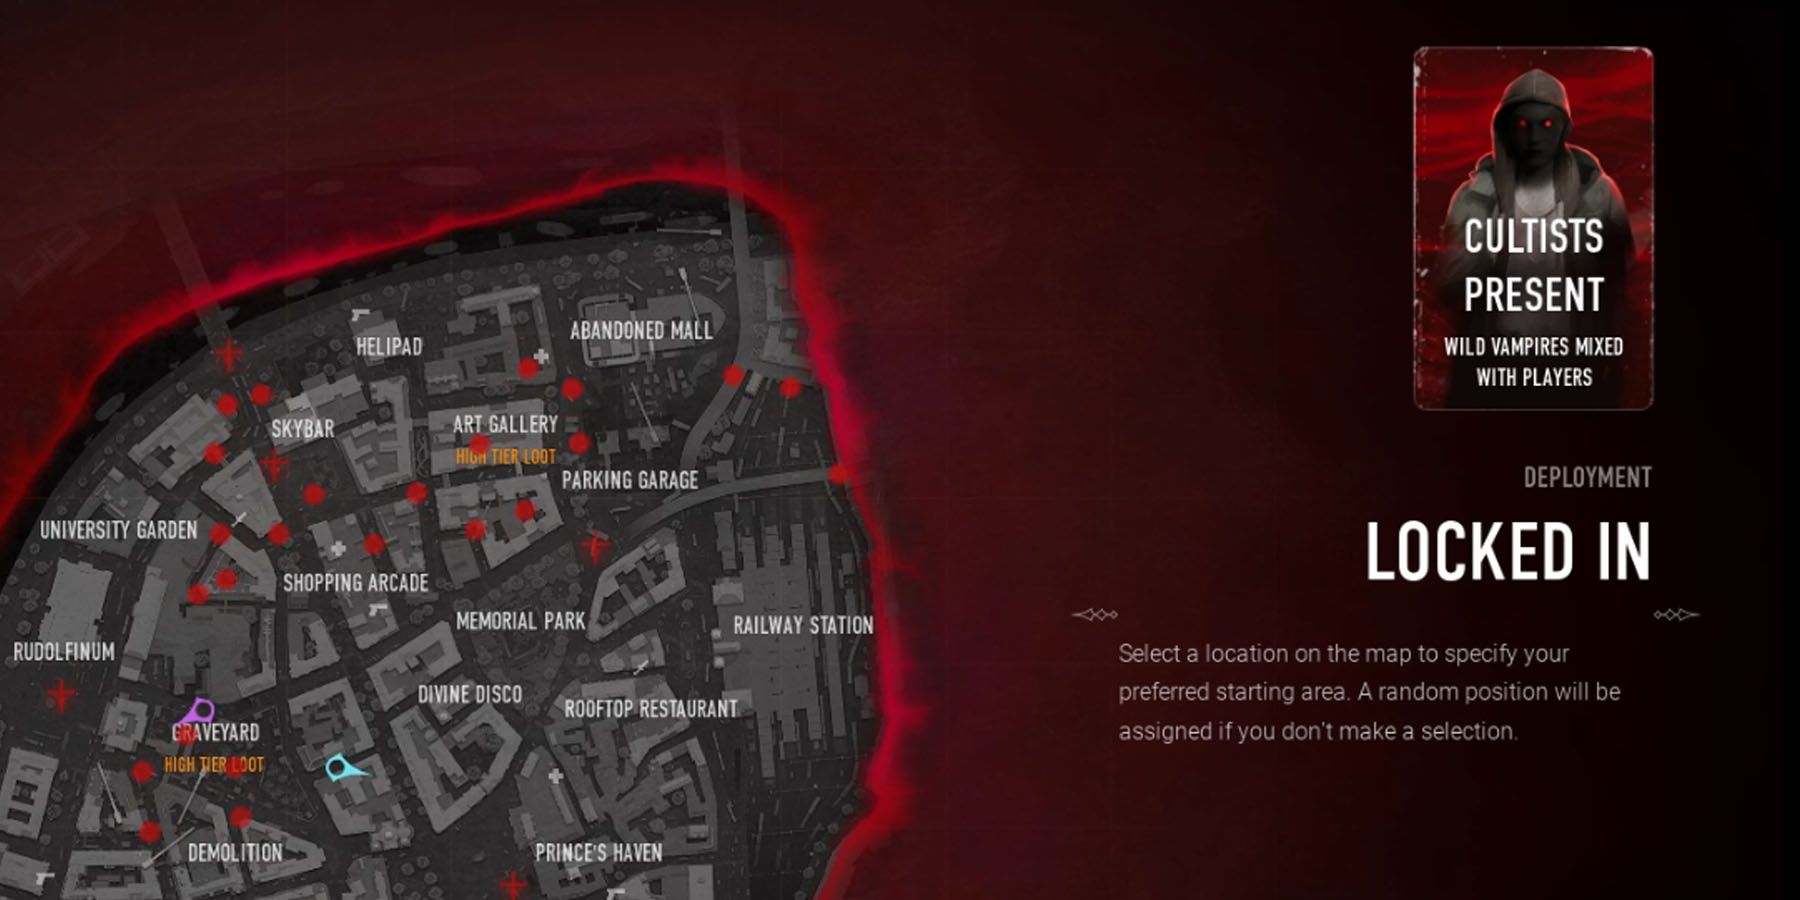
- Cultists: On the upper-right of the location select screen, “Cultists Present” denotes the presence of special NPC vampires in Prague. They are mixed in with regular people, meaning they’re tougher than regular mortals to feed on and may retaliate when approached.
- Variation Windy: Denoting a randomized weather condition, having windy weather means the Red Gas spreads much faster, making those no-go zones much deadlier than their regular counterparts.
Quickly Understand Auras
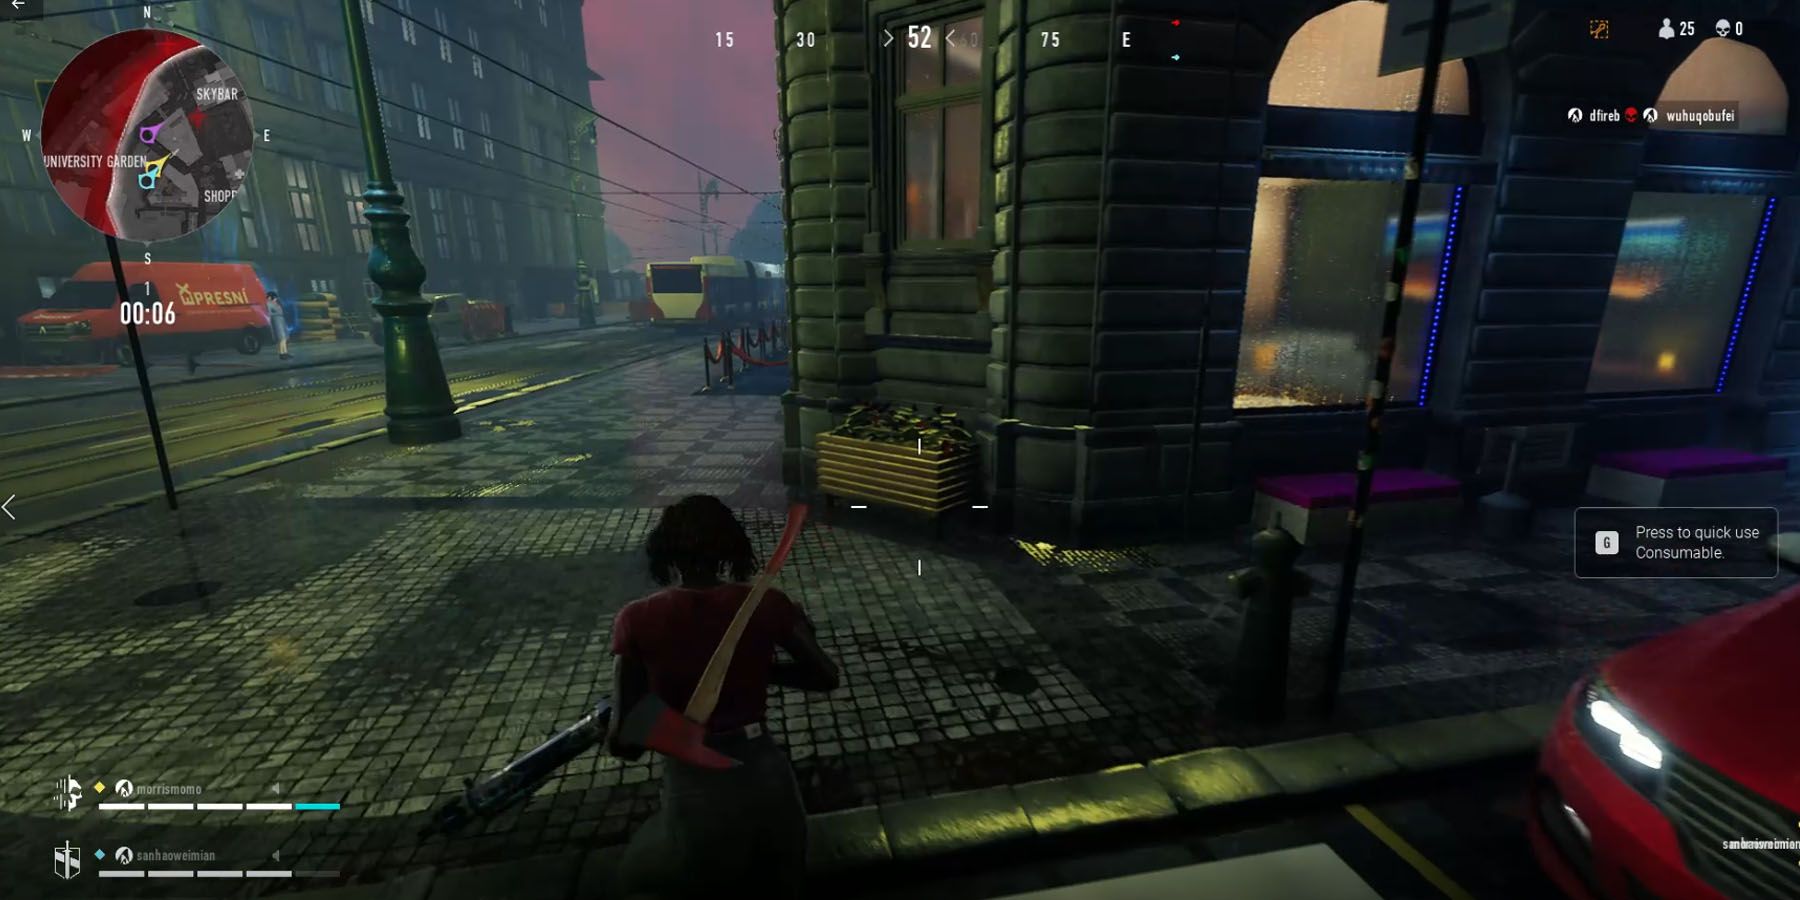
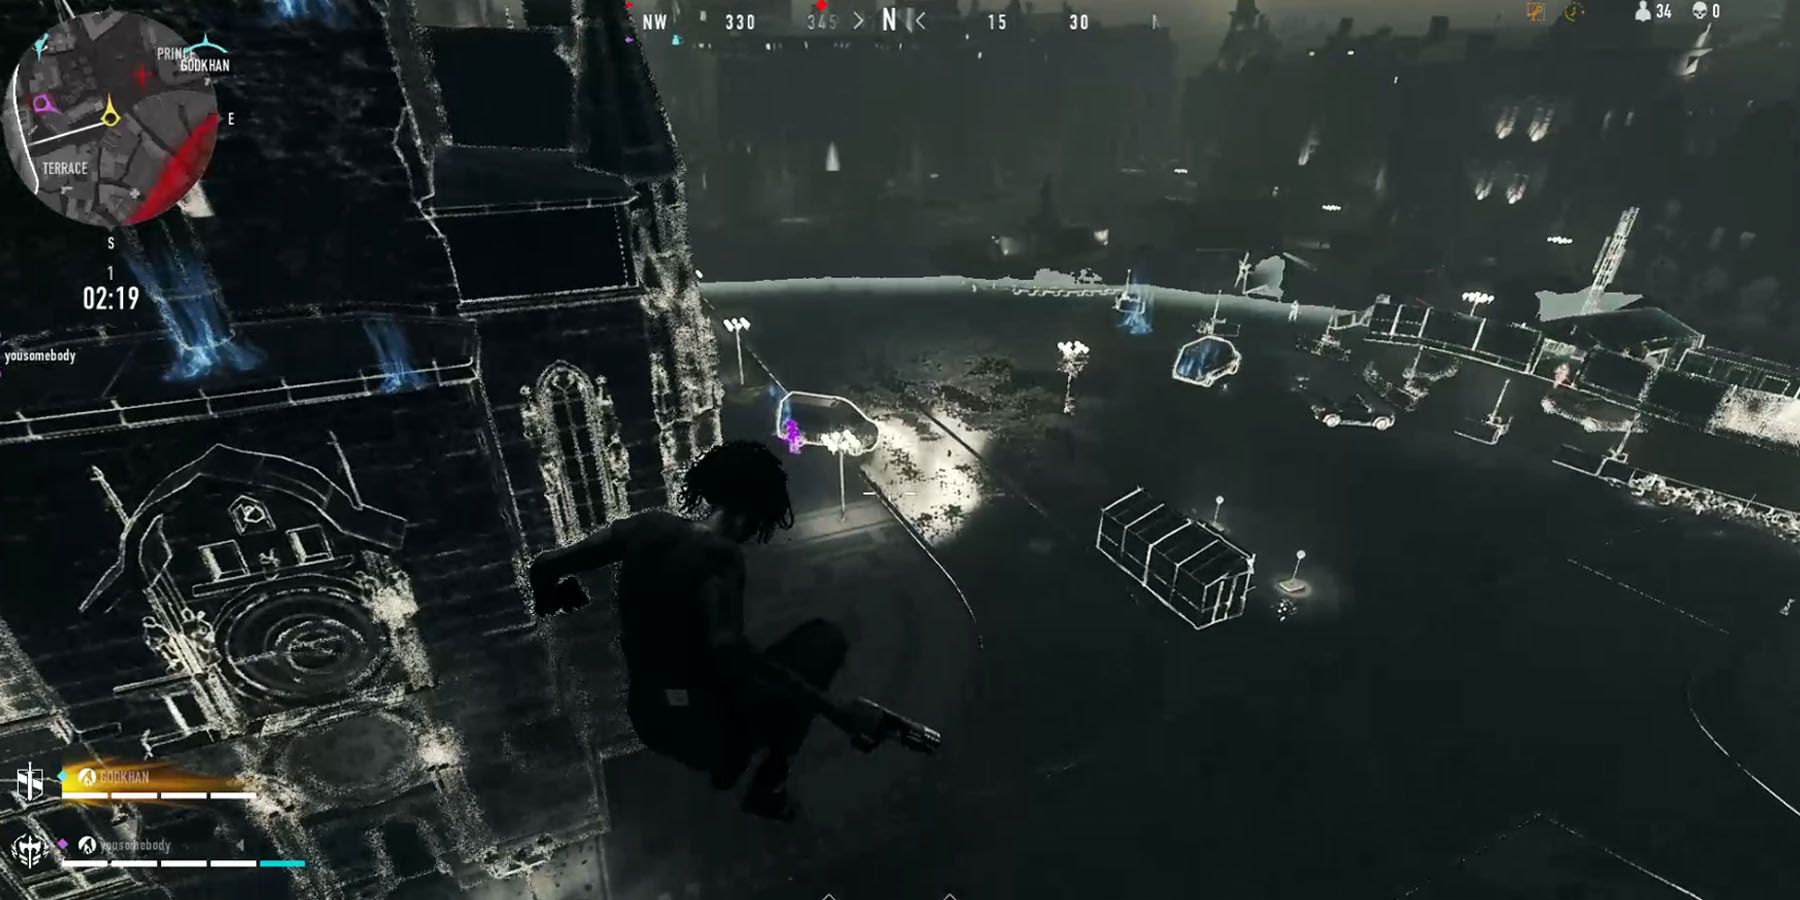
Thanks to the Sense The Unseen ability, all Kindred are able to use the Discipline Auspex to see the auras of things around them - allowing them to identify not just weapons and items, but also mortals with Blood Resonances, and even enemies. While “color means item of interest” is a reasonable way to approach these elements in the map, players should also automatically know what these mean to know how to approach them as soon as they see them:
Vehicles Always Give Useful Items
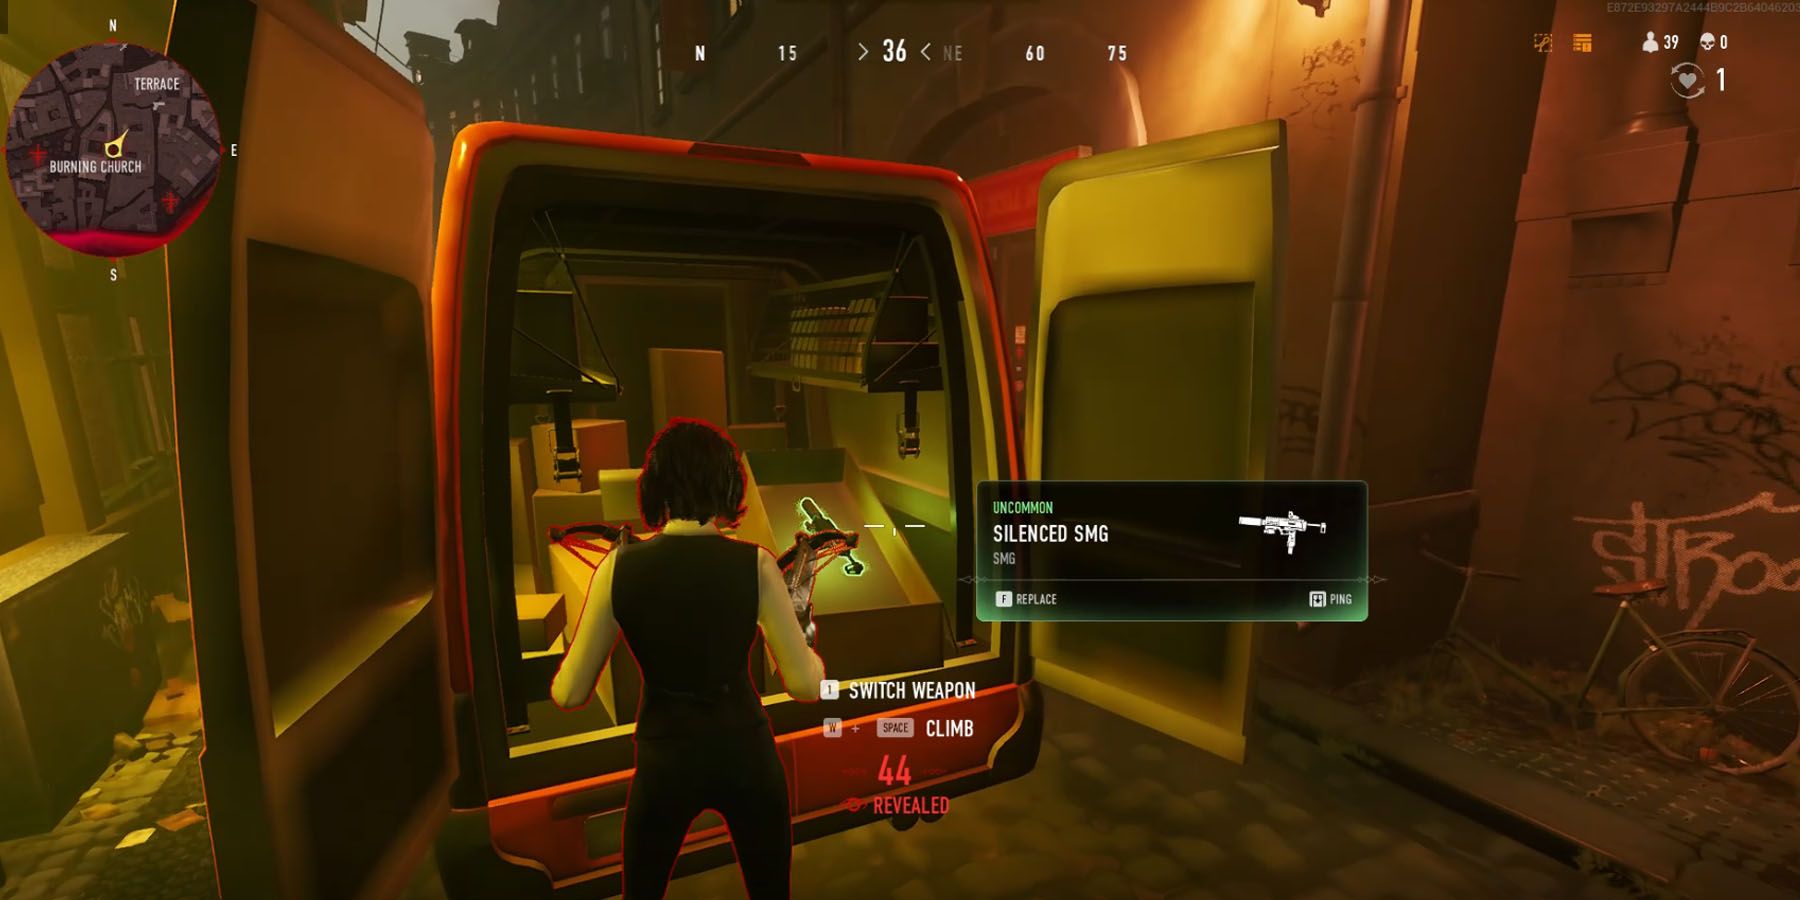
Thanks to Vehicles scattered all over Prague, players almost always have a means of gathering items and weapons away from rooftops. While almost all large vehicles can be opened to acquire items, it can help to learn which Vehicles give what, and where they can be found. Steam User MrGamet was able to compile a list of Vehicle locations around Prague for player reference. However, for a quick refresher, here are the vehicles of use for vampires in the battle royale:
- Ambulance: These emergency vehicles almost always have Blood Bags and other useful consumables for players. This is helpful in case of emergencies, as players may need to use bags instead of feeding for that faster healing.
- Weapon Van: Players able to traverse the city’s underground components can find weapon vans scattered across the city, almost always possessing all variants of Weapons that are difficult to find aboveground. Considering the combat-heavy nature of the game, the fact that these items can be found below the surface can give players who find them a chance to use them in ambushes.
- Police Van: Almost always equipped with Rare Weapons, police vans around the city give the Kindred guaranteed access to weapons in the game.
Spot Blood Resonances Quickly
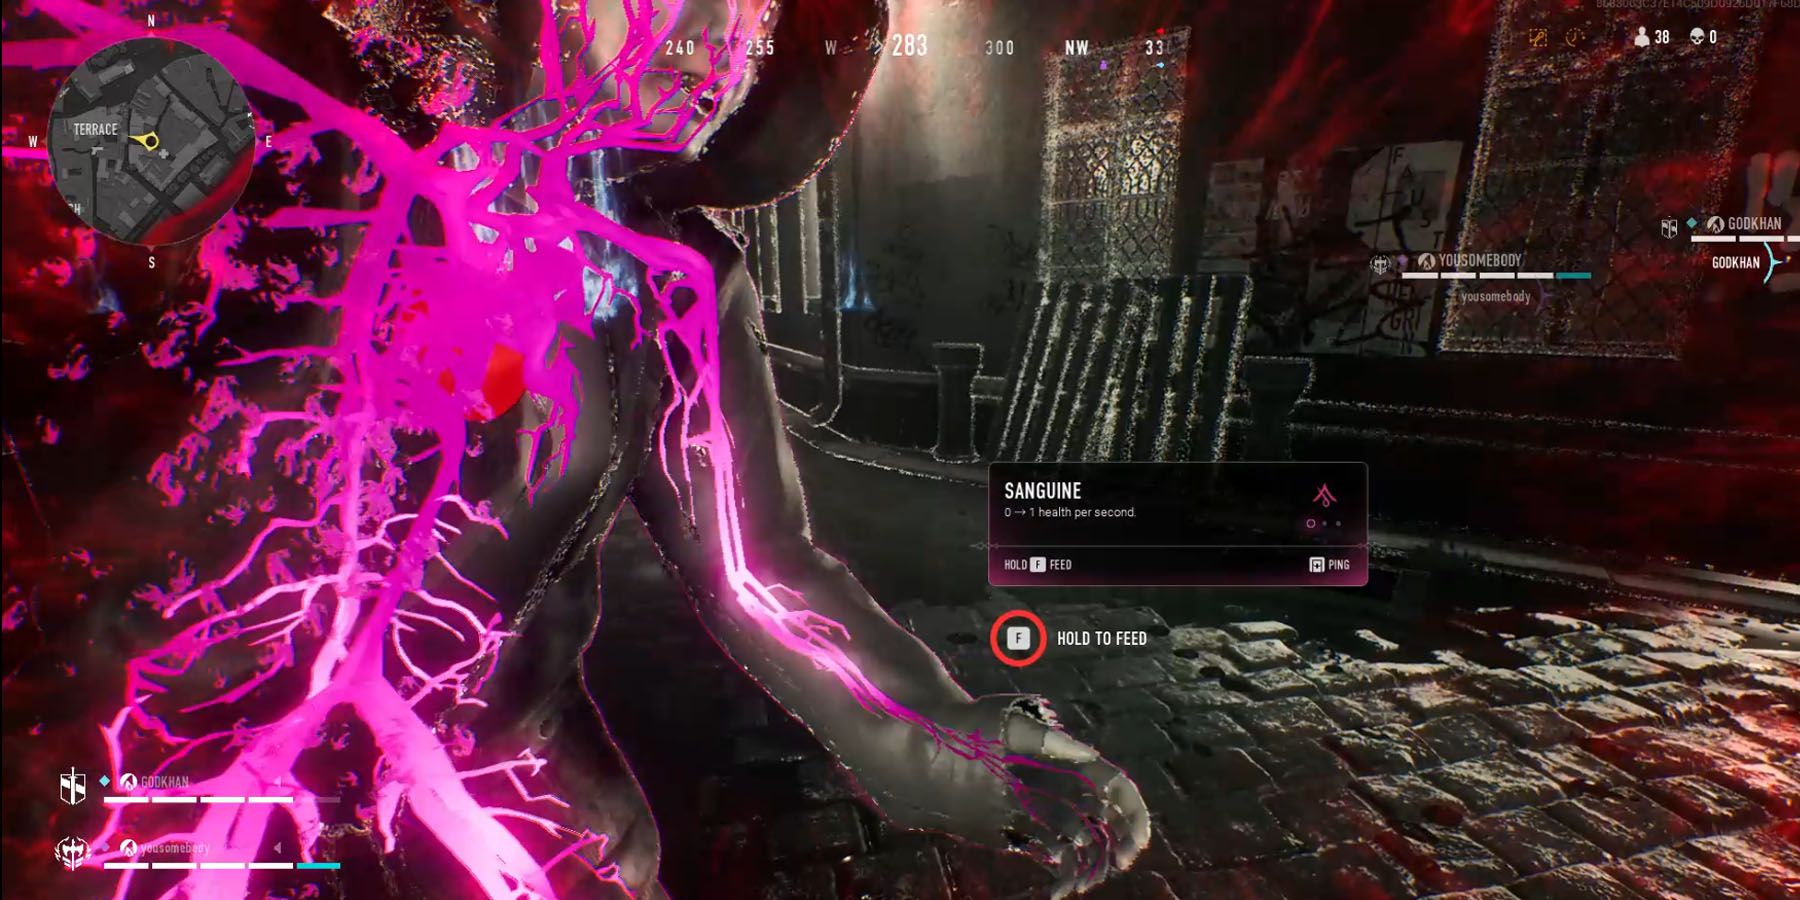
Unlike other games, Bloodhunt features an open world-esque setting, where players need to stealthily feed on mortals lest they get detected and everyone else is alerted of a Masquerade Breach. Unfortunately for vampires, getting stronger doesn’t just mean grabbing a mortal, but also the right mortal, as feeding on their blood gives special benefits called Blood Resonances. Mortals who possess them have special auras:
- Sanguine (Pink): Named after “blood” itself, a Sanguine Resonance is marked by a pink aura and is dedicated to healing.
- Choleric (Orange): Players who need to get up close to fight enemies in melee will appreciate the melee buff provided by the Choleric Resonance, characterized by an orange aura.
- Phlegmatic (Blue): Vampires who need to use their Archetype abilities much faster will benefit from Phlegmatic Resonance, characterized by a blue aura, which speeds up their cooldowns.
- Melancholic (Purple Aura): Vampires who want to use their Clan gifts more often will appreciate the Melancholic Resonance. Characterized by a purple aura, this lets vampires use Clan Powers more often through faster cooldowns.
Vampire: The Masquerade - Bloodhunt is available for the PC and PS5 and was released on April 27, 2022.

