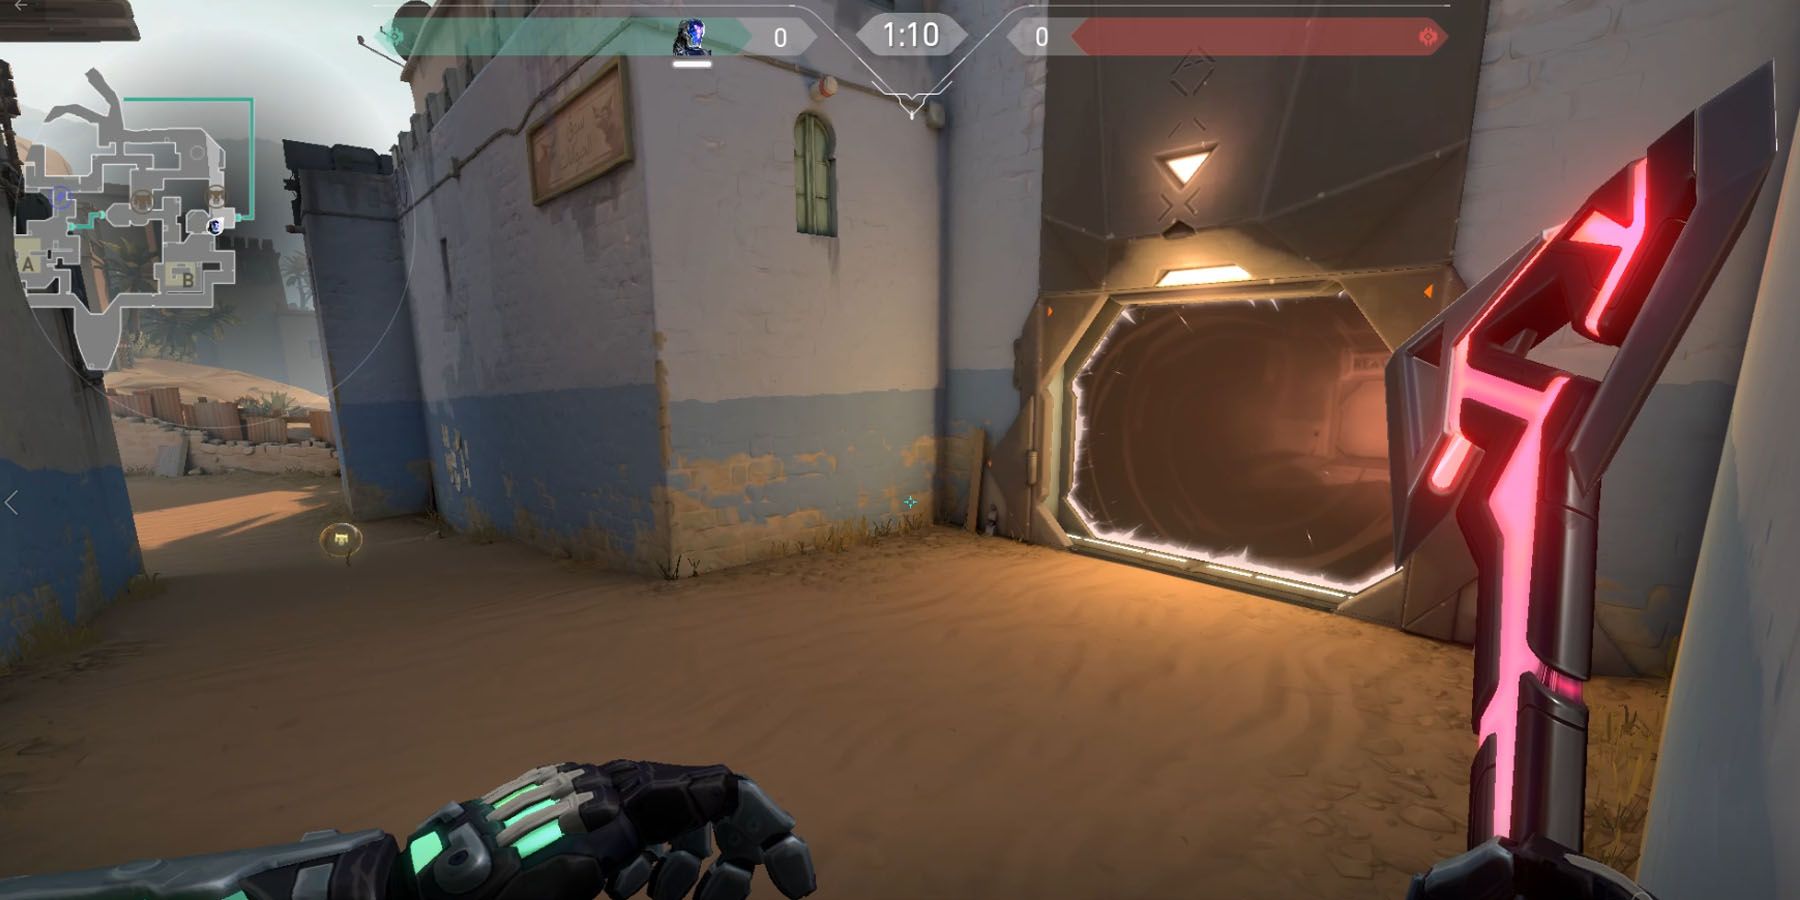
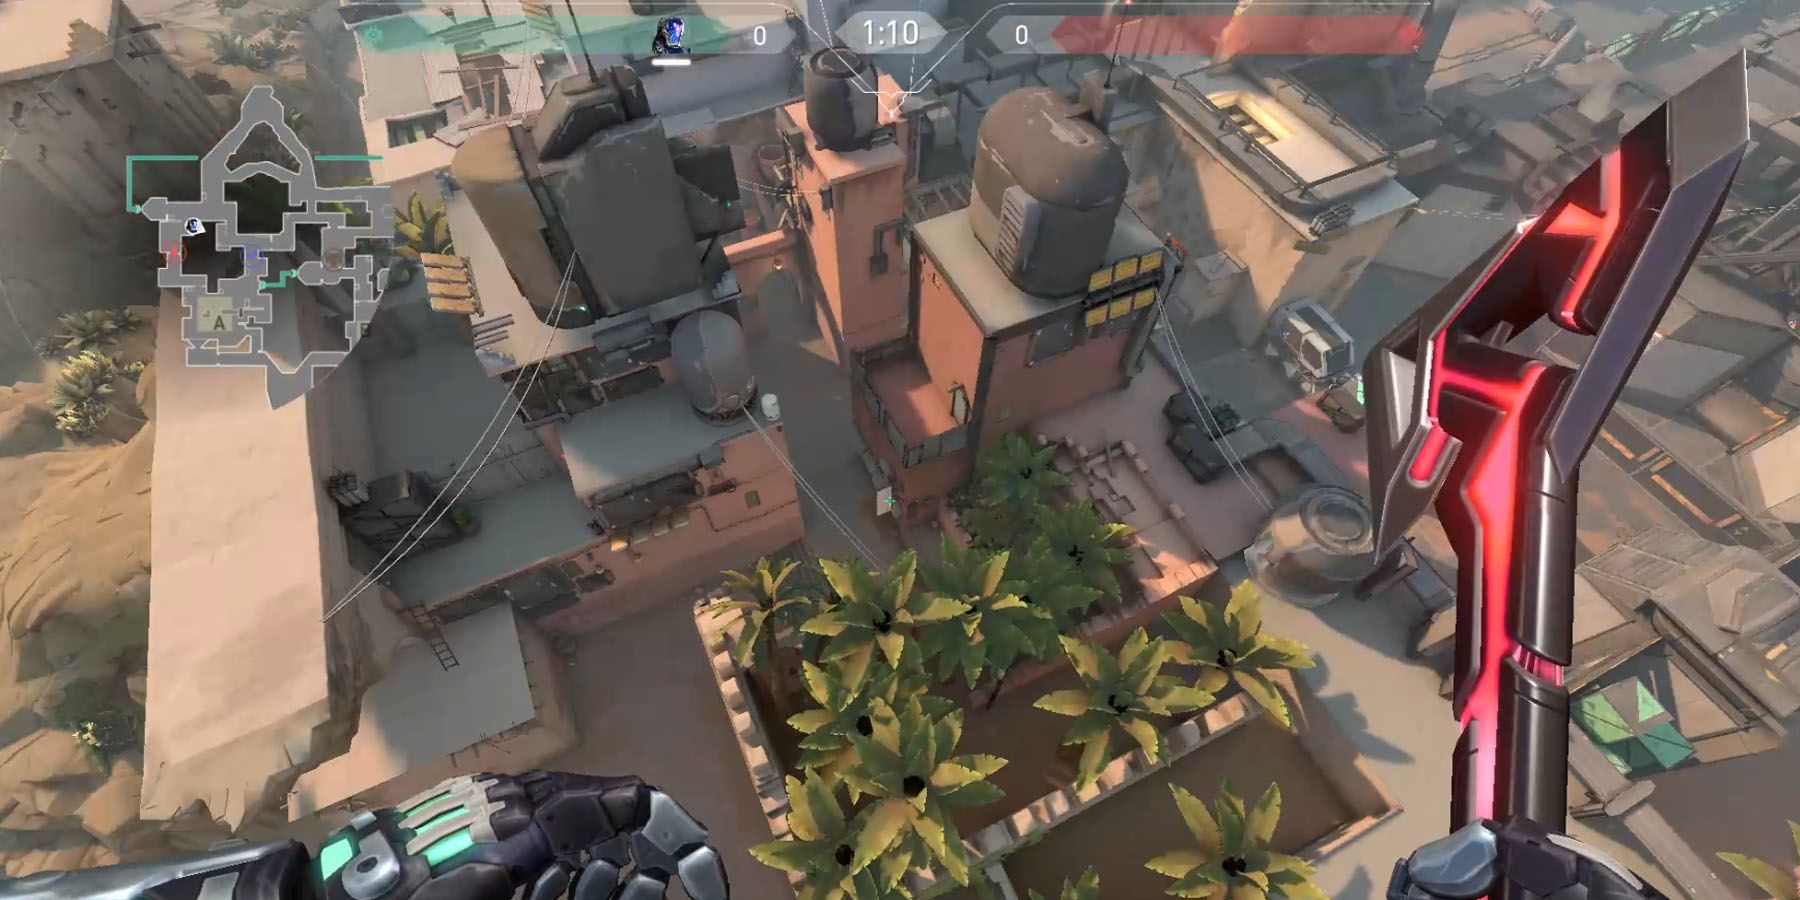
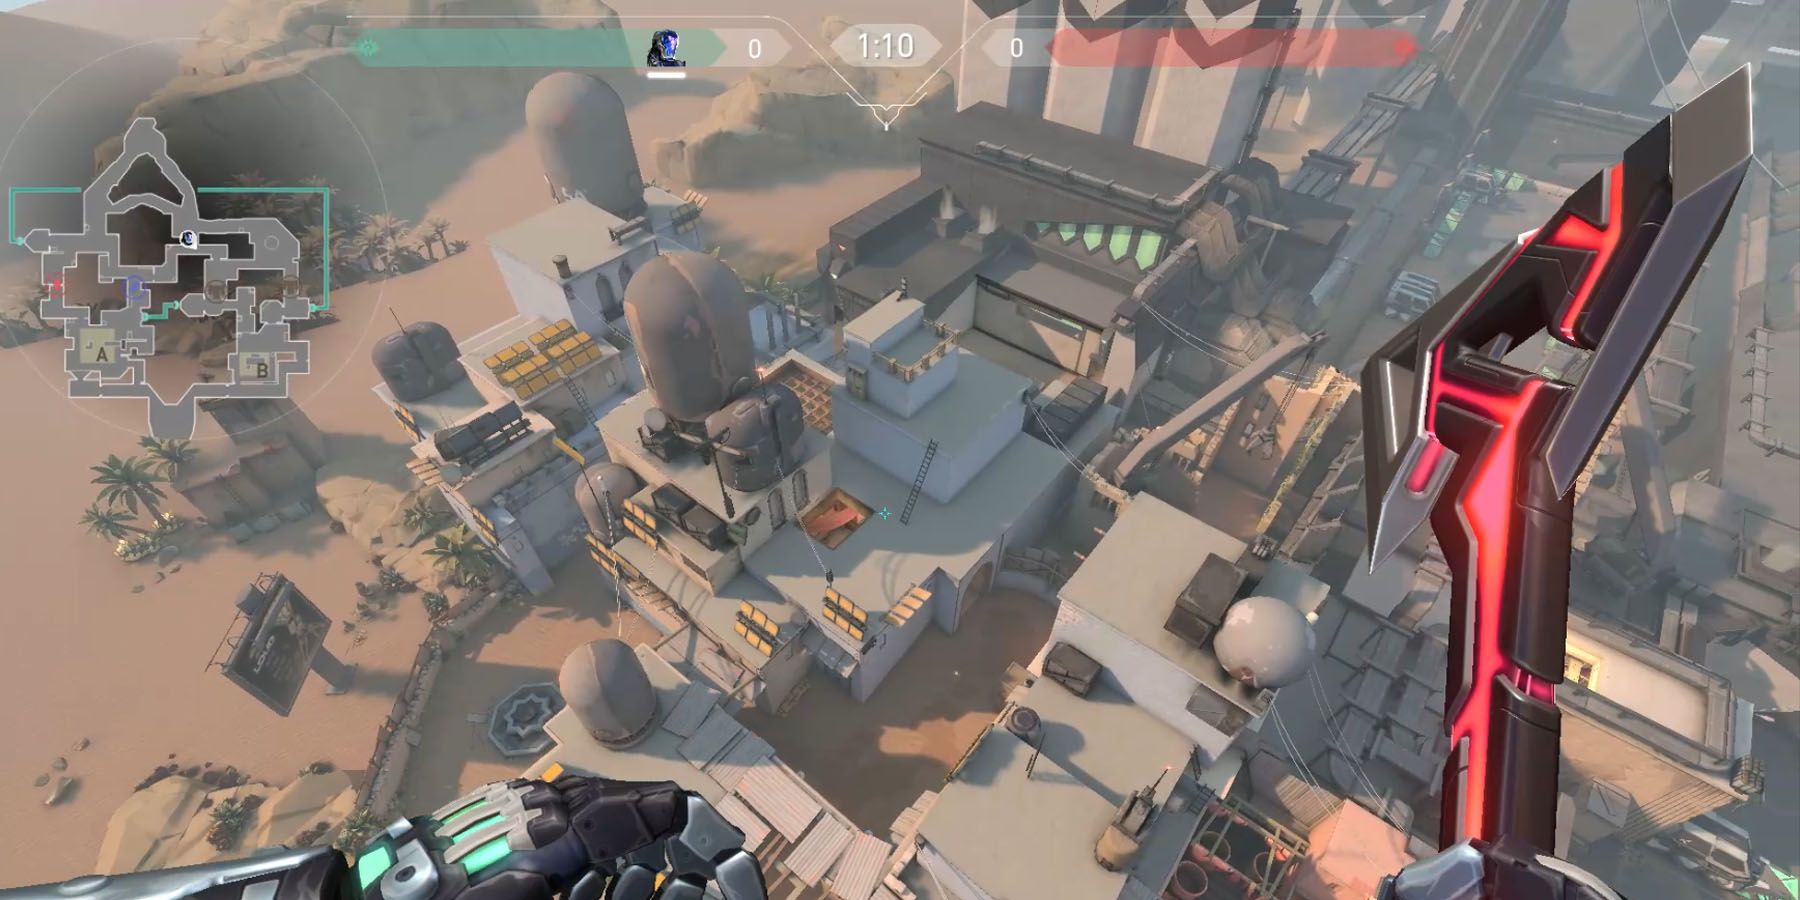
While players of Valorant are well aware that both Agent capabilities and weapon choice can greatly affect one’s performance in any match, it’s map sense that can make all the difference - and the Bind Map is one of those maps that demand such a challenge to gamers, especially with newcomer Harbor and his water-manipulating abilities entering the playing field. Boasting a desert-like landscape with multiple structures and alleyways, understanding exactly how the nooks and crannies of Bind can make even the tamest of Agents a deadly powerhouse.
However, with the Bind Map possessing two fairly large Spike sites and a wide array of tunnels and portals, players unfamiliar with the landscape can easily get confused. Thankfully, there are ways to transform the Bind Map into a Valorant player’s best friend - especially when approached with the right perspective.
The Bind: No Mid, No Problem
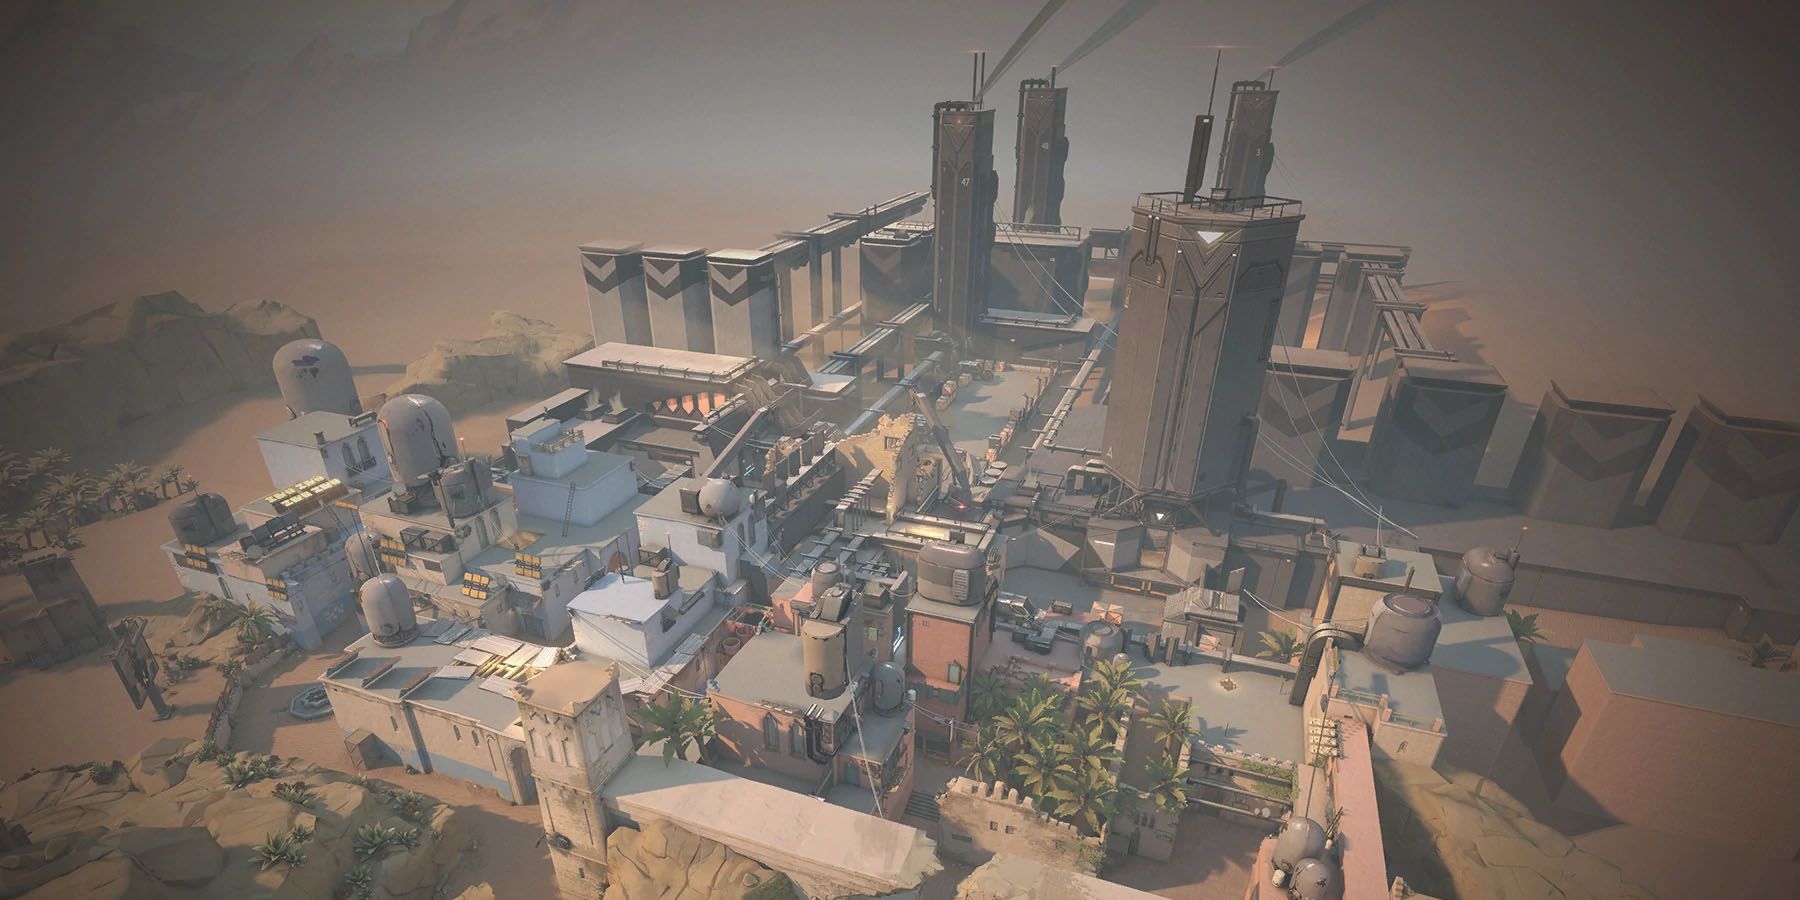
Located near the coast of Rabat, Morocco, the Bind Map is a tropical, desert-themed Valorant map populated by various small houses and tunnels, water tanks and containers. Behind the main game, the area is industrial, giving off the impression of Bind being a semi-populated village on the edge of a power plant or similar area.
Key Notes: Lack Of A Mid, Teleporter Option
Unlike other Valorant maps, one of the most prominent features of Bind is its lack of a middle section. Not only that, but its only equivalent of a "mid" section lies in its teleporters, which serve as a fast way for Valorant players to traverse both parts of the area. Here are some key notes that players need to take to heart:
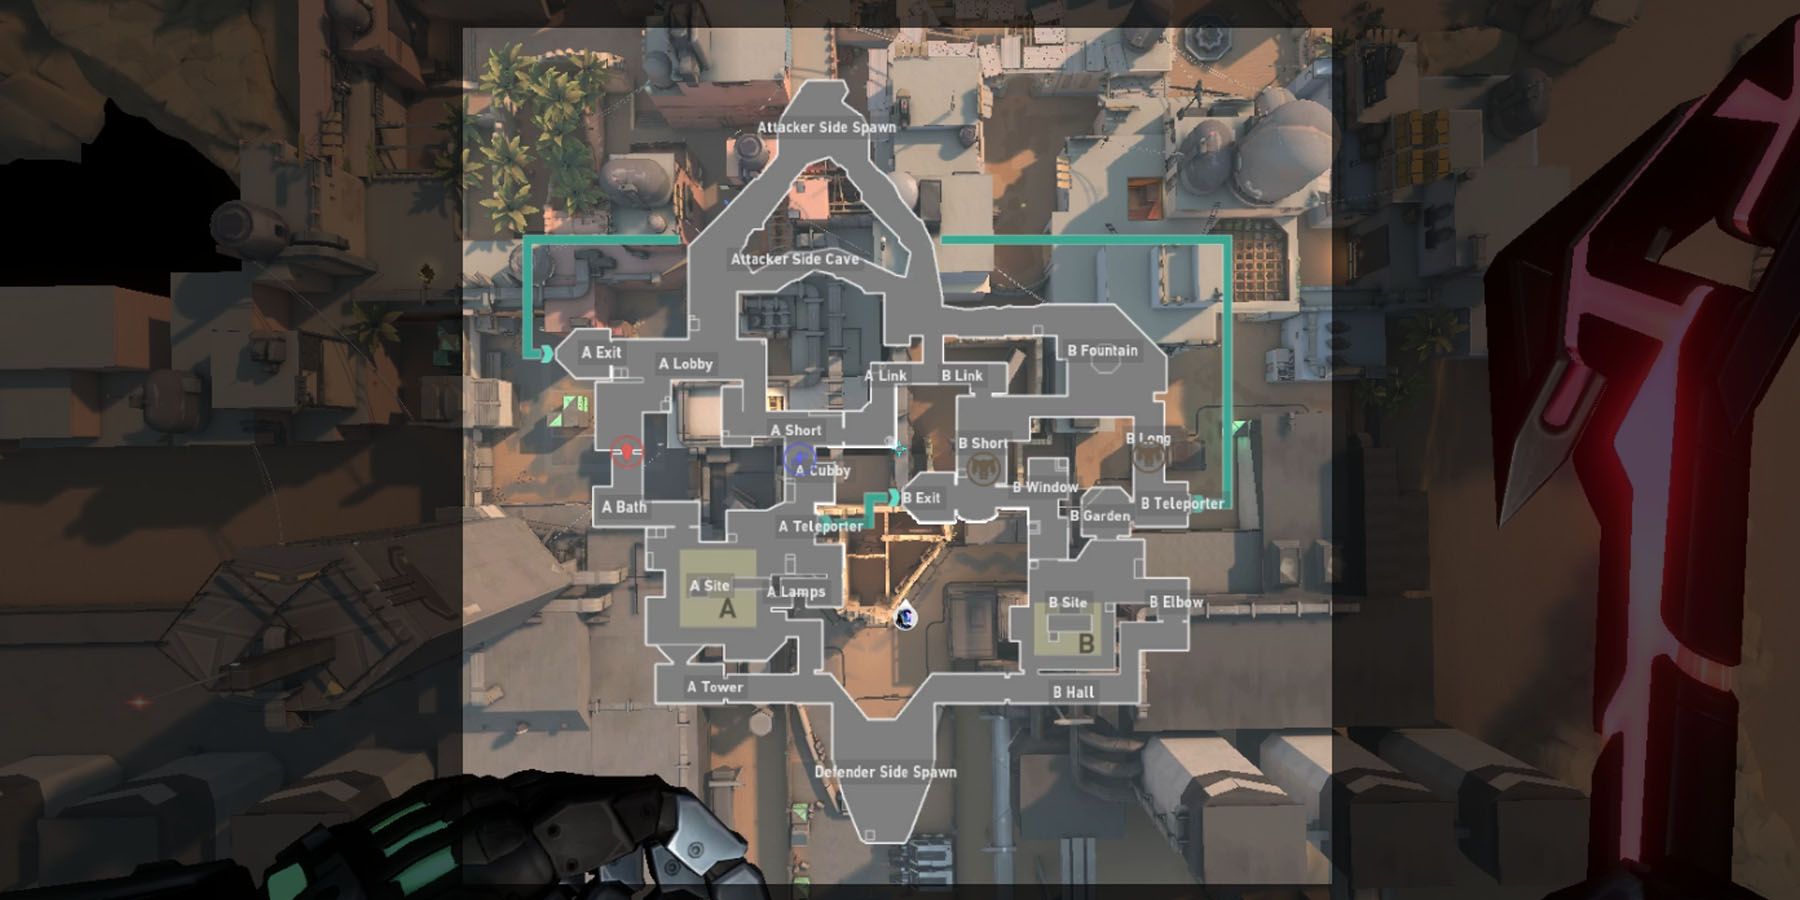
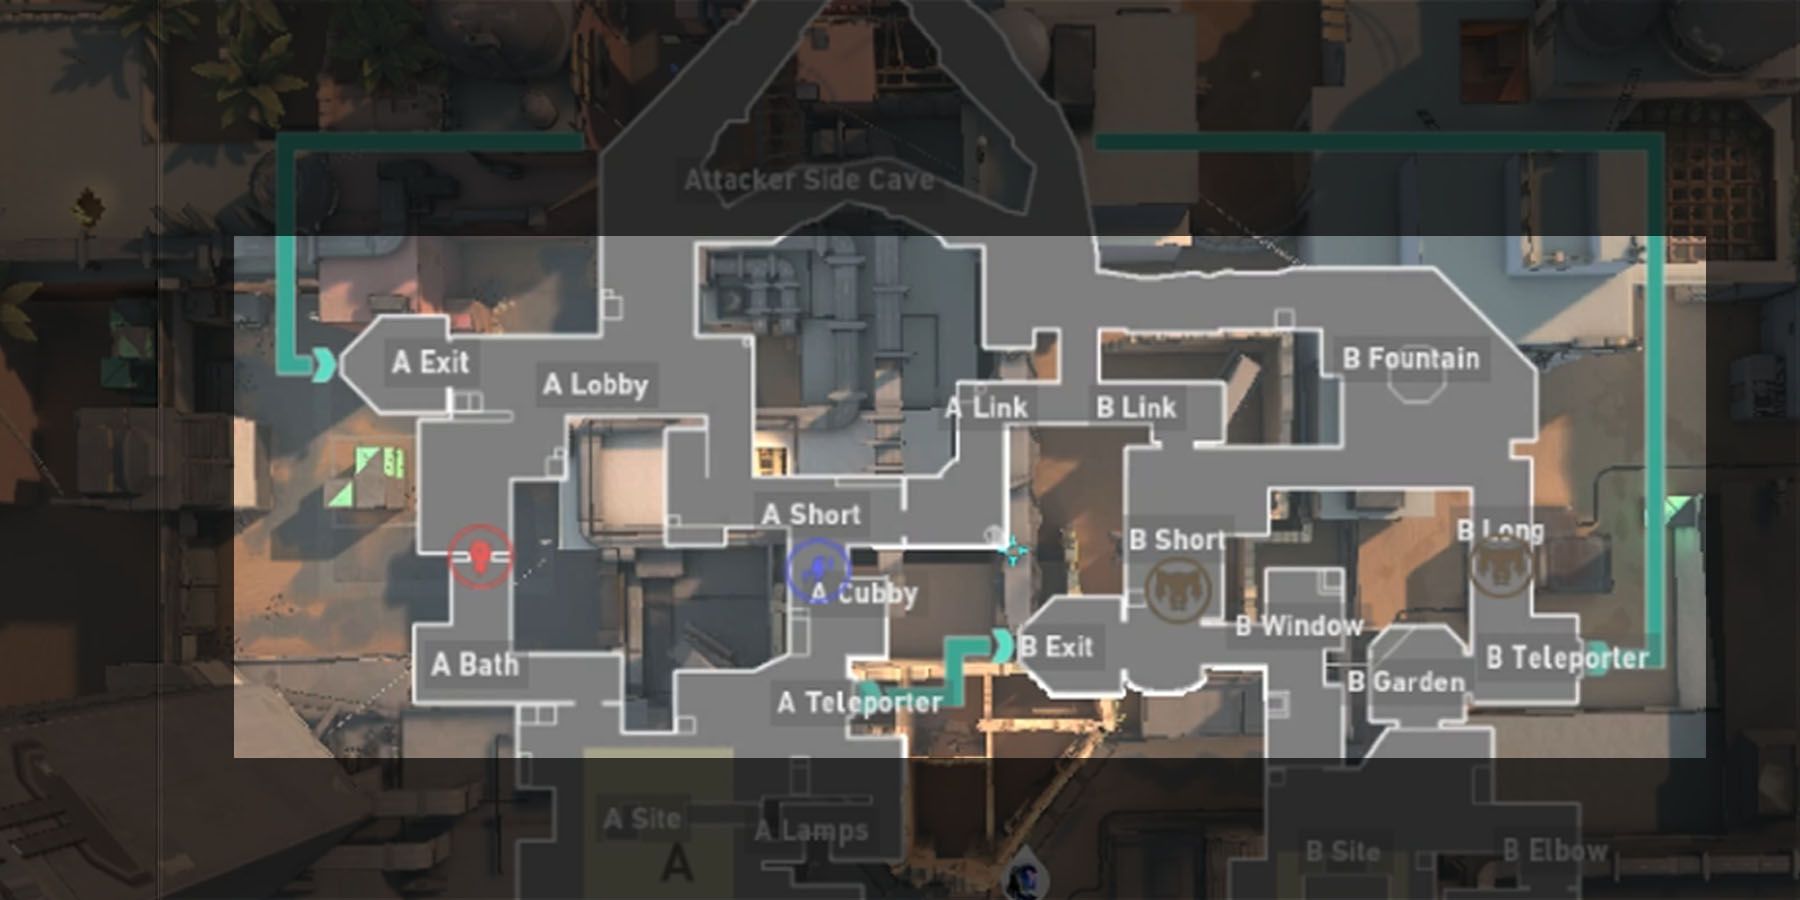
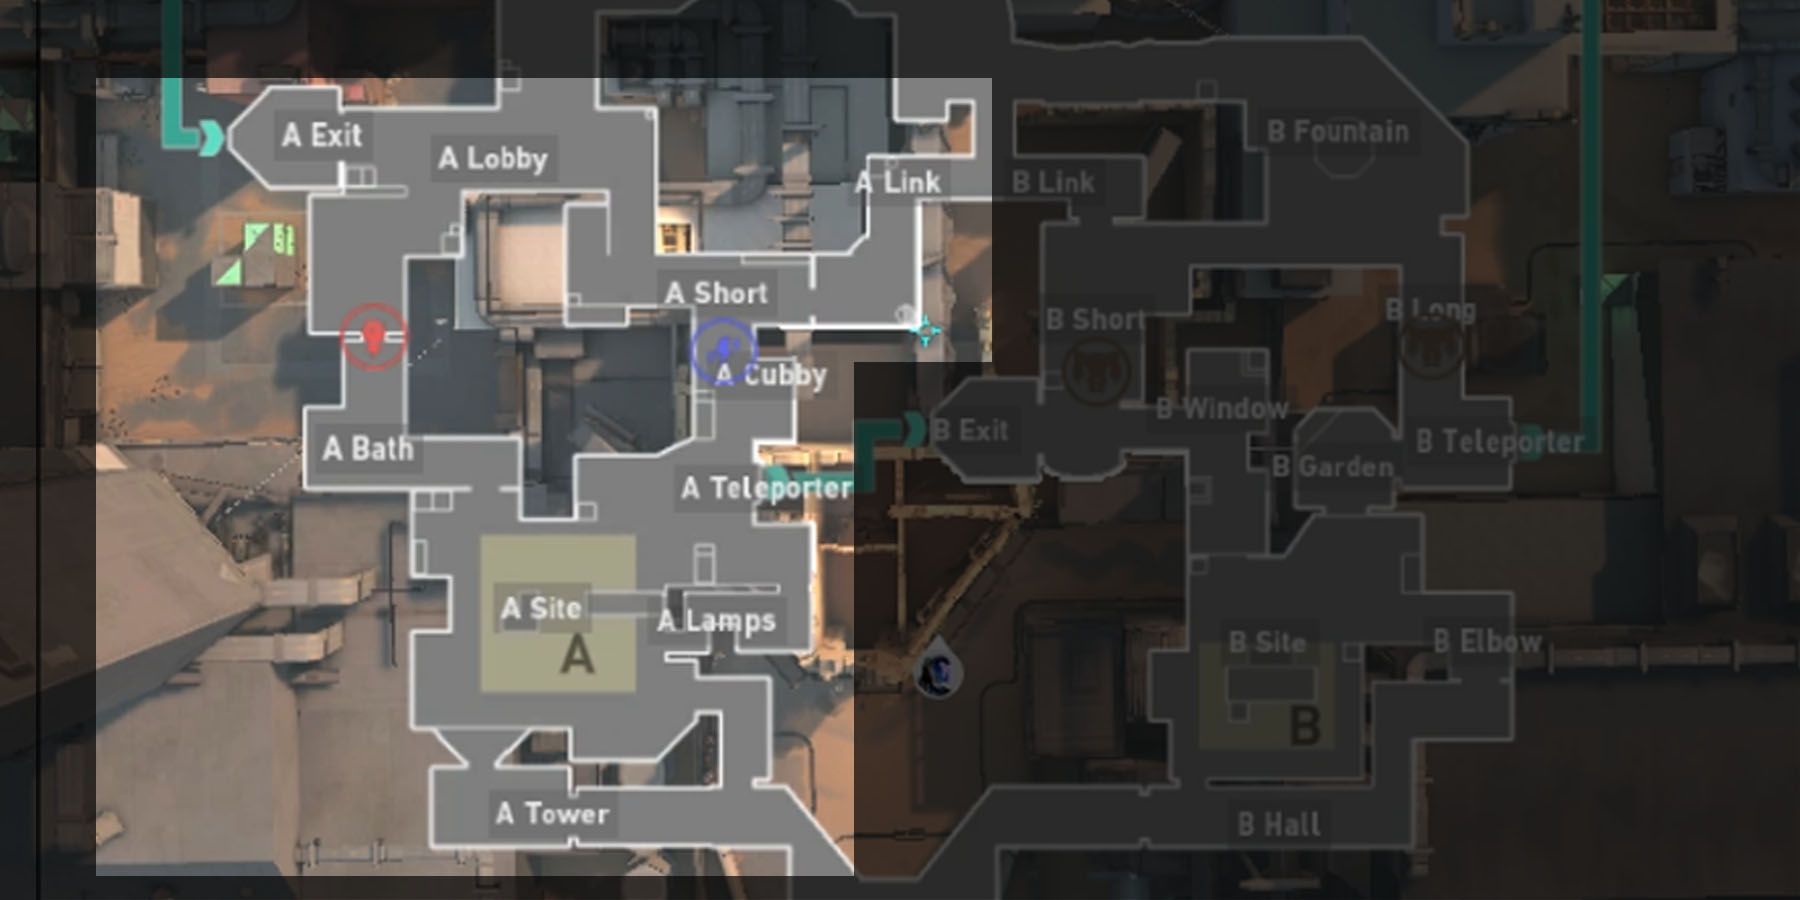
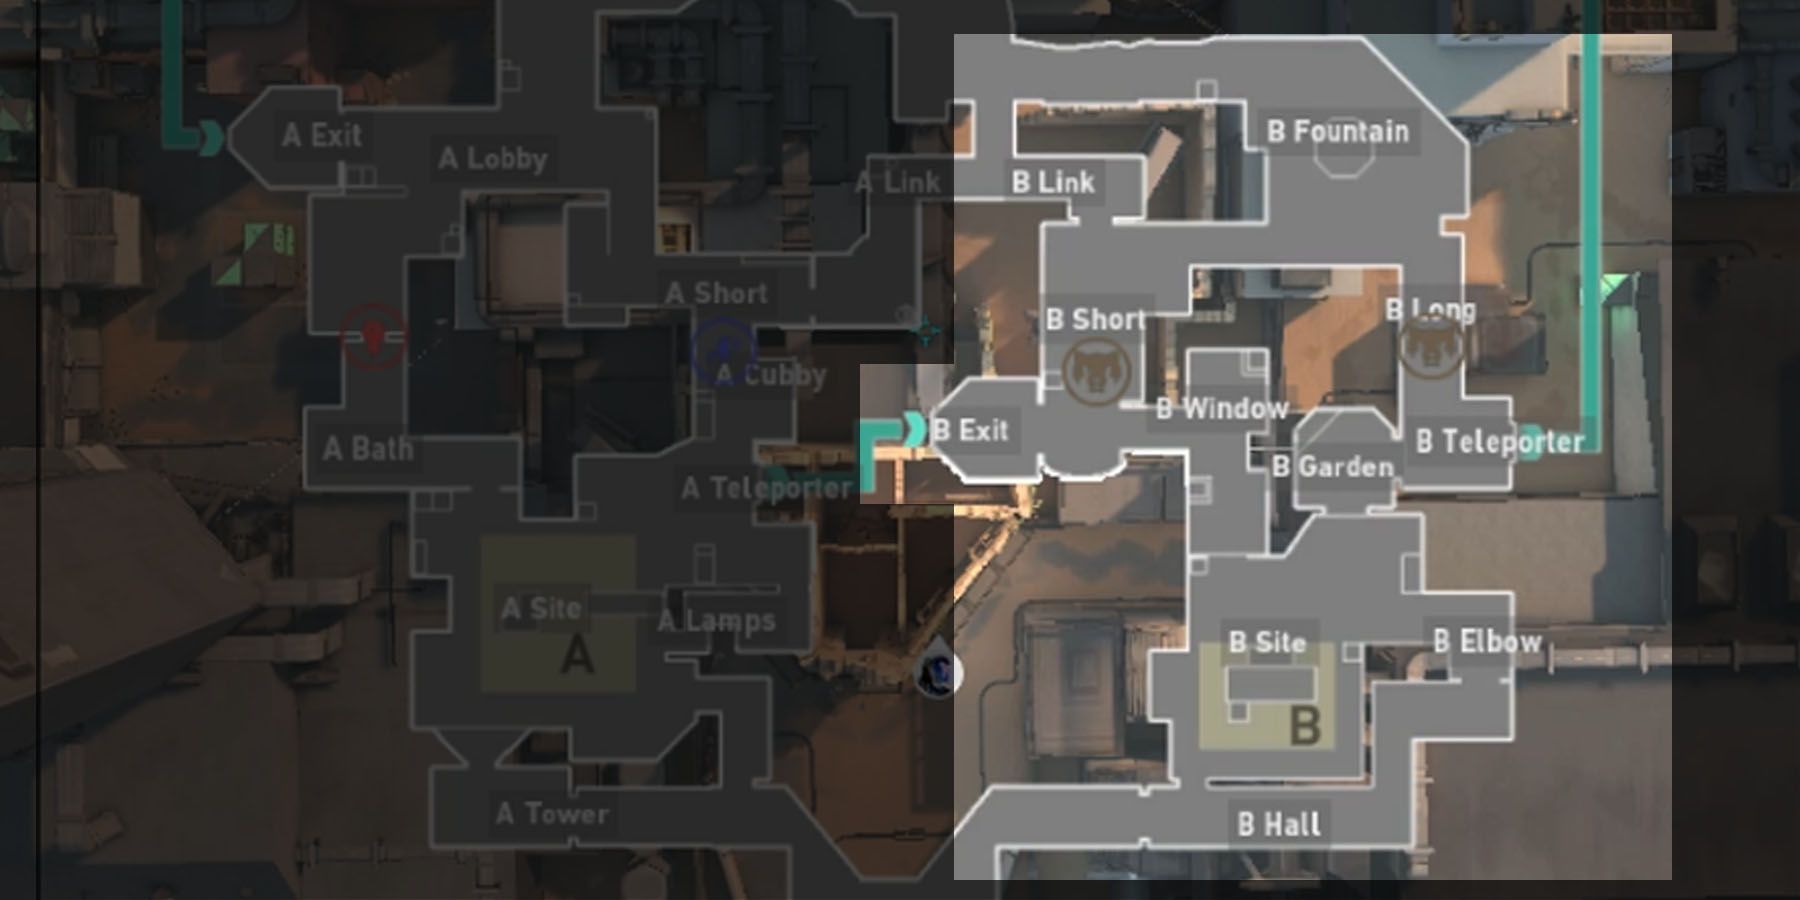
- Lack of Mid: This Map is known for its lack of a Mid-Section, which is replaced instead by Teleporters. These take players from the middle of the A-Site to the middle of the B-Site, denoted as A-Short and B-Long. There’s also a Teleporter that takes players from the edge of the entrance of B-Site to the edge of the entrance of A-Site, known as B-Long and A-Lobby.
- Teleporter Exit Rooms: Players end up in a small room with doors when using the Teleporter. They can only be opened from the inside but could be penetrated with gunfire.
Mid-Area: Teleport At The Ready
While there’s a lack of a formal Mid-Section in Bind, it helps to understand that the areas near the Teleporters may also serve as the “mid” in the map, considering how they easily allow navigation throughout the two major Site areas.
Features: Teleporter Access Is Crucial
Perhaps the essential part of any match in Bind is whichever Valorant team gets to control the site of the Teleporters since they can help dictate the proper flow of combat. For both attackers and defenders, it helps to understand the primary areas of concern when it comes to the outside-Site locations near the Teleporter:
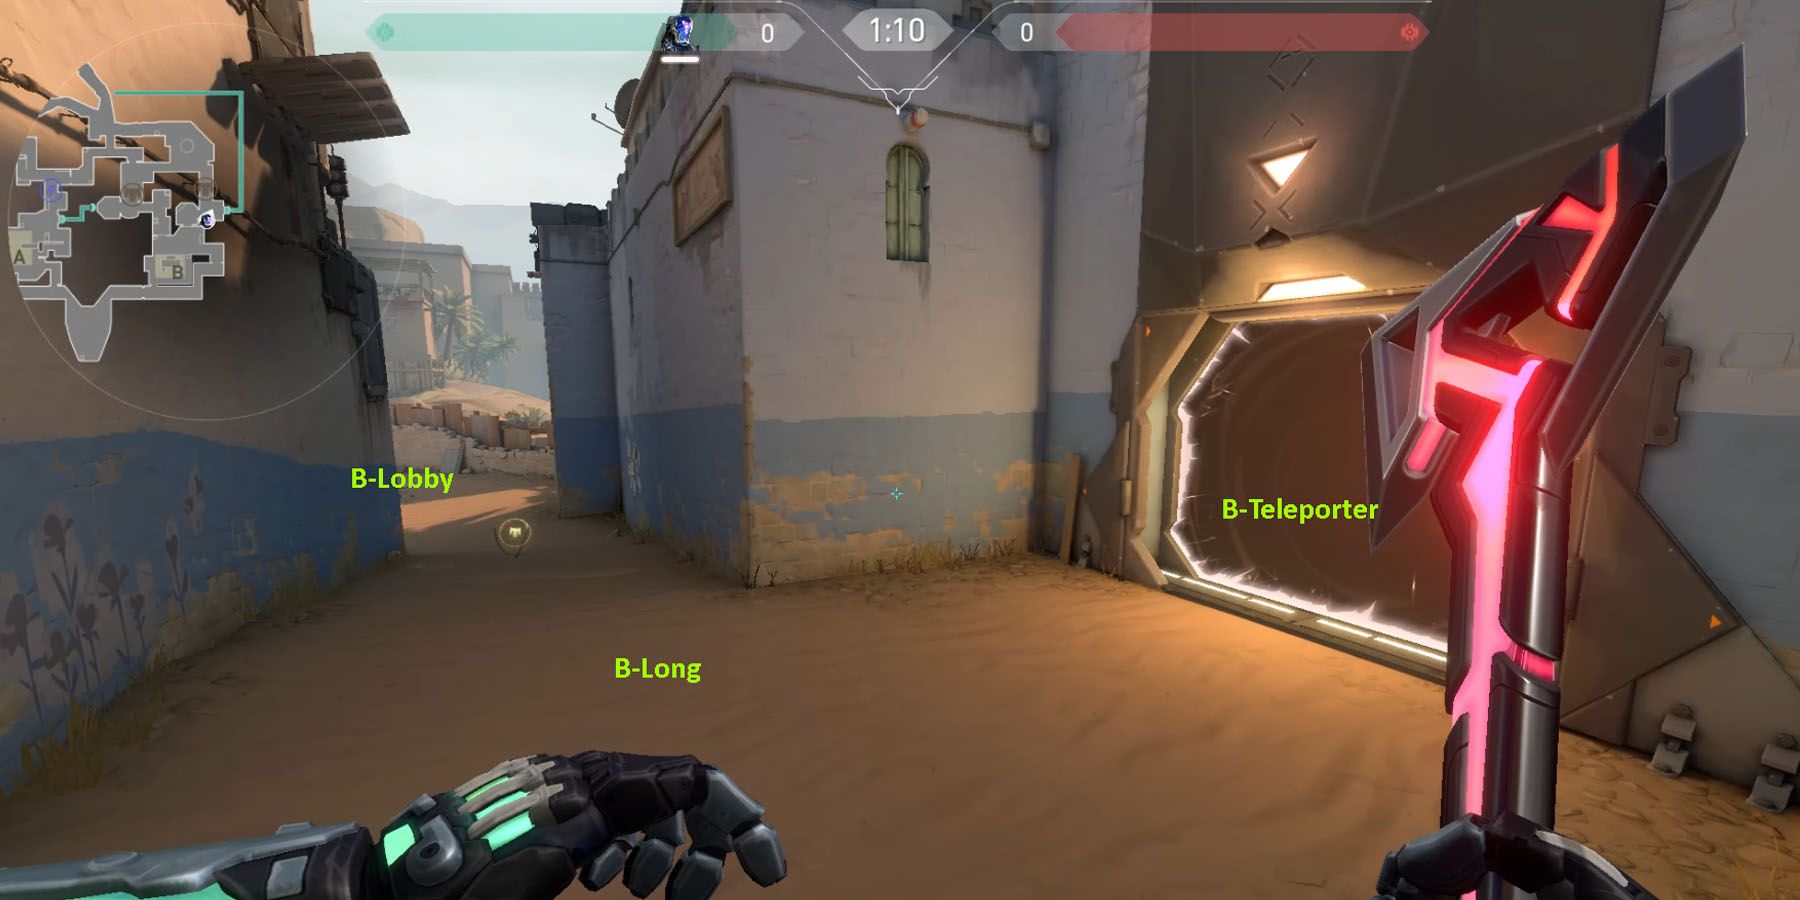
- B-Lobby: An open area with a fountain in the middle, this relatively long-ranged-friendly location gives easy access to B-Site or flanking at the back. An area of concern is primarily B-Long, since it gives quick access to B-Garden that is likely guarded considering its proximity to B-Site. The Garden faces B-Teleporter, which leads straight into A-Exit on the other side of the map.
- B-Link: A crucial crossroad from the Attacker Side Spawn, this Link area is generally approached when attacking B-Site from the midsection of the map. B-Short is an area of concern since defenders often peek from B-Window, plus B-Exit often leads to surprise counter-assaults.
- A-Link: A counterpart crossroad area from the Attacker Side Spawn, this Link area is associated with A-Site assaults from the middle part of the map. A-Short is an area of concern here since it leads to the narrow A-Cubby corridor, often a sensitive sniper-prone A-Site area popular for Operator and Marshal users. It houses A-Teleporter that leads into B-Exit.
- A-Lobby: A convenient back-site in the game, this is a generally empty part of the map like B-Lobby. A-Exit is a concern here since defenders can use B-Teleporter to get a surprise flank on the enemies here. A-Bath is almost always a location for defenders, so attackers beware.
Offense: Narrow Corridors Mark Aggression
Regarding the Mid-Area offensive, it’s important to understand that the areas with the highest activity in Bind would be its narrow corridors: B-Short and B-Long for the B-Site angle, and A-Baths, A-Short and A-Cubby for the A-Site. Here are things to take note:
- A-Baths: A relatively “safe” site for attackers, the proximity of A-Baths to the A-Site means defenders will likely fortify A-Site directly and guard the exit. Corner projectiles that lead to the A-Baths exit work here.
- A-Short: A part of the middling cluster of A-Site and B-Site pathways, A-Short is a critical offensive point due to its close access to the A-Teleporter and a safe exit to the A-Lobby. Players must be careful approaching A-Cubby because of being prone to projectiles and snipers like the Marshal and Operator.
- B-Short: Another part of the middling A-Site/B-Site pathways, B-Short is a critical corridor leading into the B-Site. There’s almost always someone going to peek from the B-Window or flank from the B-Exit.
- B-Long: An extremely narrow corridor, B-Long is a critical entrance to the B-Teleporter and the B-Garden, which is likely a well-fortified area for someone waiting from a long range.
Defense: Corners Determine Success
Regarding the Mid-Area defensive, it’s important to understand the most critical areas of weakness in the Bind Map and how to fortify them properly. These include B-Windows for the B-Site and A-Cubby for the A-Site. Here are things to take note:
- A-Cubby: Given the tight nature of the A-Site, one of Bind's most popular offensive areas would be the A-Cubby. Considering its proximity to the A-Link/B-Link, A-Cubby will likely be a critical point for Agents with projectiles. Note that meeting Agents here will force them to rotate back into A-Link or A-Lobby.
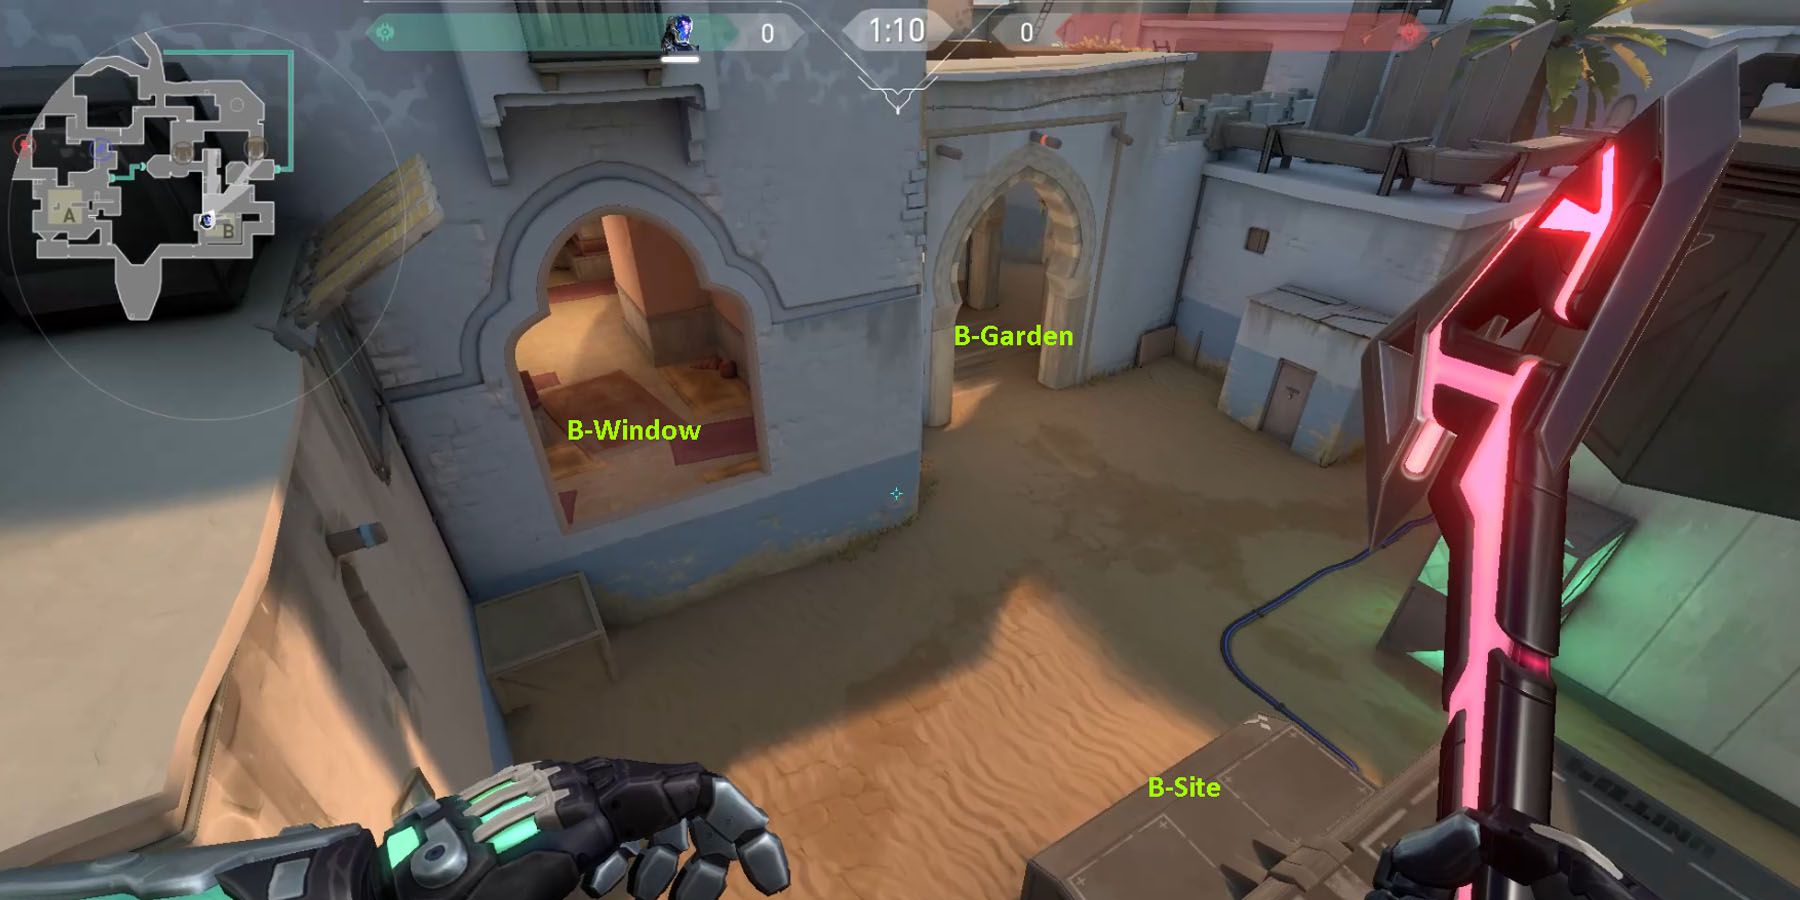
- B-Windows: A rather small corridor on the second story of the B-Site, this area faces B-Exit and is perpendicular to B-Short. This is a good waiting area for an ambush, especially adjacent doorways.
A-Site: Multiple Openings
One of the most notable features of A-Site in Bind is its relatively constrained nature, giving attackers multiple opportunities to approach while also giving defenders many rooms to defend. When pursuing A-Site, whoever gets the jump on the other can secure the round.
Features: Flexible Approach
Players studying Bind will want to note that the A-Site area is rather closely-knit to various corners and alleyways, making th map a pain to navigate for newcomers. When exploring Bind along the A-Site, it helps to take note of particular areas where quick exits are expected on both sides. Here are things to consider:
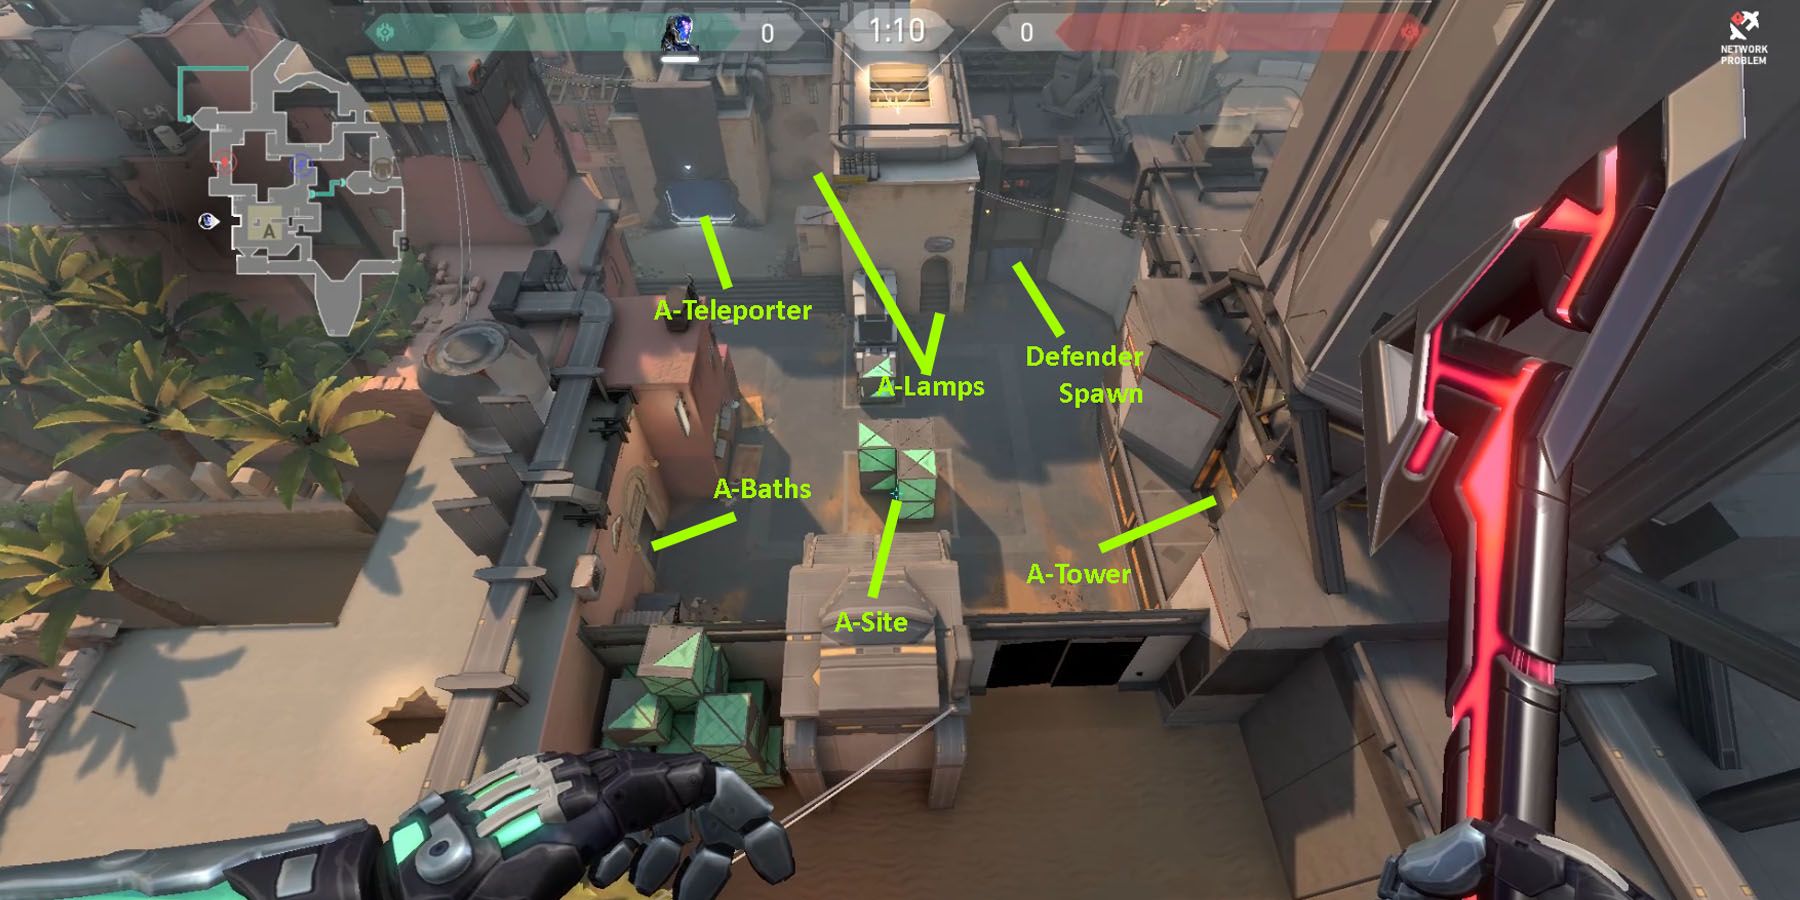
- A-Teleporter: Before entering A-Site proper, the A-Teleporter can provide a quick re-route to B-Exit. This makes it a prime flanking spot and a must-watch for both camps.
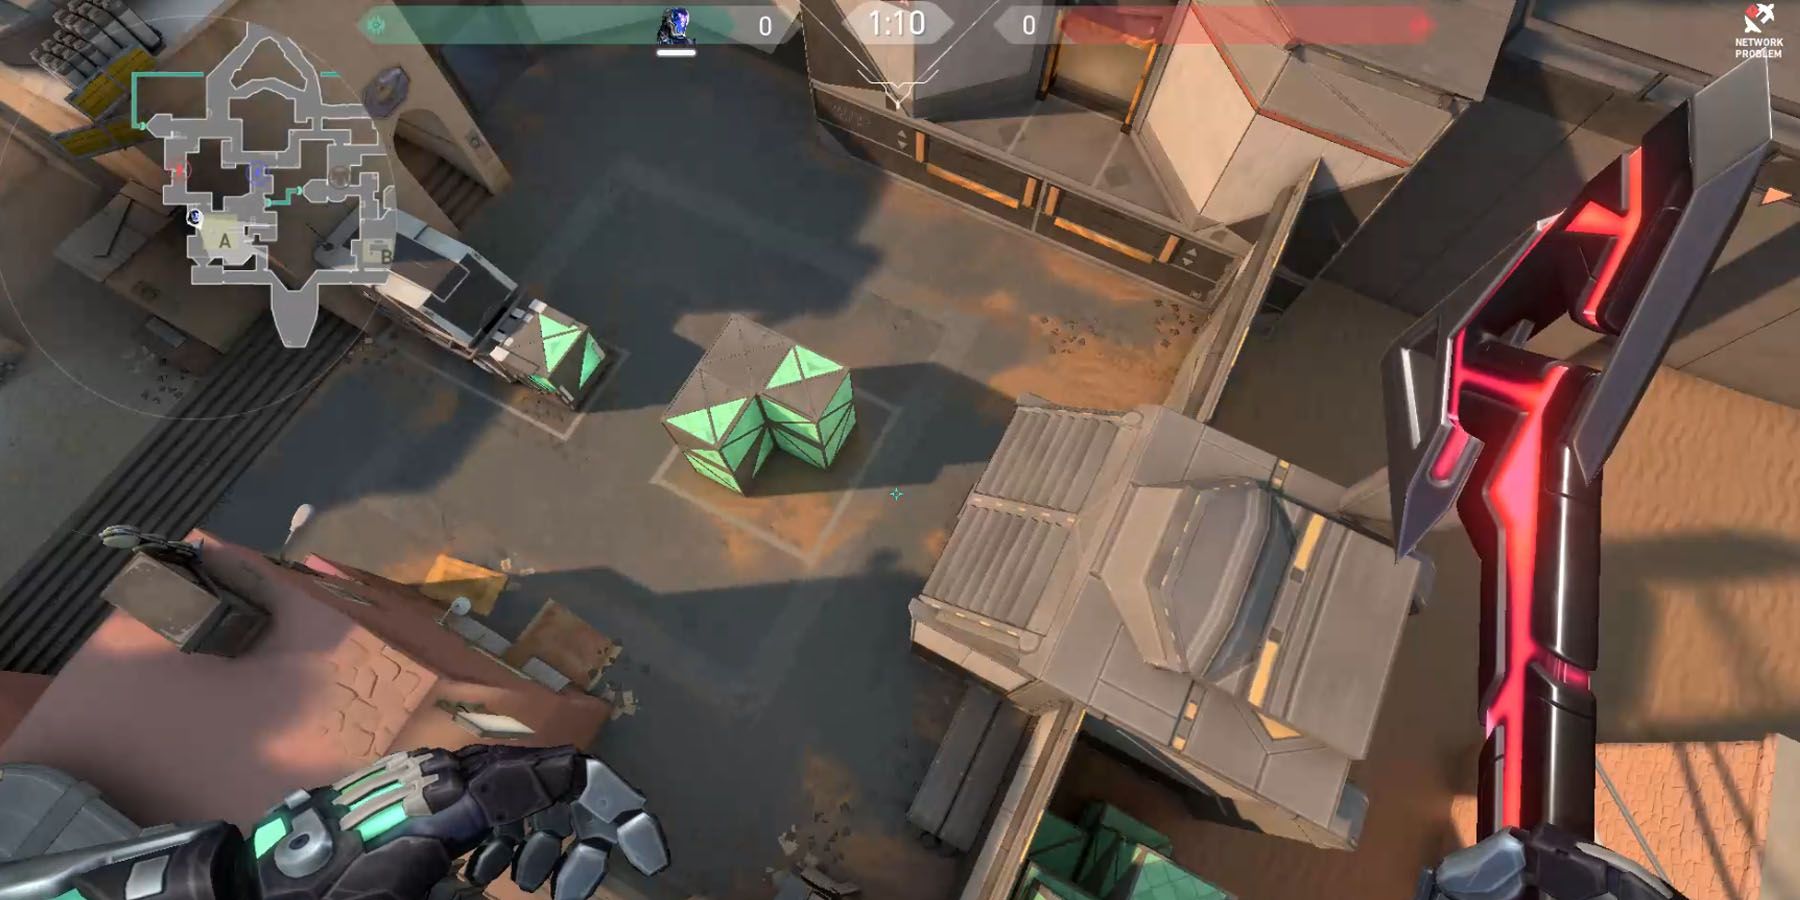
- A-Site Proper: Central to the A-Site area is the A-Site Proper, which is composed of tall central boxes forming an L-shape and a set of long boxes adjacent to it. This gives attackers room to plant close to the attacking or the defending side, with plenty of room for Spike defense.
- A-Lamps: On the defender side, A-Lamps are a quick way to access the A-Teleporter side from behind the A-Site proper, allowing defenders to surprise unwary attackers potentially.
Offense: Flank All At Once
Due to the tight nature of A-Site, attackers in Bind are often forced to consider flanking or going all-in. Regarding an A-Site focus, it may help to do a bit of both, wherein the team pursues A-Site but “flanks” in the sense that both entryways are used. That way, enemies are confused about which zones to defend, leaving them open for counters. Here are things to consider:
- A-Teleporter: It helps to lure the opponents towards B-Site by mollying, using a detection skill, or using Skye’s wolf form in B-Short via B-Link. That way, the opponents at A-Site may take the bait and use A-Teleporter to get to B-Exit, leaving this entryway open.
- A-Cubby: Turn left at the closest corner when entering A-Site from A-Short. This Cubby is a popular rat spot, as players often focus on securing A-Lamps and A-Site proper instead of securing their rear.
- A-Lamps: After securing A-Teleporter, it’s ideal for players to enter A-Lamps and flank the defensive. The tight corner here makes it great for mollying and catching off-guard the A-Site defenders from the rear - especially A-Tower snipers.
Defense: Cramped Means Multiple Openings
It’s important to remember that A-Site's cramped nature means there are many nifty corners for enemies to traverse when securing the offense. Covering these tricky locations and secure defense here can discourage enemies from pursuing A-Site altogether. Here are some areas to consider:
- A-Tower: The area of A-Site closest to the base, A-Tower is an ideal sniping position especially against enemies trying to take A-Site Proper from the center. This is also an ideal spot to guard against anyone trying to micro-flank via A-Lamps.
- A-Teleporter: Aside from waiting for enemies to approach from A-Short, defenders guarding A-Teleporter can use its view of A-Baths to catch enemies off-guard. This area also has many decent corners, perfect for establishing defensive positions against A-Baths and A-Short entrances.
- A-Lamps: This tight corner is a highly-contested micro-flanking zone due to its navigable nature. The right defender here can outmaneuver fast-moving Neons or mollying Brimstones.
- A-Exit: Although deep within enemy territory, players who find no enemies along A-Site may want to guard A-Exit instead, as B-Site flankers can use this for a quick exit.
B-Site: Tight Approaches
Contrary to A-Site, the rather open nature of B-Site in Bind makes it tricky to approach, especially since defenders have easy access to potential entry points. However, if attackers like Raze know which entryway to exploit, B-Site can become a haven for flanking.
Features: Blank Space
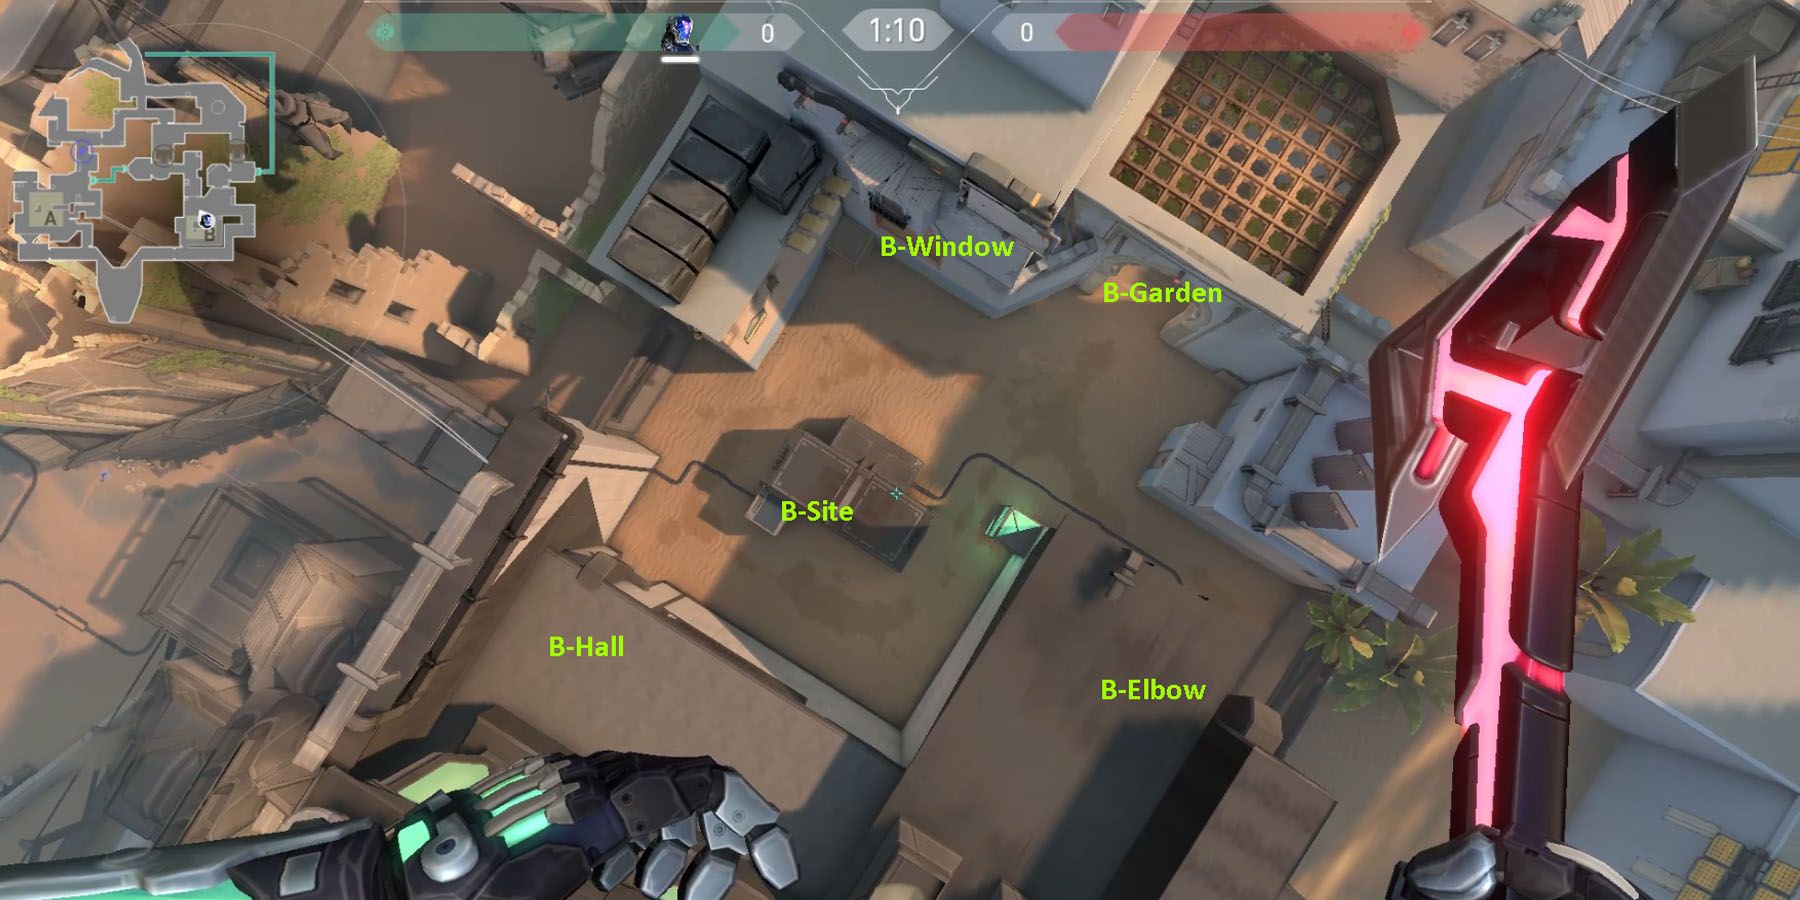
What perhaps makes B-Site of Bind rather iconic is its relatively open space, save for B-Hall and the B-Site Proper. This makes combat incursions on Bind rather movement-intensive, as sometimes survivors are left doing cat-and-mouse chases to outpace each other and secure the kill. Here are places to note:
- B-Teleporter: Similar to A-Site, before entering B-Garden and B-Site Proper is the B-Teleporter, giving attackers a last-minute exit in case of emergencies.
- B-Site Proper: Most notable to B-Site of Bind is the B-Site Proper, composed of two crates beside an open crate. The relative size of the Site Proper compared to the rest of the map makes it a tough obstacle to traverse in open combat, making this a difficult place to both defend and attack under the right circumstances.
Offense: All About Prediction
Given the straightforward nature of the B-Site in Bind, attackers can easily pinpoint where potential defenders are located on the map. In turn, many of the best attacking strategies deal with predicting where defenders are stationed and taking them out before being able to fortify their defenses. Here are considerations:
- B-Lobby/B-Long: It’s very likely for defenders to be stationed at just the doorway leading to B-Garden to guard the B-Teleporter entryway. A sniper in B-Lobby or blinding the B-Garden proper may be a good way to lure the opponent out for a clean kill.
- B-Garden/B-Hall: When going into B-Site, it may help for attacker escorts to smoke the area just outside B-Garden exit and then high-tail to the left-most corridor. This tight entryway leads to two corners leading into B-Hall, making this a great way to kill a sniper.
- B-Short: It’s highly unlikely for an enemy to be waiting at the end of B-Short on the get-go. Rather, scouts will likely survey the area from the corridor outside B-Window or right from B-Exit. Attackers should note B-Window in particular, as it’s a hotspot for retreaters and campers. There’s also a small space before entering B-Short from B-Lobby, and it could be a notable camping site for attackers waiting for rotations.
- B-Window: Enemies will likely be camping from the wall-end and the window-end of B-Window, so it may help to molly into these corners with Brimstone before entering. A sniper may also be overlooking B-Window from B-Hall, so resistance from this direction is expected.
Defense: All About Anticipation
Thankfully, B-Site of Bind is rather defender-friendly as it’s all about a matter of anticipating where enemies approach. This also makes the strategy an obvious weakness, as B-Site defenders will likely stay in fixed locations that are both the best and the most predictable areas to fortify. As such, defending B-Site becomes a matter of establishing multiple defensive lines. Here are things to consider:
- B-Teleporter: Due to the proximity of B-Long, it’s easy to see enemies advancing from B-Lobby. A sniper positioned in B-Garden could be a convenient way of dispatching enemies from afar, and then quickly retreating to A-Exit in emergencies.
- B-Garden: Even without a defender stationed near B-Teleporter, it’s easy to spot enemies approaching B-Garden from almost anywhere in the B-Site, making this area a risky place for attackers to choose as an entryway.
- B-Site Proper: The interior part of the cargo box in the B-Site Proper is a popular Spike placement location, making this an ideal defending spot for defender-leaning Agents like Sage to engage attackers by surprise in case of emergencies.
- B-Hall: Perhaps a favorite defending position in Bind, the B-Hall is a great place to position a sniper to engage B-Window combatants. Of course, a B-Window attacker is likely a sniper as well, making B-Hall a risky defensive position when not properly maximized.
- B-Exit: A mid-focused defender may transition from defending A-Teleporter to B-Exit as soon as allies tag a B-Site approach or if they want to outflank flankers. Remember that the teleporter sound is rather loud when in proximity, so enemies in B-Short may hear defenders. Players must move forward from the exit to open the elevator doors, so they can stand there indefinitely to stall enemies.
Agents: Delay The Assault
One of the Valorant Bind Map's most interesting features is its Teleporters' prevalence and rather tight spaces. Due to the lack of a formal Mid-Section, it’s become an in-demand option for players to use the narrow walkways and corners of the A/B-Links, making defenders and attackers rather predictable in their play. Here are recommended Valorant Agents to capitalize these map elements:
- Sage: Although a Sentinel like Sage might be at a disadvantage in the current meta due to the existence of faster Agents, the tighter maps of Bind can encourage her to capitalize on her slow orbs. A perfectly-timed orb in A-Cubby or B-Window can delay an enemy’s assault and chance to flank significantly.
- Brimstone: A fast-paced Controller like Brimstone can make quick work of enemies if his lineup is used rather quickly. His instantaneous smokes allow quick entrances and exits in Sites, and his Ultimate can eliminate multiple enemies at once when used in tight spaces.
- Skye: Although Skye can lag quite a bit compared to her other fast-paced flashers, this Initiator can rule Bind regarding gathering intel. Thanks to Teleporters, her Trailblazer can effectively become a map scout. Not only that, but her blinds can become an asset in tight corners and covers where enemies could usually wait for ambushes.
- Raze: Raze's brutal bombardier nature allows her to quickly eliminate targets as Bind is built for her angular-dependent toolkit. Her Satchels can allow her to navigate tight corners quickly for the offensive, while BoomBot can scout areas in advance. When used properly, angling her Grenade throws can efficiently eliminate both attackers and defenders.
Harbor arrives as the newest Agent in Valorant on October 18, 2022 alongside the Episode 5 - Act 3 update.

