Playing the vanilla version of The Elder Scrolls 5: Skyrim can be rough. The lingering bugs and outdated graphics are enough to drive anyone mad. Luckily, Skyrim has proven to be one of the most modded video games on the market. Thousands of them, both large and small, exist to improve the game in a myriad of different ways.
But for the uninitiated beginner, modding can seem like an intimidating endeavor. Installing mods is half the battle. Keeping the game stable is a whole different matter entirely. Doing things right from the outset can save the player a lot of trouble down the road. With the right information in hand, the process of modding becomes surprisingly easy.
Updated December 6, 2021 by Mark Hospodar: With the release of Skyrim: Anniversary Edition, now has never been a better time to re-experience the classic RPG all over again. For players who have never modded the game before, the process may seem difficult at first glance.
Modding is simply a series of baby steps. Being patient and taking things slow is considered a virtue. Once fans have successfully installed a couple of mods, the rest of the process becomes much easier. This guide has been expanded to give players a clearer roadmap when it comes to installing their very first mod.
6 Start With A Clean Install
This step may seem unimportant, but it's actually quite necessary. Any game a player intends to mod should be built from the ground up. It's typically not a good idea to try to incorporate mods into an ongoing playthrough, especially for Skyrim. Starting the process from scratch, although seemingly cumbersome, will yield the best results in terms of stability.
It's highly recommended for a player who intends to install a lot of mods to begin with a fresh install. This is done in the interest of avoiding any possible incompatibilities as a result of the incoming mods.
Don't Install In Program File Folders!
It's also worth noting that players should not install Skyrim in either of the Program Files folders on their PC in order to avert weird error messages from popping up in the future. Ideally, Skyrim should be installed directly onto the hard drive rather than buried in some other unrelated folder.
5 Choosing The Right Mod Manager
Theoretically, mods can be installed directly into the game's Data folder. Never do this! Organizationally, this method quickly becomes unmanageable. Spotting incompatibilities and faulty load orders are next to impossible in this manner. Luckily, Skyrim possesses a handful of excellent mod managers that sort all of this confusing information quite nicely.
Beginners should definitely stick with one of these two choices, either Vortex or Mod Organizer 2.
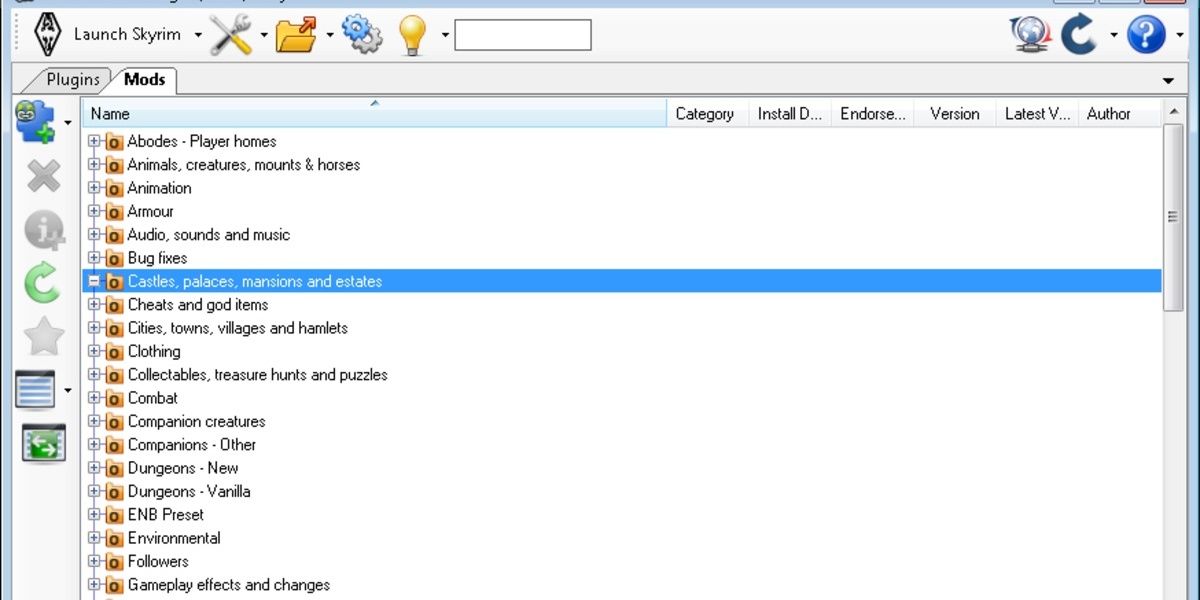
These two options are certainly the most user-friendly when it comes to installing a big list of mods. Mod managers provide a huge benefit. Individual mods can be activated or deactivated with a mouse click without going through the hassle of deleting each of the files in the Data folder.
This allows for greater experimentation as mods can be turned on or off with ease. As before, installing the mod manager itself should be done directly on the hard drive inside its own dedicated folder for the sake of clarity. Just follow the installation instructions and the mod manager will be up and running in no time!
How To Install Mod Organizer 2
For the purposes of this guide, let's use Mod Organizer 2 as an example. To install Mod Organizer 2, follow these steps:
- Navigate to Mod Organizer 2's "Files" section on Nexus, which can be found here.
- Under Main Files, select "Manuel Download." Save.
- Run the ModOrganizer.exe and select a Portable Instance.
- From the list of games, choose Skyrim: Special Edition.
- Beginners may want to consider selecting "Yes" when asked about the Tutorial.
4 Installing Mods With A Mod Manager
Now that the mod manager is in place it's time to start installing those mods. Let's use Nexus Mods as an example since it's arguably the best place to find mods for Skyrim. The majority of mods on Nexus typically have two download options: Manuel or Mod Manager. Since the player should be using a mod manager, always select the latter option.
Doing so will link the mod manager with the Nexus site. Downloaded mods will place themselves inside the manager automatically. This eliminates the need to manually unzip a mod's files every time a new mod is downloaded. Be aware, however, that certain mods do need to be downloaded manually, like when installing the mod manager itself or modding utilities (more on that later).
3 Understanding Load Order
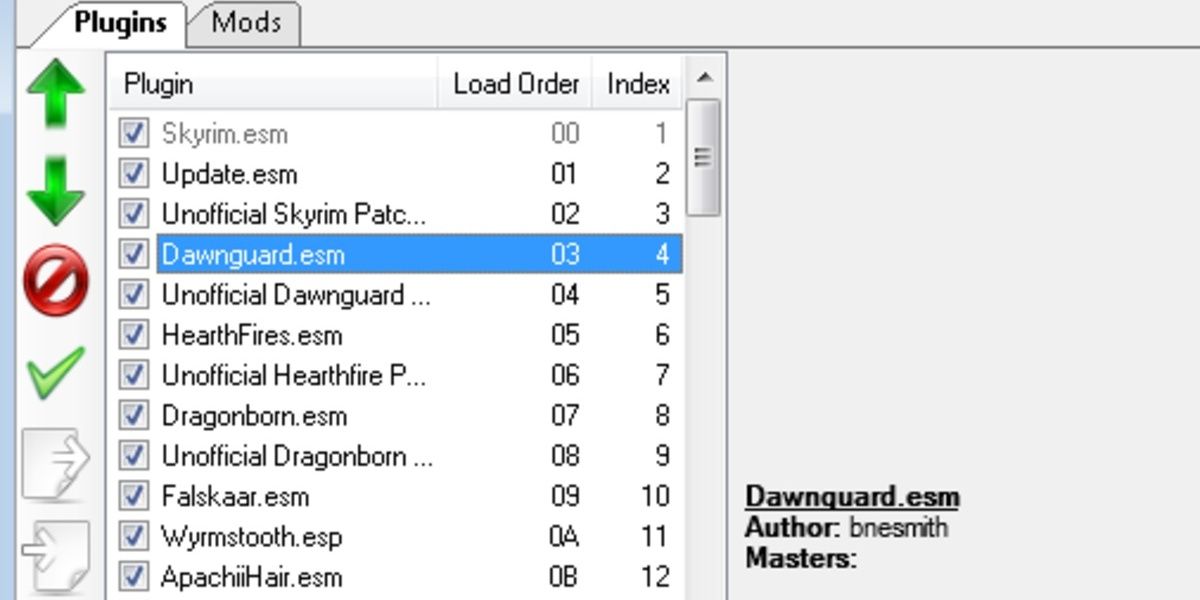
Load order is a term most players have probably heard when it comes to modding in general. Essentially, it refers to the order in which mods are loaded into the game. This is important because mods oftentimes overwrite other mods. The order in which those mods are loaded determines which one takes precedence. In a mod manager, mods that are lower on the list take higher priority. Check out this helpful tutorial for more nitty-gritty details on load order.
A correct load order is absolutely imperative for a stable game. Mods that come into conflict with each other either won't work or will crash the game completely. Any player serious about modding should install the Load Order Optimization Tool, or LOOT. Drawing upon its own massive internal database, LOOT will automatically sort all of a player's mods into the correct load order. It's a fantastic tool that should always be run once all of a player's mods have been installed.
How To Install & Run LOOT
Using LOOT to sort one's mods is very easy. Follow these steps to get started with LOOT:
- Create a "Modding Tools" Folder on the Hard Drive. Then, create a subfolder, and call it "LOOT."
- Download LOOT, which can be found here. Install LOOT inside the "LOOT" folder created in the previous step.
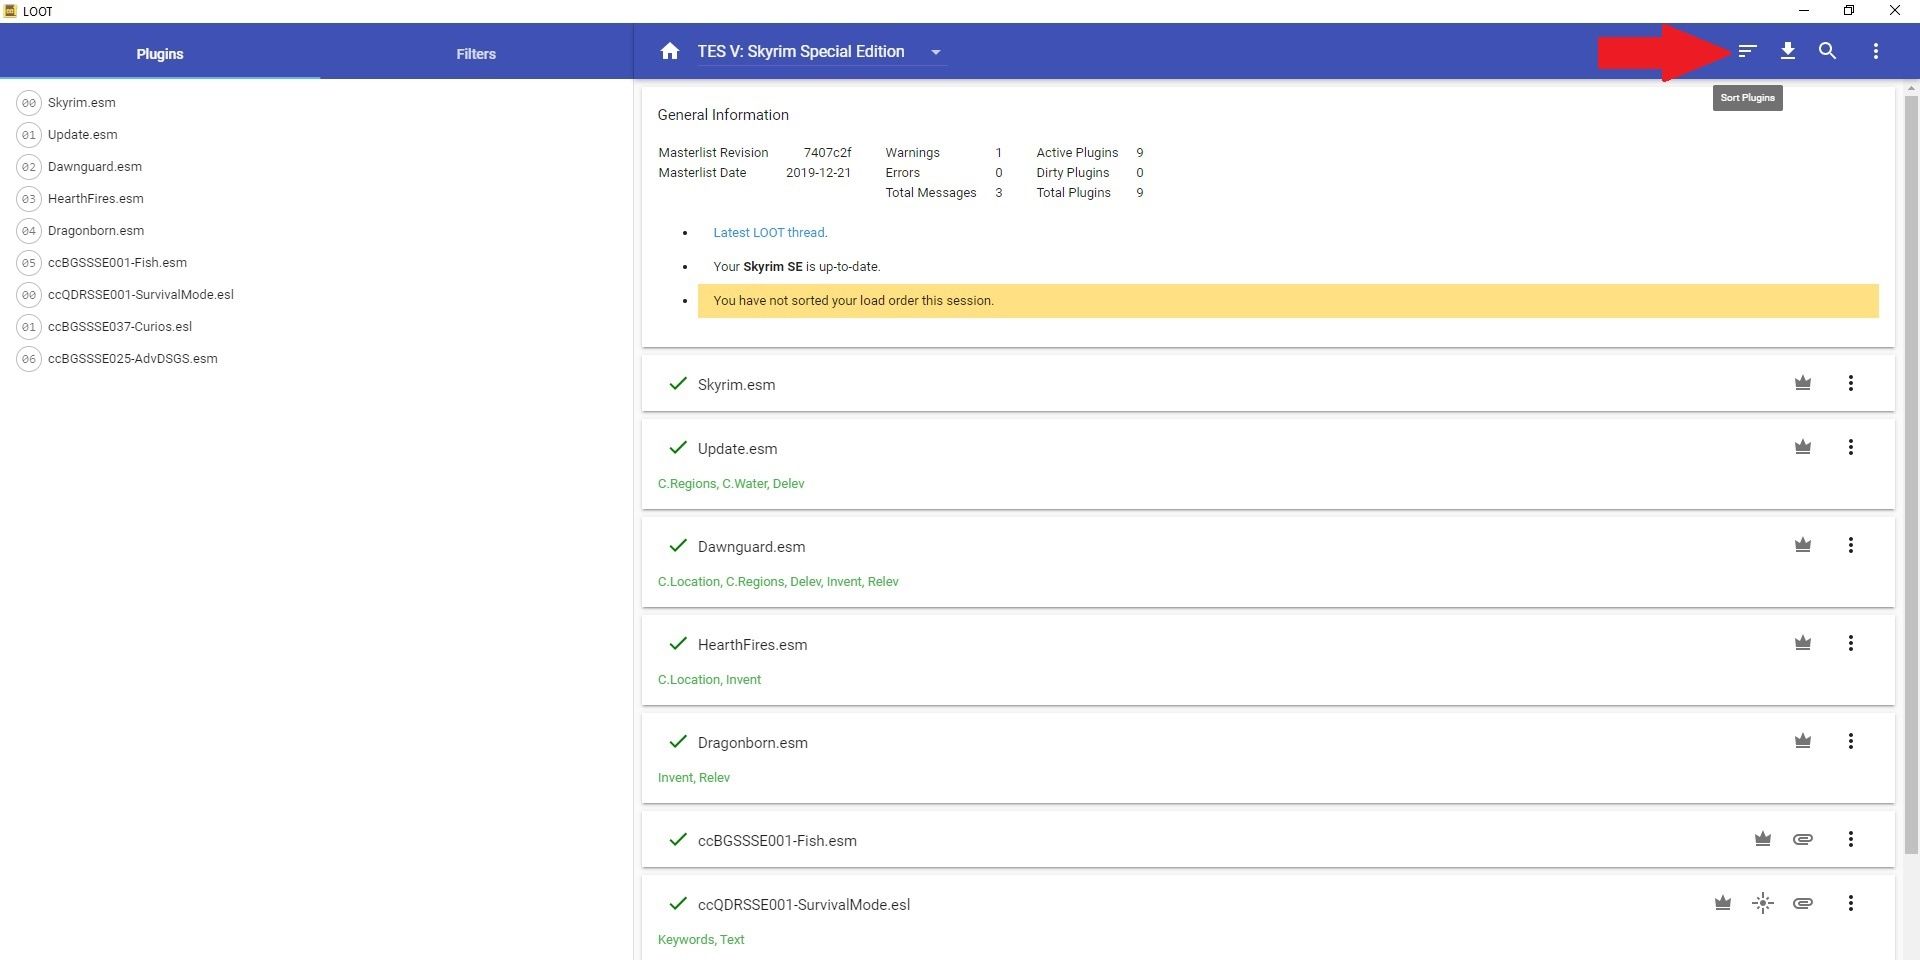
- In Mod Organizer 2, select LOOT from the drop-down menu next to "Run." Then, click Run.
- Players will see all of their installed mods and plugins. In the top right-hand corner, click on the "bars" icon as shown in the picture above.
- LOOT will sort the player's mods. Click "Apply." Done!
2 Essential Modding Utilities
Mods are great, but modding utilities make the whole operation run smoother. LOOT is an example of a modding utility. It sorts all of a player's mods into their correct load order. However, there are a few other programs that need to be taken into consideration.
How To Install SSEEdit
SSEEdit is yet another essential modding utility that will ultimately make Skyrim run smoother. This program detects other problems and conflicts certain mods may possess. SSEEdit pinpoints the source of the problem so that players may rectify it.
- Navigate to SSEEdit's "Main Files" section on Nexus, which can be found here. Select "Manuel Download." Save.
- Inside the "Modding Tools" Folder, create an "SSEEdit" subfolder.
- Unzip the contents of SSEEdit inside the subfolder mentioned in the previous step.
- In Mod Organizer 2, select SSEEdit from the drop-down menu next to "Run." Then, click Run.
- SSEEdit will scan all installed mods/plugins, highlighting any problems or conflicts.
How To Install SKSE
Skyrim Script Extender, or SKSE, is also mandatory. Many mods, especially ones that alter the gameplay in some fashion, will require SKSE to function. In fact, once SKSE has been added to the mod manager, the game itself will always be launched through this tool.
- Navigate to the SKSE website, which can be found here.
- Choose the Zip Archive that matches your current version of Skyrim. Save.
- Unzip the contents of SKSE onto the Desktop.
- Copy/Paste everything inside the SKSE folder onto the Skyrim directory, which can be found here – C:/Steam/steamapps/common/Skyrim Special Edition.
1 The First Test
Let's tie all this information together by applying it to a simple test. Skyrim was (and in many cases still is) a notoriously buggy game. Official patches have smoothed over the most glaring problems, but certain frustrating issues still exist.
Thankfully, the modding community has come to the rescue. The first mod any beginner should install is the Unofficial Skyrim Special Edition Patch. This comprehensive mod fixes many of the bugs that Bethesda missed.
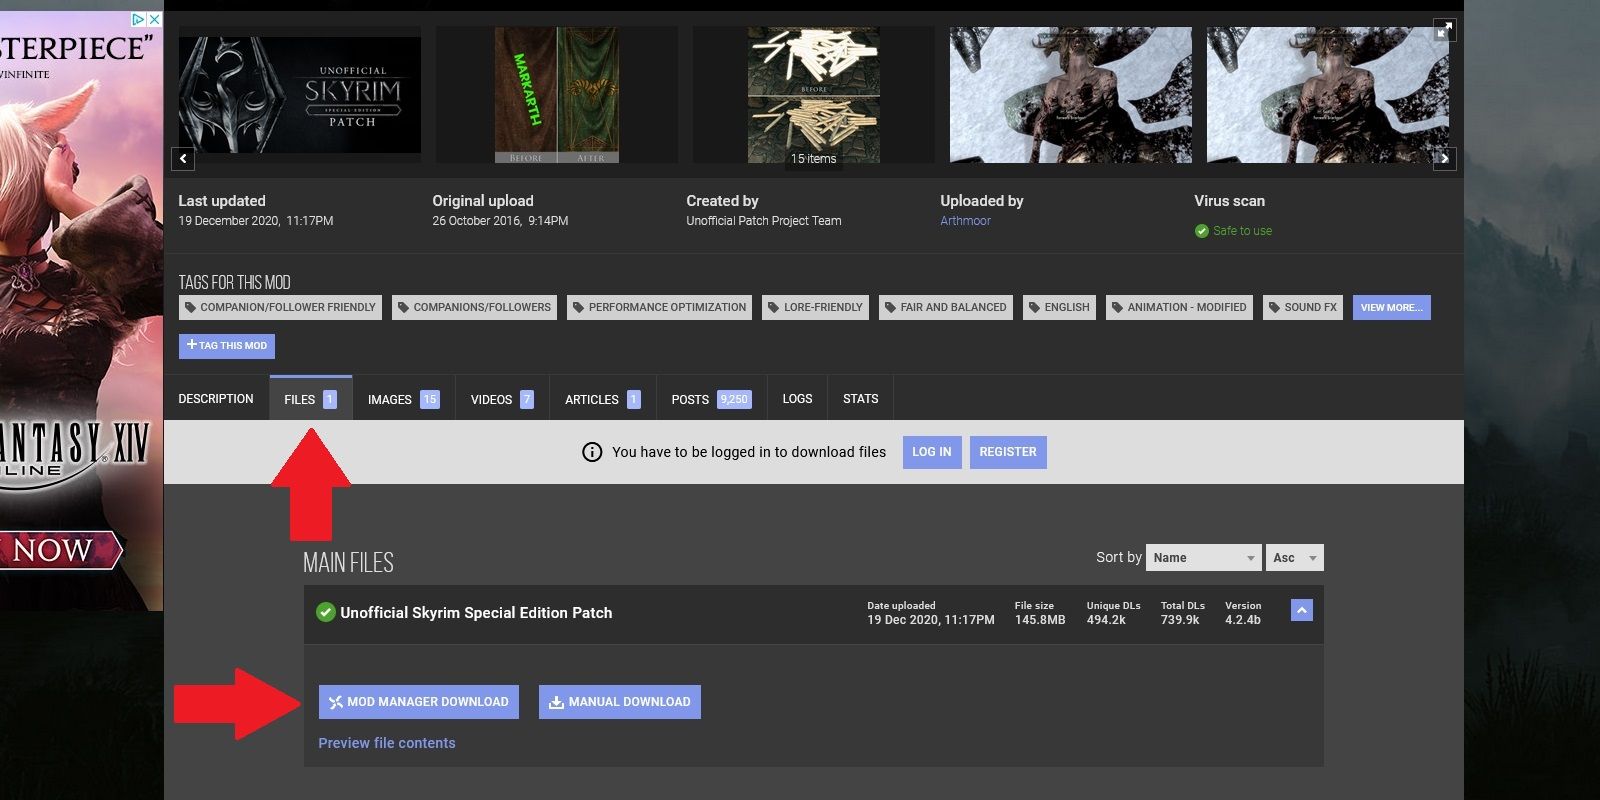
- First, find the Unofficial Skyrim Special Edition Patch on the Nexus Mods site.
- Then, click "Files" and select "Mod Manager Download." The player should allow the mod manager to link itself to the Nexus Mods site if he has not done so already.
- When the download is complete the mod should appear in the manager.
- Activate the Unofficial Skyrim Special Edition Patch with a simple click and the mod will now take effect when the game is launched. The first of many mods have been properly installed. Congratulations!
Skyrim: Anniversary Edition was released on November 11, 2021 and is currently available on PC, Playstation 4, Playstation 5, Xbox One, and Xbox Series X/S.

