


Quick Links
A big part of the fun of a game like Pikmin 4 is to achieve that elusive 100% completion rate, and in th world, that means collecting all the possible Treasures, Onions, and Rescues in a level before moving on to the next challenge.
With more sights to see and even more puzzles to solve, that can be a difficult endeavor to keep up without some help. Fret not, for this Blossoming Arcadia 100% completion guide for Pikmin 4 will provide everything needed to accomplish that task.
All Treasures, Onions, & Rescues in Blossoming Arcadia
For the 100% completion of the Blossoming Arcadia level, there are a total of 3 Onions, 9 Rescues, and 60 Treasures to bring back to Rescue Command. During the level, aside from the Red, Ice, and Yellow Pikmin, players will also gain access to the Blue and Rock Pikmin as well.
The guide will be broken into two main sections, one covering the surface world and the other charting out the course in the seven caves found on the level.
Surface World
Top-left quadrant

- Treasure - Wayward Moon: In the left-most elevated area, this heavy Treasure will require 50 Pikmin to carry. An upgraded Oatchi with the Buff/Super Buff skill will come in handy for this task.
- Treasure - Velvety Dreamdrop: From the previous Treasure, head northeast and find this Treasure protruding slightly from the ground. Use Yellow Pikmin to dig effectively to obtain it.
- Treasure - Harmonic Synthesizer: Just next to the water, this Treasure is hard to miss out there in the open.
- Treasure - Mooching Vase: A well-hidden Treasure; look to the north of this section and throw Yellow Pikmin at the top of the stump to dig it out.
- Treasure - Octoplus: To get to it, defeat the enemy patrolling about in the small alcove in the north. Watch out for its vacuuming snout to avoid losing any Pikmin.
- Treasure - Wind Detector: Another hidden Treasure, this can be dug up just behind the previous Treasure's location.
Top-right quadrant

- Treasure - Unfloatable Boat: With it being in the water, the best way to get to the Treasure is by using the newly discovered Blue Pikmin.
- Treasure - Mechanical Harp (Memory Song): From the nearby base, head northeast to the platform above. The Treasure can be found on top of a manhole cover that can be reached with Yellow Pikmin.
- Treasure - Shake-a-Smile: Now go south, and defeat the creature that is walking about to find this Treasure.
- Treasure - Orbital Communication Sphere: Now, push down the nearby paper bag to create a shortcut, which will lead directly to this Treasure just below.
- Onion: South of the base will be this Flarlic that is slightly buried within the box. Use Blue Pikmin to make navigating the waters an easy task.
Bottom-left quadrant

- Treasure - Sweat-Soaked Blue Bird: Just south of the starting area will be this Treasure next to some Pellet Posies.
- Treasure - Cupid's Grenade x 3: Now head uphill and turn the corner to the right; beat the Waddlequaff to make it cough up three of these.
- Treasure - Brush of Wisdom: Head west now to the upper levels, and get ready to fight the Burrowing Snagret. Defeat it, and the Treasure will become accessible.
- Treasure - Sphere of Fuzzy Feelings: Proceed north and dig this Treasure out using Oatchi or Yellow Pikmin.
Bottom-right quadrant

- Treasure - Sticky Jewel: Near the blooming mushrooms, find this Treasure just lying on the ground.
- Treasure - Floral Instigator: Now head southwest through the gap to find this Treasure hidden among the flowerbeds.
- Onion: The Yellow Onion can be obtained by breaking down the dirt wall nearby to open up access to the upper level.
- Treasure - Daughter Doll Head: Keep going north from the Onion to find this Treasure. Use Oatchi's Rush or throw Yellow Pikmin to get to it.
- Treasure - Searing Acidshock: For this Treasure, circle around to where the mushrooms are, build up the wall, climb up, and collect it.
Hotshock Canyon, Battle in a Box & Rockaway Cellars

- Rescue x 3: Completing all three of these Dandori-related Challenges and Battles will see two Leaflings and one Castaway rescued.
Caves in Blossoming Arcadia
Secluded Courtyard
Sublevel 1
- Treasure - Decorative Goo: Head west from the starting point and then north towards the alcove. Throw any Pikmin to grab this Treasure
- Treasure - Citrus Lamp: Loop around and from the elevated platform; use Yellow Pikmin to make this Treasure drop.
- Treasure - Universal Rubber Cutie: After defeating the nearby enemies, take a break and grab this Treasure.
Sublevel 2
- Treasure - Talisman of Life (Cherry Blossom): Head west of the starting point and find the climbing stick. Use Yellow Pikmin to dig it out of the ground and reach this Treasure.
- Treasure - Time Marker: Loop around to the open area and get ready to fight some spiders. Defeat them and move this Treasure back to the base.
- Rescue - Head north to the area in the back, and eliminate the spider carrying the Castaway.
- Treasure - Disguised Delicacy: Now go south and destroy the dirt wall. Once again, contend with the electric spider so that the Treasure can be obtained.
Sublevel 3
- Treasure - Blonde Imposter: Head west and find this Treasure hanging from some cobwebs.
- Onion - Take the long route around to find this Onion in a flower pot. Use Yellow Pikmin to get the job done.
- Treasure - Astringent Clump: Now loop around all the way east to the elevated platform, and use Pikmin to weigh this item down.
Sublevel 4
- Rescue - Beat the Foolix in the main arena to ensure the safety of this Castaway.
- Treasure - Expression Hider: With the boss gone, the gate should now be opened, with this Treasure found in a corner on the way to the exit.
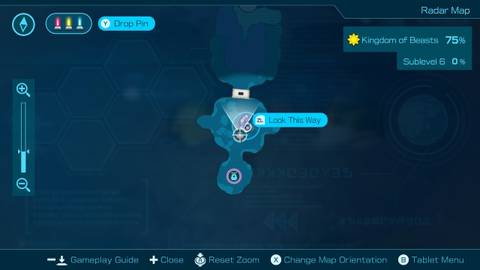
Kingdom of Beasts
Sublevel 1
- Treasure - Flaky Temptation: Use the Red Pikmin to extinguish the hot floor to get to this Treasure.
- Treasure - Memory Fragment (Bottom Right): Found just inside the broken pot, use two Pikmin of any color to move it.
Sublevel 2
- Treasure - Ambiguous Goo: Use the Rock Pikmin to destroy the crystal way to reach the Treasure.
- Treasure - Director of Destiny: After defeating the nearby enemy, look in the corner to dig the Treasure out of the dirt.
Sublevel 3

- Rescue - The Castaway will appear once the Empress Bulbax has been vanquished.
- Treasure - Disk of Joyous Wisdom x 3: Defeat the Empress Bulbax to open up the locked door. Behind it will be the Treasures.
Sublevel 4
- Treasure - Planetary Rubber Cutie: Use Oatchi to press down on the switch behind the hole to lower the fence before reaching this Treasure.
- Treasure - Sweet Stumble-Not: Defeat the large Bulborb in the area to make it cough up the Treasures.
Sublevel 5
- Treasure - Cookie of Prosperity: Hard to miss, pick it up on the ground just to the west of the starting point.
- Treasure - Crew-Cut Gourd: Find it in the corner along the path to the exit and dig it out of the ground.
- Treasure - Chance Totem: Go south at the junction to find a large Bulborb, defeat it and this Treasure will pop up.
Sublevel 6
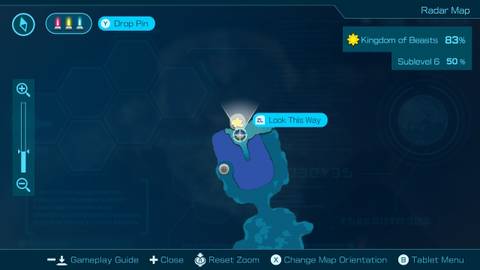
- Rescue - Beat both Emperor Bulbax creatures on this floor to make the Castaway appear.
- Treasure - Ancient Statue Head: After the fight, cross the water and use Red Pikmin to cool the lava to reach this Treasure.
Sightless Passage
Sublevel 1
- Treasure - Micromanagement Station: From the starting point, go southeast and locate this Treasure along the wall.
- Treasure - Masterpiece Plank: Proceed along the path to the left of the level and go to the most southern tip. Use Yellow Pikmin to reach the heights required to bring down this Treasure.
- Treasure - Hoop of Healing: In the northeast corner, use Oatchi to go through the tunnel and emerge out the other side. Transport the Treasure this way to get it to the nearby base.
- Rescue - Now head west, and in the middle room, use Oatchi's Rush ability to knock down the Castaway so he can be transported to safety.
- Treasure - Heat Sensor: In the west room, look for a spot on the ground to dig up this piece of technology.
Drafty Gallery
Sublevel 1

- Treasure - Memory Fragment (Top... Probably): From the starting point, go to the right and find this Treasure on a high platform. Use Yellow Pikmin to grab it easily.
- Treasure - Hoop of Fortune: Located in the central area of the map, find it easily without any fuss.
- Treasure - Spouse Alert: To get to this one, climb up the platform in the bottom left corner and then use Yellow Pikmin to settle the matter.
Sublevel 2
- Treasure - Sphere of Support: Head north and destroy the nearby dirt wall. Go around the structure and use Yellow Pikmin to bring this Treasure down.
- Treasure - Back-at-the-Beginning Track: Use the winds in the upper left corner to get up to the path where this Treasure can be found.
- Treasure - Tandem Trainer: Just below the previous Treasure, choose any Pikmin to get the job done
Sublevel 3
- Treasure - Middle-Management Tank Car: Unclog the winds to get up to the second area. Follow the path north, and use 20 Pikmin to bring down the platform to reach this Treasure.
- Treasure - Internal-Clock Measurer: Now head south and west along the rest of the paths to find this Treasure on a ledge. Throw the Pikmin over to get the Treasure home safely.
Sublevel 4

- Rescue - Face off against the Puffy Blowhog and defeat it to enable the rescue of this particular Castaway.
- Treasure - Sphere of Family: With the boss gone, the Treasure will also appear together with the Castaway. Transport both back home and secure them.
Pikmin 4 is available now, exclusively for the Nintendo Switch.