Sticking to the formula Guerrilla Games introduced in Zero Dawn, Horizon Forbidden West continues Aloy’s adventure across post-apocalyptic America and features the familiar dungeon-like areas known as Cauldrons that players can complete. But it’s back to square one for returning players as the rewards given for the first game’s Cauldrons are no longer available and will need to be unlocked once more as they travel into the West.
Out of the six Cauldrons that can be found in the Forbidden West, two are associated with main quests and cannot be missed. Although the other four are optional, completing these levels will unlock multiple machine overrides that Aloy can use while out in the wilds. Overriding machines comes with handy benefits, such as obtaining a machine mount and turning otherwise hostile machines into allies.
For the players who want an easier time finding these dungeons, this guide has all the details for the Cauldrons that can be found in the Forbidden West and their rewards.
Remember: Once a player enters a Cauldron, they will not be able to leave until it has been completed.
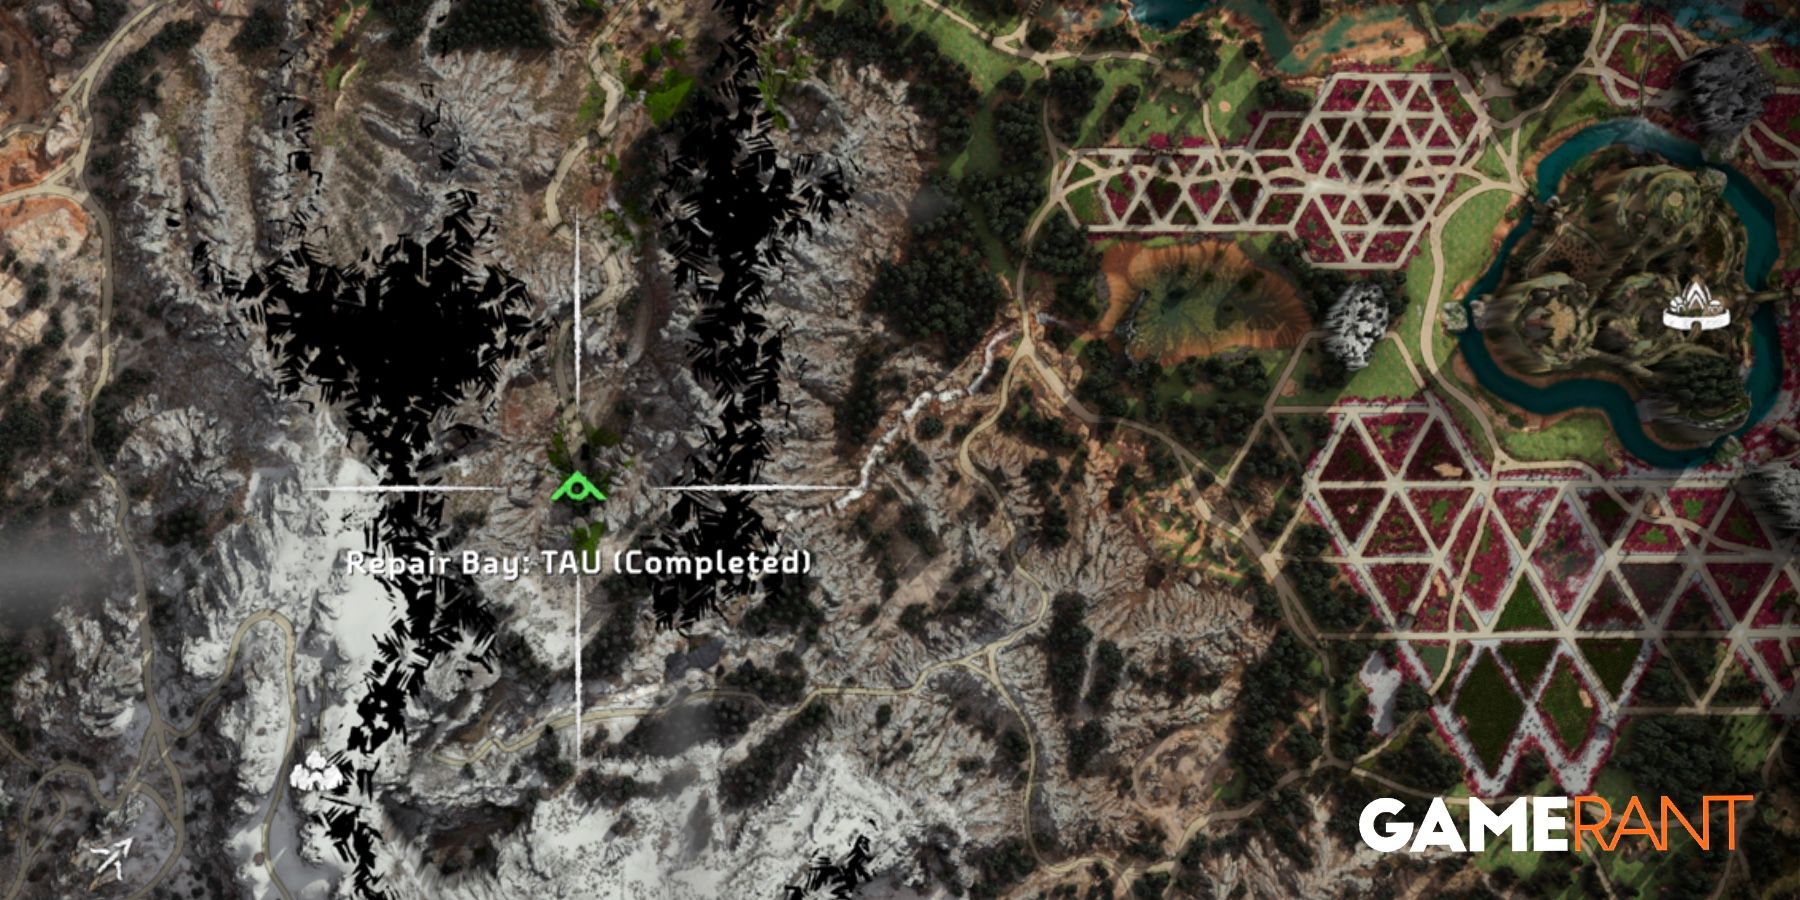
Repair Bay: TAU
Level 15
Overrides Bristleback, Plowhorn (partial), Grimhorn (partial)
Rewards 9000 XP + 2 skill points
This Cauldron main quest, ‘The Dying Lands,’ and cannot be missed. Completing this mission will grant players access to the Base, home of the all-important Fabrication Terminal, which players will need to use to obtain full override capability for certain machines after depositing specific machine parts.
After the player meets with Zo in Plainsong, she will lead Aloy to a location known to the Utaru tribe as The Sacred Cave, which turns out to be a Cauldron to the west of the settlement. The player must first override the door to gain access to the facility and navigate through the chambers.
Once inside, the player will be faced with two Leaplashers; a nimble transport class machine that hops around, making it difficult to hit. These machines are strong against shock damage but weak to purgewater, although it is possible that the player will not have access to this elemental ammunition yet.
Instead, players can focus their fire on weak points like the power cell, which will disable some of the machine’s heavier attacks when knocked off. Try to get scans with Aloy’s Focus in quickly as Leaplashers also have the ability to scramble the Focus.
When the Leaplashers have been successfully taken out, the player must now locate and override four Network Uplinks. To do this, players will need to traverse through the area by completing short platforming challenges and shooting at rotating columns to lock their path into place. Remember that the Focus also highlights climbing points that Aloy can use to scale surfaces or grab onto when jumping.
Overriding the fourth and final Network Uplink of this Cauldron will trigger the boss encounter; a new type of machine, the Grimhorn.
An altered version of the Plowhorn, Grimhorns are combat-type machines that deal plenty of fire damage, and the Focus will reveal that they are weak to acid. Players should deal as much acid damage as possible and keep the Grimhorn in a corroding state to continually deal damage and erode the machine’s tough armor.
Scanning with the Focus will also highlight the Grimhorn’s weak points, such as the cluster launchers that can even be used as a heavy weapon against it if the player can detach them.
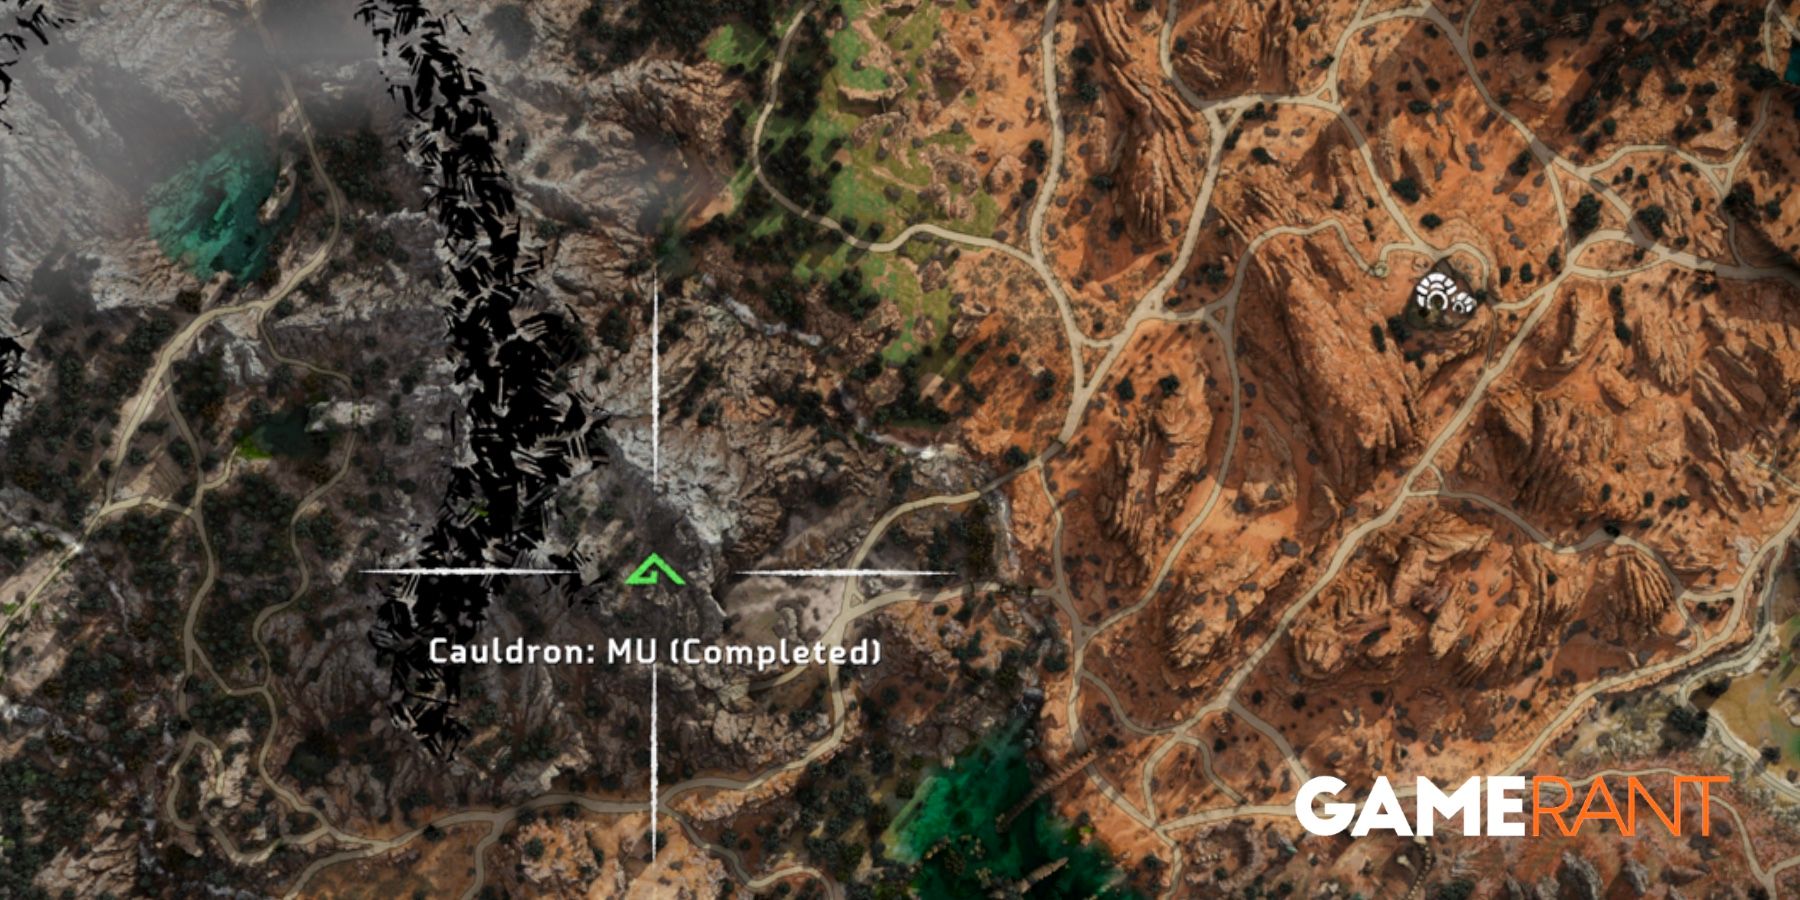
Cauldron MU
Level 18
Overrides Scrounger, Burrower, Grazer, Fanghorn (partial), Widemaw (partial), Scrapper (partial)
Rewards 8000 XP + 3 skill points
Located southwest of Stone’s Echo and directly south of Plainsong, the entrance of Cauldron MU is guarded by machines, specifically Leaplashers and Scroungers.
There are several patches of tall grass in the area, so players can choose to either take the stealthy approach and bypass or silently destroy the machines, or to go in guns (or arrows) blazing. After choosing their means of approach, the player will need to ride the cable down into the Cauldron proper once the entrance has been reached.
Inside will be a handful of machines, but most of these are small fry and can be taken out relatively quickly. At this point of the Cauldron, the machine to be on the lookout for is the Shell-Walker. This transport-type machine actively protects the cargo it carries on its back by creating an energy shield with one of its arms and shooting long-ranged shock attacks with the other.
They are strong against shock (unsurprisingly) and fire damage, while being weak to acid. The Shield Claw and Lightning Gun can be disabled by destroying these components.
Once the player progresses further, they will locate the Network Uplink that will need to be overridden to begin the final fight of the Cauldron. This time, the player will be fighting against a Widemaw… only there’s two to contend with.
Widemaws have truly earned their name as their mouths split into four segments when they open fully and use a vacuum to then shoot out projectiles at high speed to deal huge amounts of damage. They are also strong against almost every elemental type in the game, excluding purgewater. If the player has access to any weapons that use purgewater ammunition, then now is the time to use it. Another way to whittle down a Widemaw’s health is to use explosives such as the blast trap or the explosive spike thrower.
The key to this fight is preparation and taking advantage of the arena's size to better dodge and anticipate incoming attacks. Players should focus on one Widemaw at a time rather than splitting their attention between the two of them, as it becomes far too easy to be overwhelmed. Stay calm and try to disable their projectile attacks by detaching the vacuum turbine, so keeping a distance isn’t as hazardous.
Cauldron IOTA
Level 22
Overrides Leaplasher, Longleg, Lancehorn, Glinthawk, Clawstrider, Bellowback (partial), Snapmaw (partial), Rollerback (partial), Ravager (partial)
Rewards 7500 XP + 2 skill points
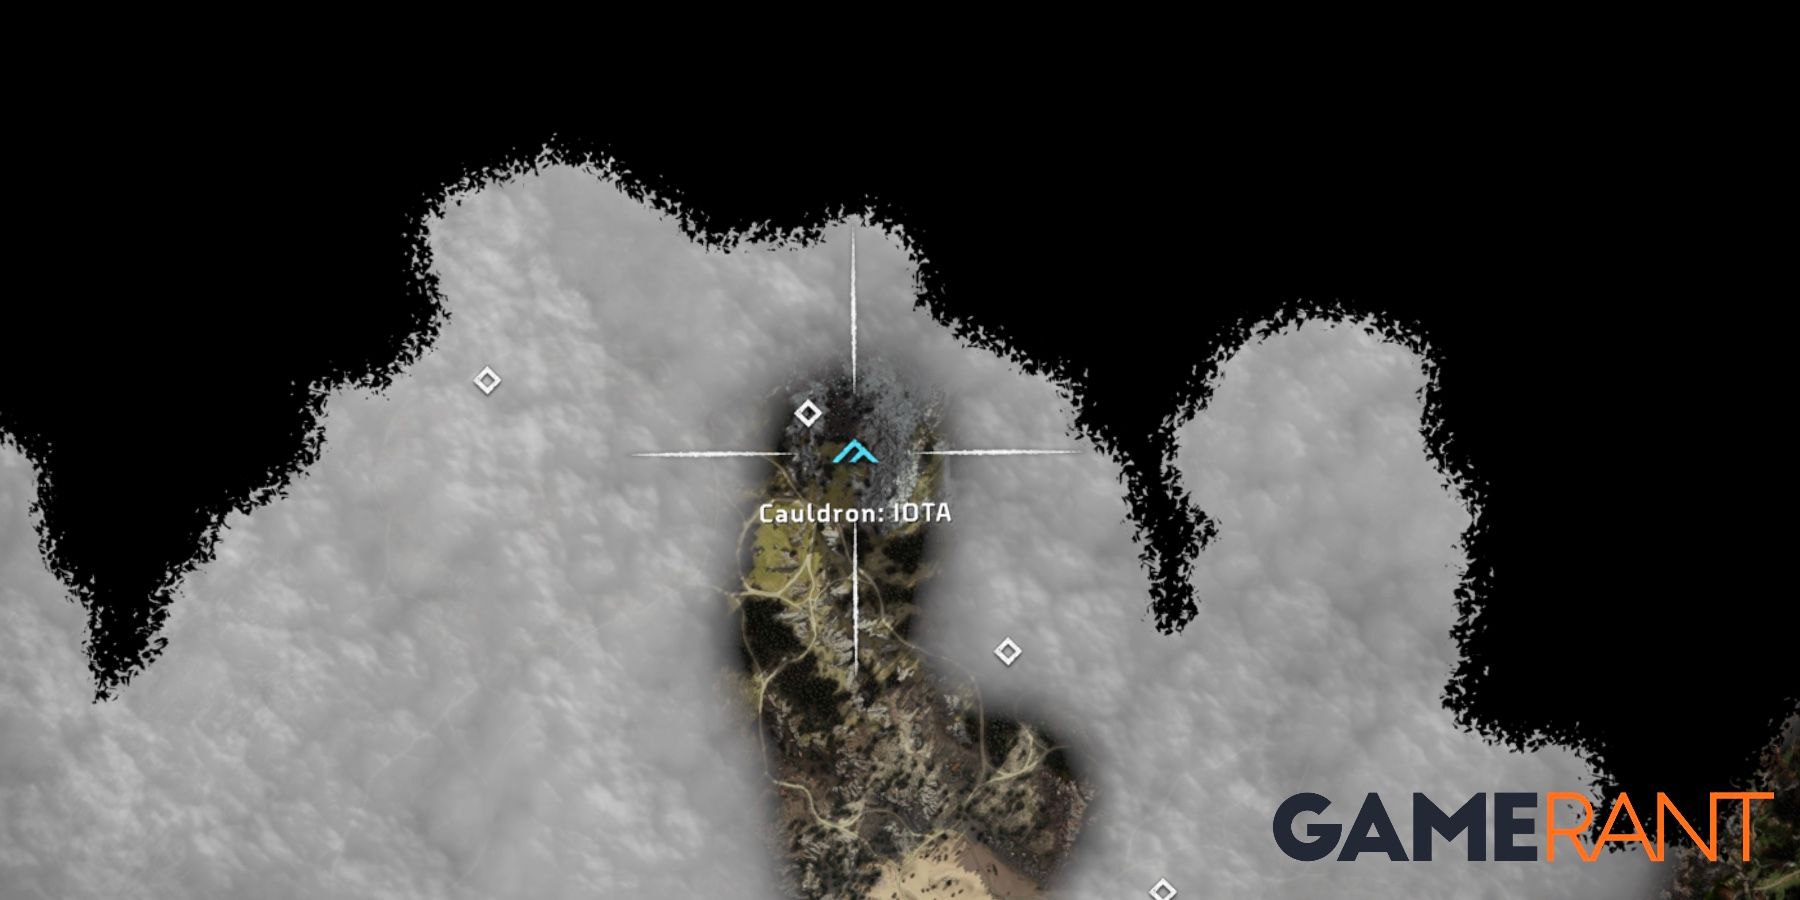
This next Cauldron is north of the Scalding Spear. Leaplashers are patrolling outside, but the entrance for this Cauldron on the ground appears to be sealed. Instead, players must locate another way in.
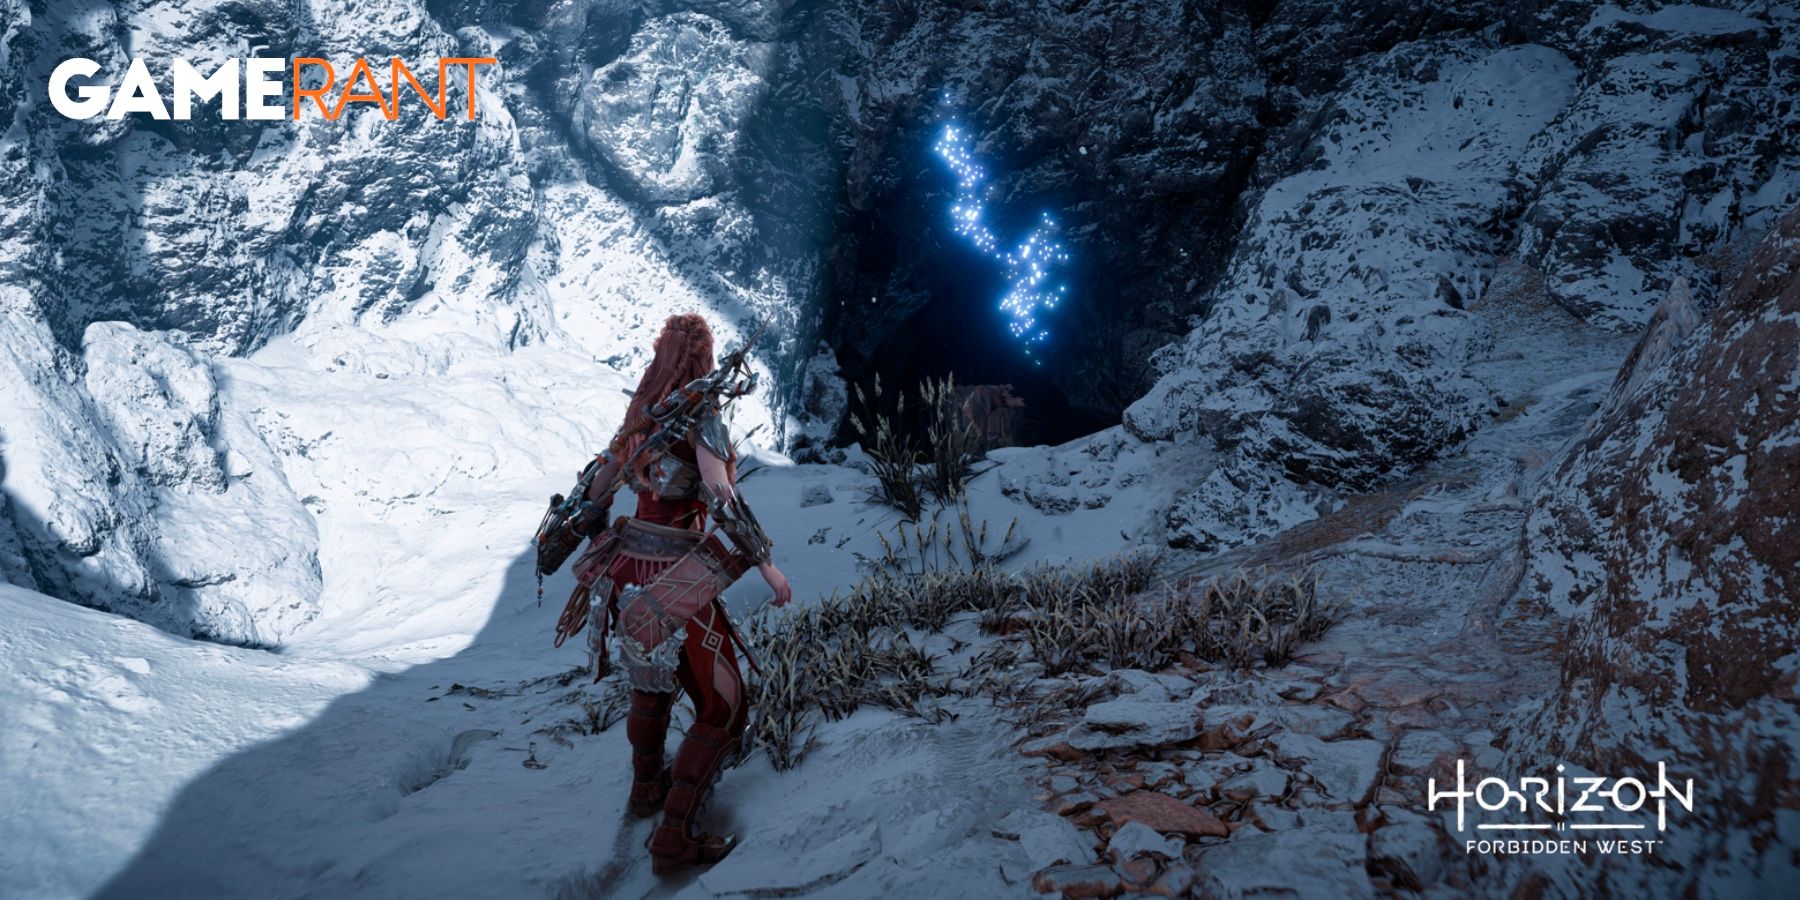
To the west of the blocked-off route, players will find a gorge where the true entrance to Cauldron IOTA is. Before reaching the entrance, the player will be promptly ambushed by two Tracker Burrowers that will spring out of the ground to attack. These reconnaissance machines are weak to fire, and although they are small, they can still stun the player by making a high-pitched sound.
Once inside, the player will find tougher machine variants than what have been encountered in previous Cauldrons. Aloy will eventually encounter Fire Canister Leaplashers, a Clawstrider, Apex Burrowers, Apex Scroungers, and a Spikesnout even before reaching the final combat challenge. There are environmental aids that the player can take advantage of to gain the upper hand during fights against these machines, such as damaging steam vents to give Aloy temporary cover or to get back into stealth.
When the player has successfully overcome the combat and traversal obstacles, they will arrive at the entrance to the Cauldron core. Before overriding the core, it’s advised to survey the arena and place any traps before the final boss encounter. In this case, the fight will be against a Rollerback, a transport type machine that uses a combination of devastating rolling attacks and has the ability to reattach its armor plates that have been removed during the course of battle.
Rollerbacks are weak against acid, so keeping them in a corroding state is ideal, and players can also focus fire on the Acid Canister on the underside of its tail. Maintaining distance is crucial against Rollerbacks as it’s the best way to predict their path when it launches into a roll or tail attack.
After the Rollerback has been defeated, players will quickly find that their time in Cauldron IOTA is not quite done yet. Unlike in previous Cauldrons, the core will reveal a gap beneath it that can be jumped down into, revealing a small room with a door that can be unlocked.
Through here, and after defeating the machines along the way, the player will discover the Salt Bite Tallneck and must free it from the debris that blocks its path to gain access to the map data it holds.
Completing this Tallneck will grant the player an additional 7500 XP and two skill points.
Cauldron CHI
Level 30
Overrides Frostclaw, Redeye Watcher, Shell-Walker, Clamberjaw, Behemoth, Stalker (partial), Shellsnapper (partial), Spikesnout (partial), Scorcher (partial), Fireclaw (partial)
Rewards 12500 XP + 3 skill points
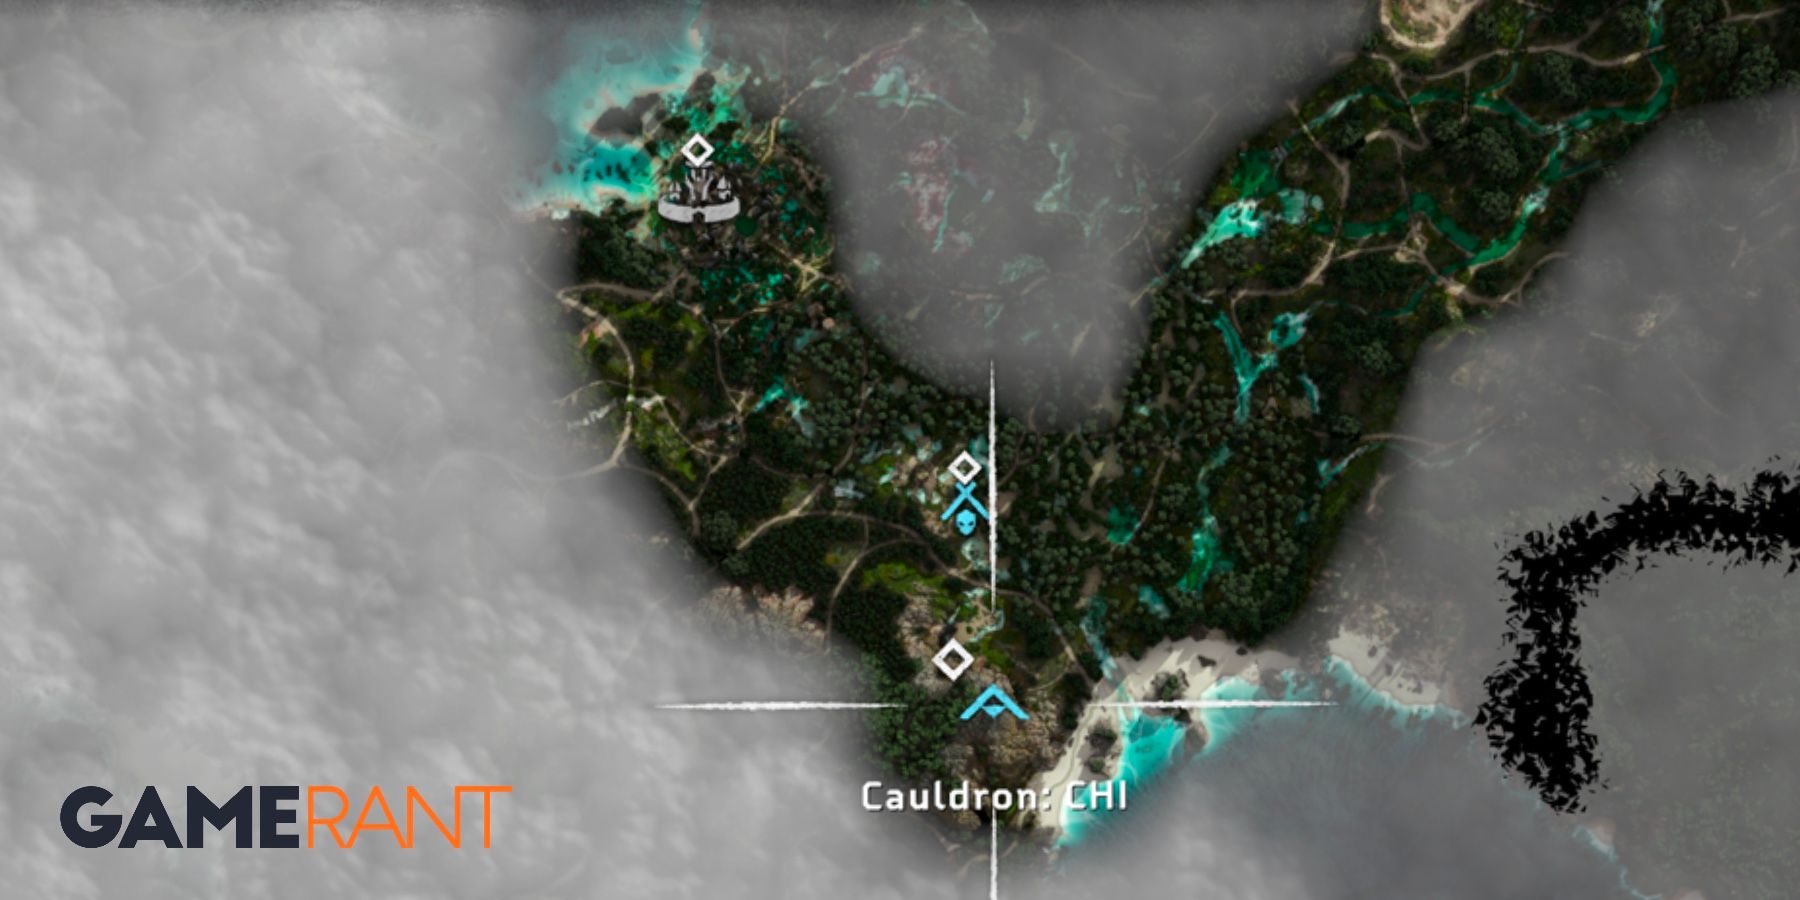
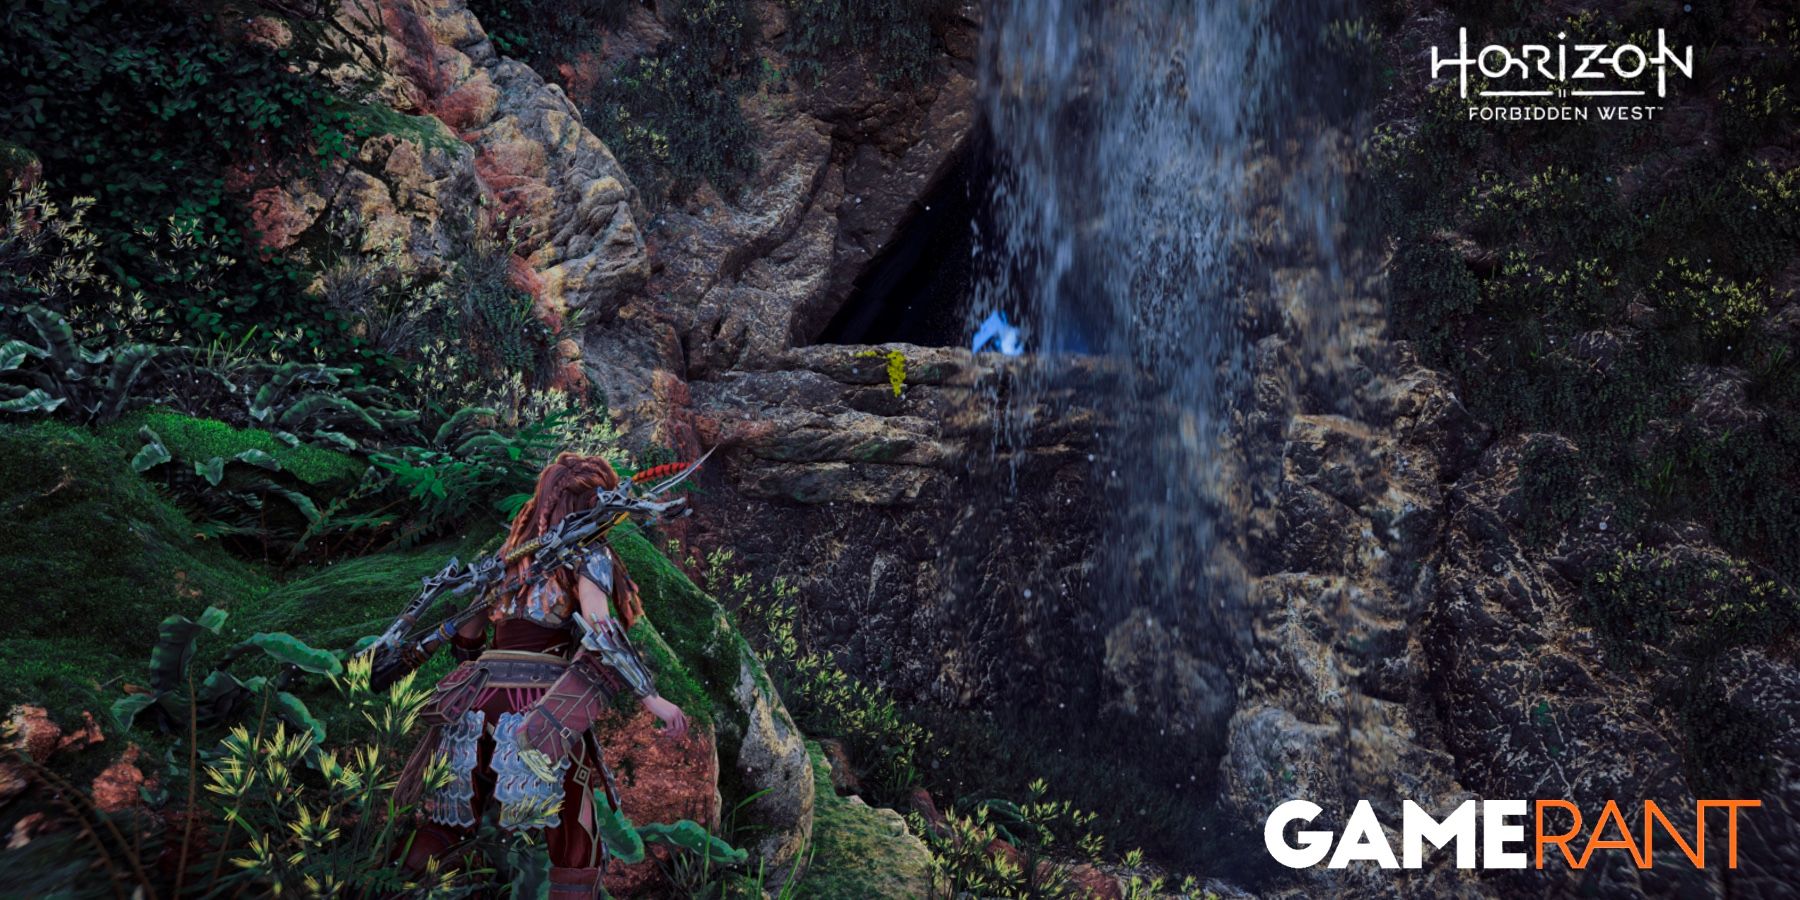
Similar to Cauldron IOTA, players will need to find another route into Cauldron CHI. The Cauldron itself is located southeast of Thornmarsh, but as vines block the entrance, an alternative door can be found to the right of the Cauldron.
Players should take caution when approaching this other entrance as two Redeye Watchers and a Stalker guard it. The latter’s Dart Gun can be devastating and surprisingly accurate at long range, so either avoid detection or try to take out the machines beforehand.
Players will need to rappel down a cable to enter the Cauldron once they find their way in, and there will be a glass panel that will need to be smashed to proceed further. In this next room, players will need to use the Pullcaster on four purple canisters located in the ceiling, but before this, they will be ambushed by three Scroungers.
After dispatching the machines, Aloy will comment on the fourth canister being too high to reach. Players will be able to find a crate that can be used to climb higher and reach the final canister before finally using the canisters as handholds to pull Aloy up onto another platform.
The next machine players will encounter is the Frostclaw, a tough and familiar machine to players that played the Frozen Wilds DLC in Zero Dawn. Frostclaws are strong against frost and shock damage, so the player’s best bet is to focus on using fire to deal as much damage as possible.
If players are looking to obtain the Sac Webbing that can only be found on Frostclaws, then avoid using explosives or damaging the central Chillwater Unit located on the Frostclaw’s chest.
After the Frostclaw has been dealt with and Aloy has lowered the floor to reach the core, players will soon realize that the core cannot be overridden due to a biofuel leak.
Use the Focus to highlight a trail of fuel that leads to a Regulator Component. The component is guarded by a Clamberjaw, which must be defeated in order to retrieve the part. Clamberjaws are agile acquisition type machines and are weak against purgewater damage. Players should try to target the Concussion Sack located around the machine’s neck to deal massive damage at the start of the encounter.
More Clamberjaws will appear once Aloy has retrieved the Regulator Component, and once these have been dealt with, players will now begin the final boss encounter with a Slitherfang. Focus fire on the Shock Orb as it can be detached from the Slitherfang and used as a heavy weapon against it, but be warned that this is not the easiest shot to pull off.
A guaranteed method of dealing damage is to use plasma damage, which is most effective when used to damage its Glowblast Canister. Frost and fire damage are also good options, so make sure to place plenty of traps and arrange your weapons accordingly.
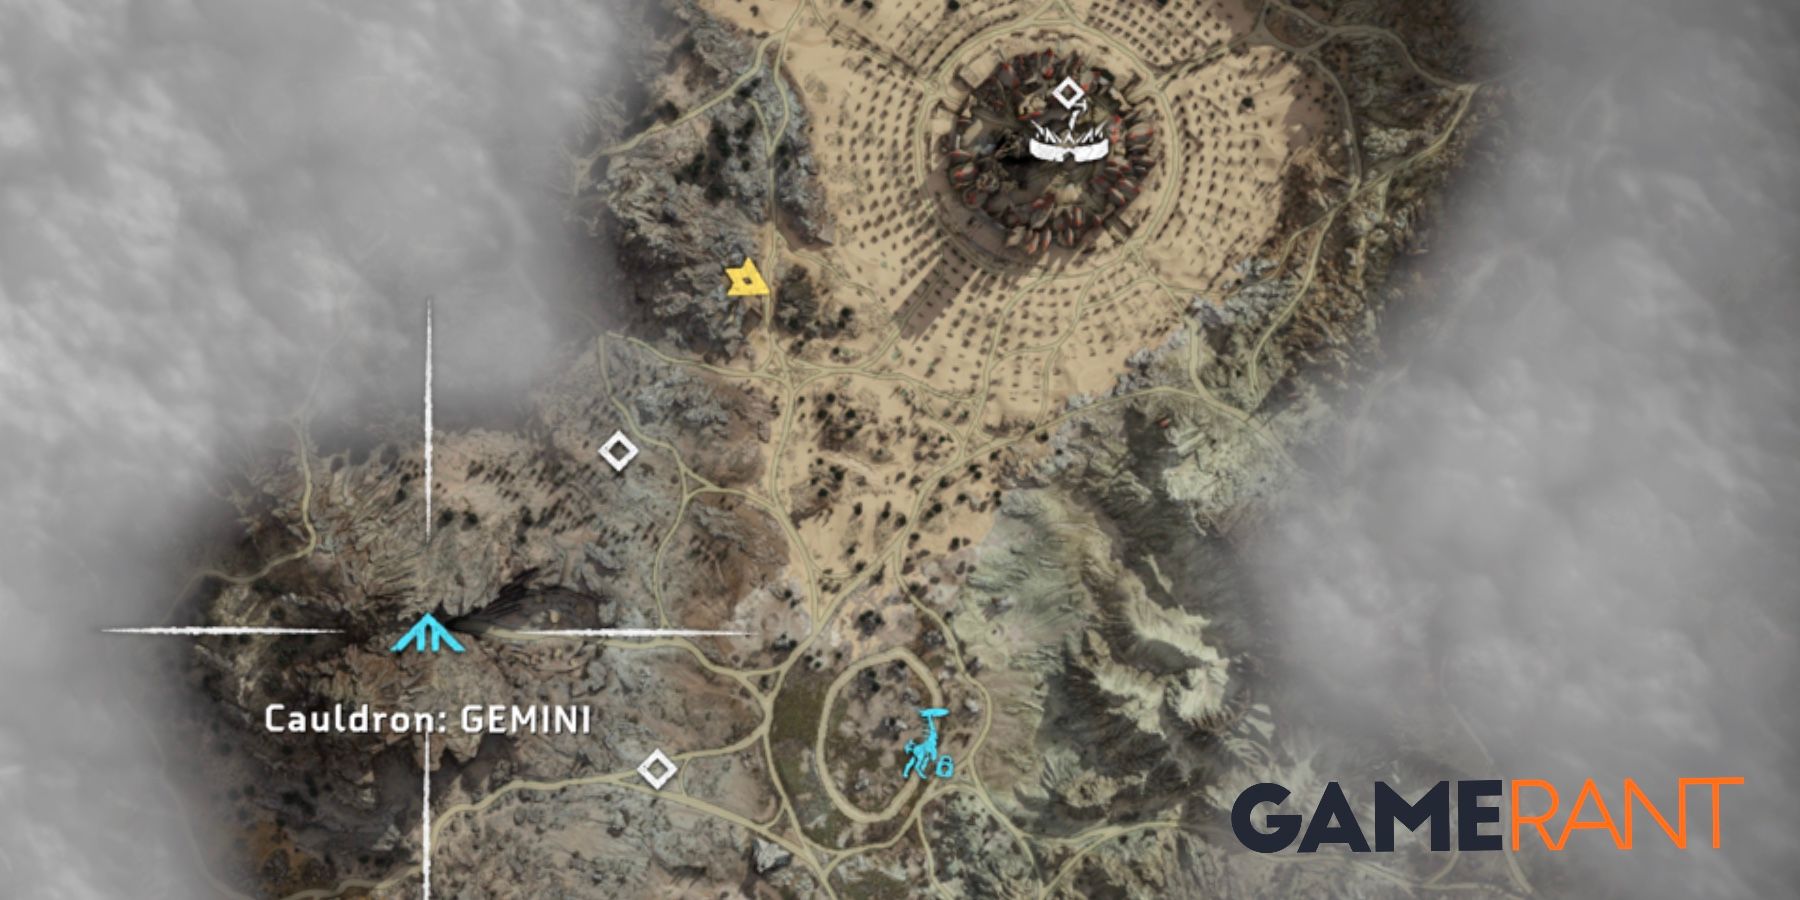
Cauldron GEMINI
Level 30
Overrides Sunwing
Rewards 15000 XP + 2 skill points
Located in the middle of Tenakth Clan lands and to the west of the Shining Wastes Tallneck, Cauldron GEMINI is the final Cauldron associated with the main quest, ‘GEMINI.' To trigger this quest, players must return to the Base when it becomes available.
Once inside the Cauldron, players will be faced with a Behemoth and Ravager. Behemoths are sturdy transport type machines that use an anti-gravity system to hurl large projectiles at Aloy. They are weak against fire and acid damage, and using acid ammo on its Acid Canister will cause an explosion.
If possible, try to get this component to explode near the Ravager as it is also weak against acid. Additionally, Ravagers have a detachable cannon on their backs that can be used as a heavy weapon. After defeating the machines, players need to use the Pullcaster to create pathways for Aloy to travel along to reach Network Uplinks and override them.
Next, a Fire Bellowback and Clawstrider will appear. Fire Bellowbacks are weak against frost, while Clawstriders have a weakness for shock. The Cargo Refining Sac on the Bellowback’s back and its Gullet will both explode after sustaining enough damage, but be careful when attempting this as it may also damage Aloy if the player is close enough to the machine.
Clawstriders can be slowed down significantly if the player is able to get them to run into shock traps and use critical strike to deal damage while they’re incapacitated.
Players will then need to return to the junction, but avoid the now electrocuted floor as they enter a room off to the left. Inside will be more machines; specifically Longlegs and Leaplashers, and upon killing them a Grimhorn will appear. After taking these machines down, players should override the next Network Uplink and prepare for the final confrontation with a Slaughterspine.
Slaughterspines are heavyweight combat machines that predominantly use plasma as their element of choice. They will often use charging and tail whip attacks against Aloy, and their stomp attack can knock players back while also dealing heavy damage. Slaughterspines also have an attack called Godzilla Beam, which has the potential to kill Aloy in one hit – players will need to avoid this attack at all cost.
Frost and purgewater are the most helpful in this fight, and getting the machine into a frozen state will slow it down significantly, allowing the player to get in some crucial hits.
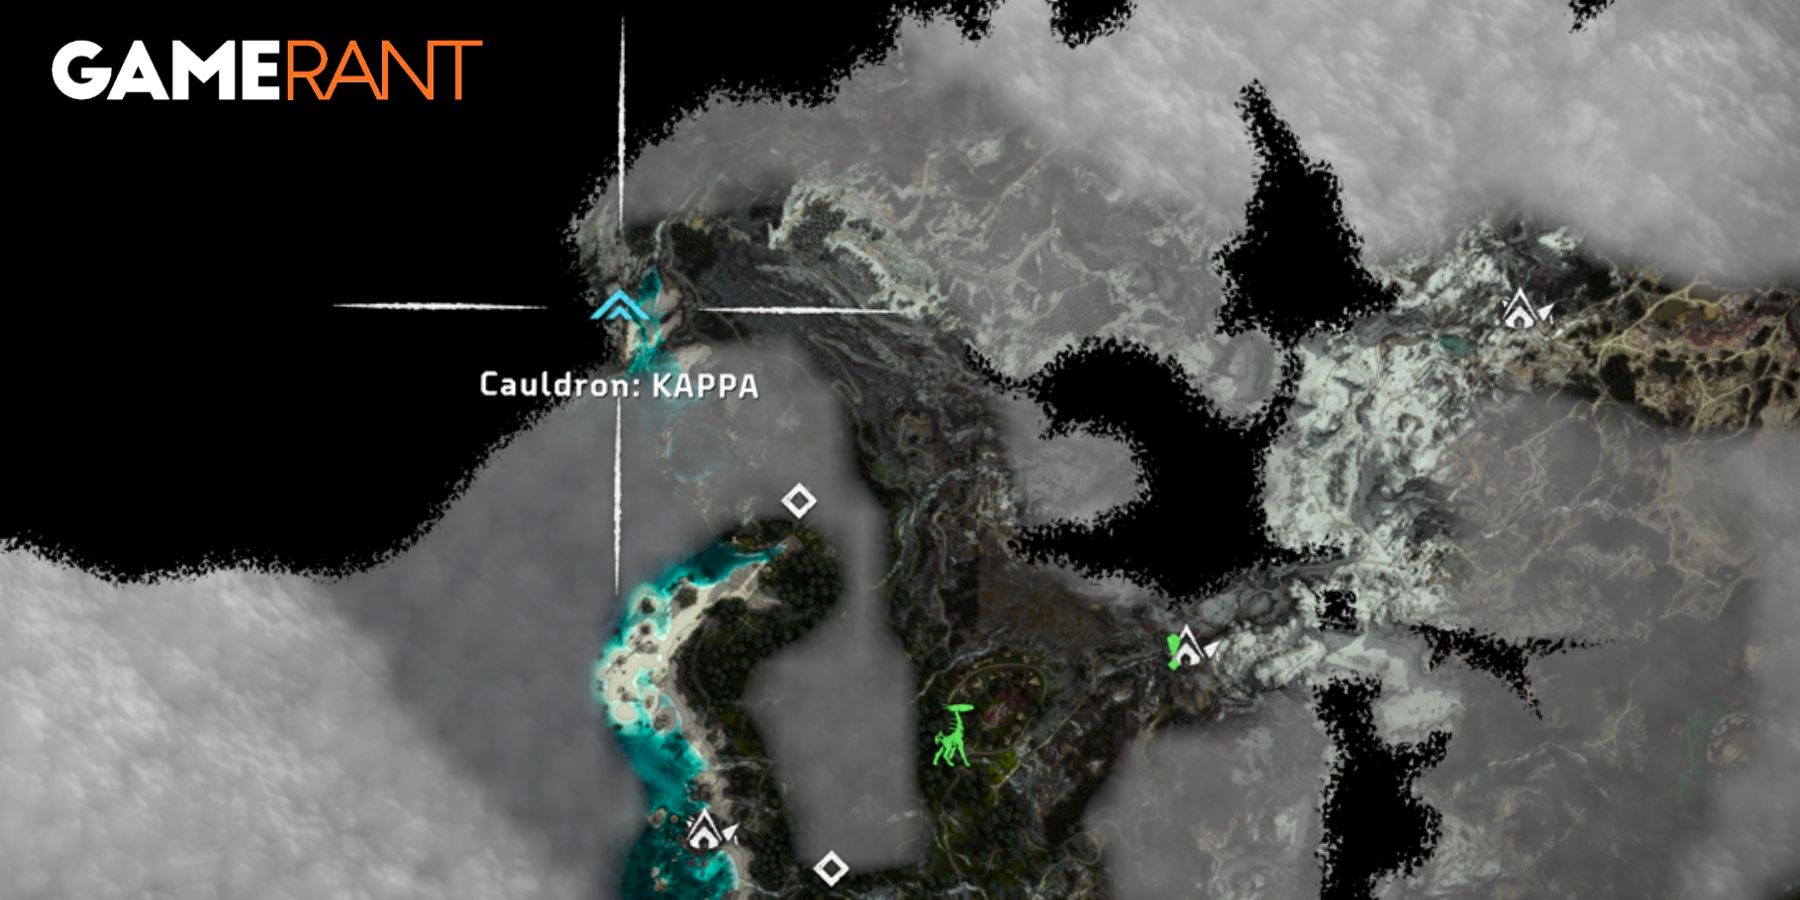
Cauldron KAPPA
Level 40
Overrides Rockbreaker, Tideripper, Tremortusk, Stormbird, Thunderjaw (partial), Slitherfang (partial), Dreadwing (partial), Slaughterspine (partial)
Rewards 12500 XP + 3 skill points
To the north of Tide’s Reach and northwest of Cliffwatch, Cauldron KAPPA is the toughest amongst the Cauldrons in the game. To enter, players will need to have completed the quest ‘The Sea of Sands’ to obtain a special piece of Horizon Forbidden West gear.
Directly outside the underwater entrance to this Cauldron will be a patrolling Shellsnapper. The player can decide whether they want to fight or avoid the machine, but for players that want a bit of a challenge, note that Shellsnappers are weak to fire and acid, and although they are resistant to frost, their Frost Cannons can be detached and used as a heavy weapon too.
Once the player proceeds past the Shellsnapper, a Snapmaw will be there to greet them in the water. The majority of this area is flooded, so it is best to avoid fighting the Snapmaw in its element.
Underwater will be an opening being circled by several fish that leads even further down to an override point that Aloy can use to gain access to the Cauldron. Once inside, players will be met with a Cauldron that is partially submerged.
Players can use the water as a means to avoid detection from machines, but there are also some underwater as well, so choosing a safe route is key. Machines here will include Snapmaws, Spikesnouts, Apex Burrowers, Scroungers, and Shell-Walkers.
Players will then need to raise and lower the water level accordingly to continue progressing through Cauldron KAPPA. This can be achieved by using the Pullcaster to move crates around for climbing and reaching doorways. Once this has been completed, players will trigger a final battle with a Tideripper after overriding another node.
Weak to frost and shock, Tiderippers are hardy acquisition type machines with heavy hitting attacks such as a Purgewater Beam and its metal tail. Although its heart is listed as a weak point when exposed, players should note that this is a difficult shot to land reliably.
Instead, focus on detaching or destroying parts (depending on if harvesting specific components is a priority) to reduce the Tideripper’s moveset. The Chillwater Canister will cause an explosion when hit with enough frost damage and will inflict the frozen status effect, making them brittle for a short time and susceptible to damage. Overcoming this trial will grant players access to the final set of machine overrides available to Aloy.
And that’s it. Completing this final section marks the end of the Cauldrons that can be found in the Forbidden West and will award players with the All Cores Overidden trophy. Players can be proud knowing that they saw, they fought, and they conquered.
Horizon Forbidden West is available on PlayStation 4 and PlayStation 5.

