Quick Links
Horizon Forbidden West: Burning Shores features a brand-new selection of machines for Aloy to interact with during her time in the ruins of Southern California. Expanding on the already impressive additions Forbidden West brought to the Horizon franchise, Horizon Forbidden West: Burning Shores includes both new enemies to engage, and new friends to override. Whether it be in the air, on land, or under the sea, Burning Shores will offer Aloy something new around every corner.
Unfortunately for Aloy, many of these new machines cannot be overridden when first encountered. Just as it was in Forbidden West, Aloy will first need to explore the appropriate cauldron before she can unlock the override upgrade. In the case of the expansion, Cauldron THETA is the first step toward unlocking overrides for Burning Shores' new machines. This guide will take players through the entire process.
How to Find and Enter Cauldron THETA in Horizon Forbidden West: Burning Shores
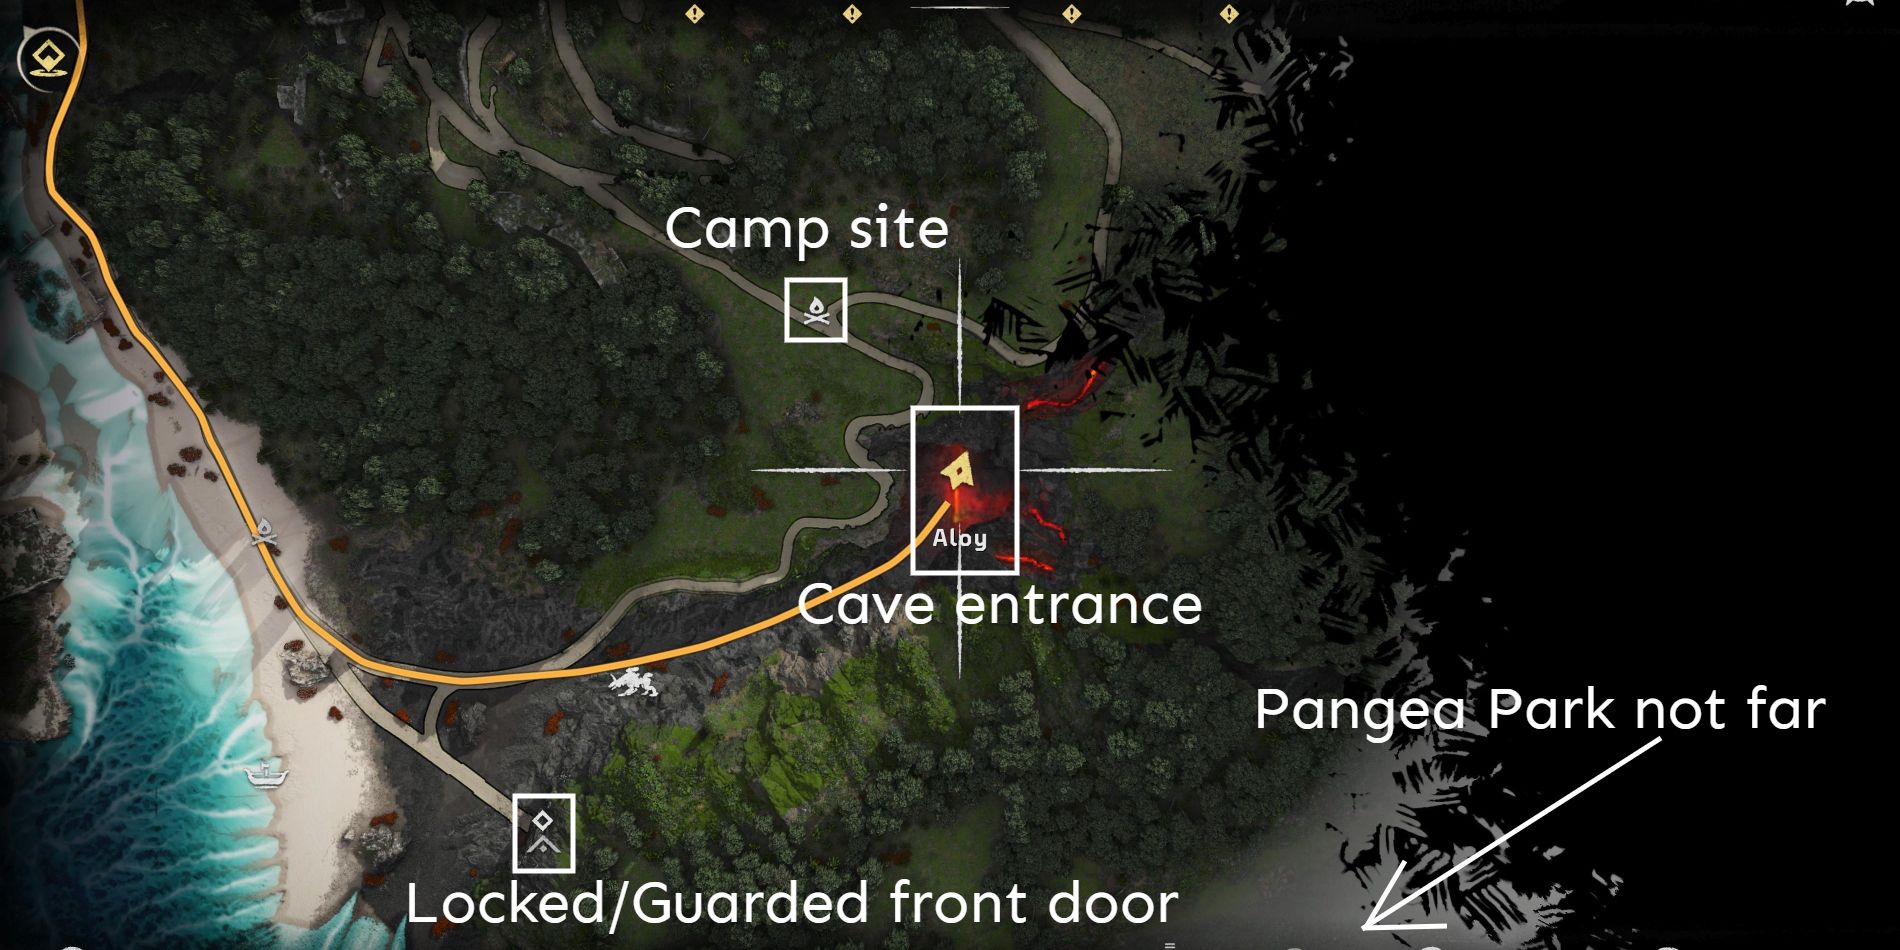
The marker for Cauldron THETA is found on the eastern edge of the Burning Shores map, just north of Pangea Park. However, the marker is not where Aloy must go to enter the cauldron. The actual entrance is found slightly northeast of the marker, down in a massive volcanic pit. Do not bother going to the entrance at the symbol as it is locked.
There is a campfire Aloy can unlock northwest of the massive pit. Simply fly close to the ground and the campfire will become available for fast travel. Aloy can also access the pit by jumping from her flying mount, but it is not necessary.
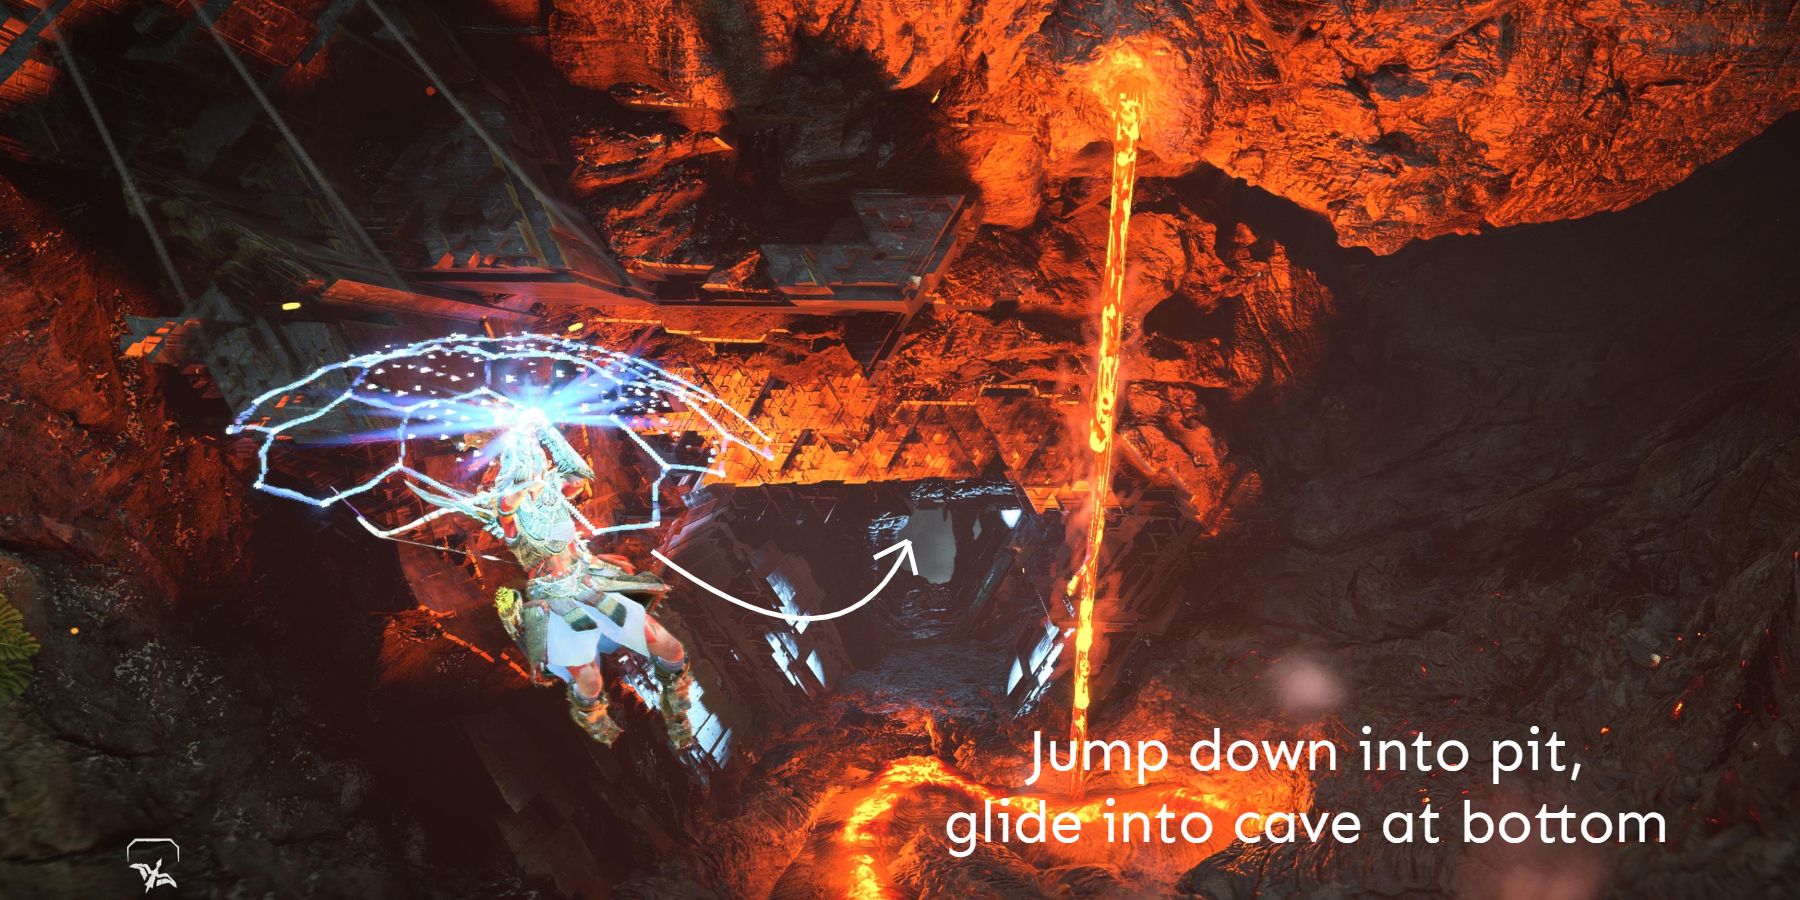
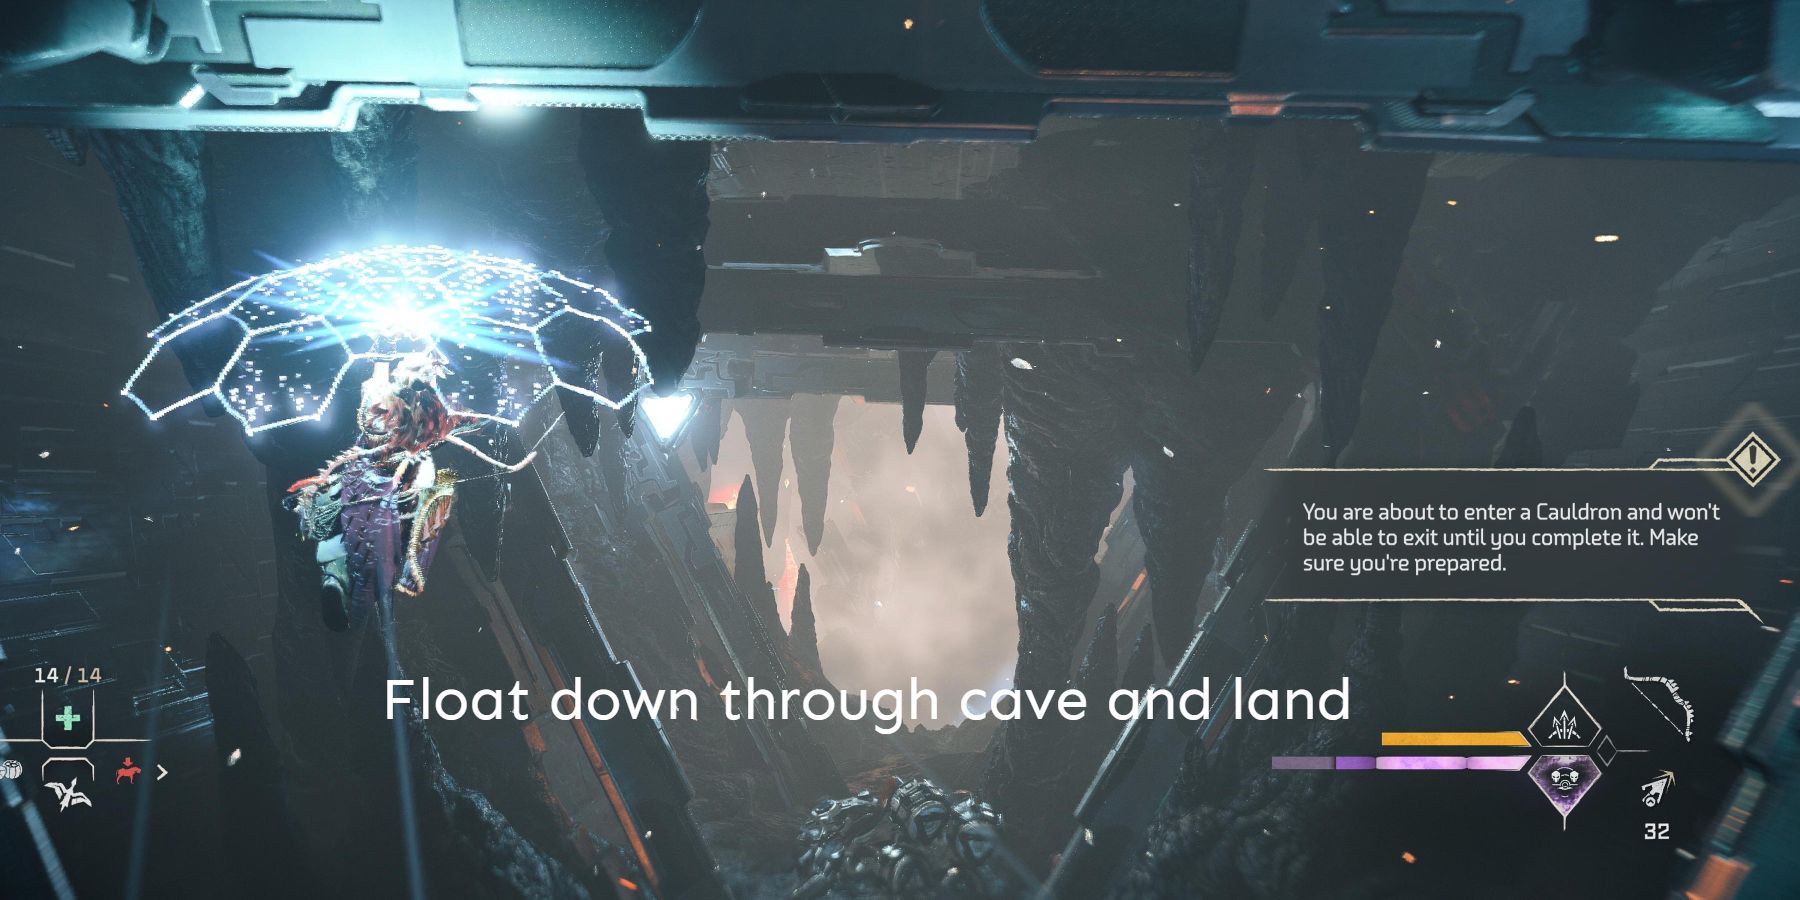
From the air or from the campsite, glide down into the pit using Aloy's Shieldwing Glider. Do not stop gliding until Aloy clears the entire entrance tunnel. This will be clear in the game, as the chamber opens up, revealing an obvious 'starting point.'
How to Find Cauldron THETA's Core in Burning Shores
Once Aloy lands in the first chamber, she will be immediately tasked with locating the cauldron's core. In that opening chamber, Aloy will comment on the high number of Stingspawn eggs. Luckily for her, these eggs appear to be just for show. If Aloy heads west from the landing area, she'll find a small gap she can glide across. Head down this path to find a moderate supply stockpile.
Walkthrough - Area 1:
Head back to the starting area and through the door surrounded by the eggs. Aloy will notice an automated machine that drops a chillwater canister onto the volcanic rock, creating a plume of steam that Aloy can use to glide up. Aloy can shoot the canister and get it to drop wherever she likes. If she happens to miss the ledge, she can simply try again from the bottom.


If Aloy looks across the gap not far down from where she crosses, she'll see another moderate supply stockpile and a yellow climbing hold that she can grab. Aloy can simply glide back to move ahead.
Walkthrough - Area 2:
Continuing through the door, Aloy will come to the next area, which is the first room to have aggressive machines. There will be several Stingspawn, as well as two Apex Leaplashers, and several Apex Redeye Watchers. With the weapons Aloy should possess at this point in the story, these enemies should pose no real threat.
The same basic principles from Area 1 apply here as well. Aloy must shoot the chillwater canisters and glide to the high ledges. This time, the ground is not entirely volcanic, so check where the canister will land before shooting.
Aloy can reach three nodes that will create bridges to the center platform when overridden. On the eastern platform, Aloy will also find a crate that she must drag up the three bridges, leading to a pressure plate on the final level. Be careful while dragging the crate along the bridges, as more Apex Leaplashers will show up.
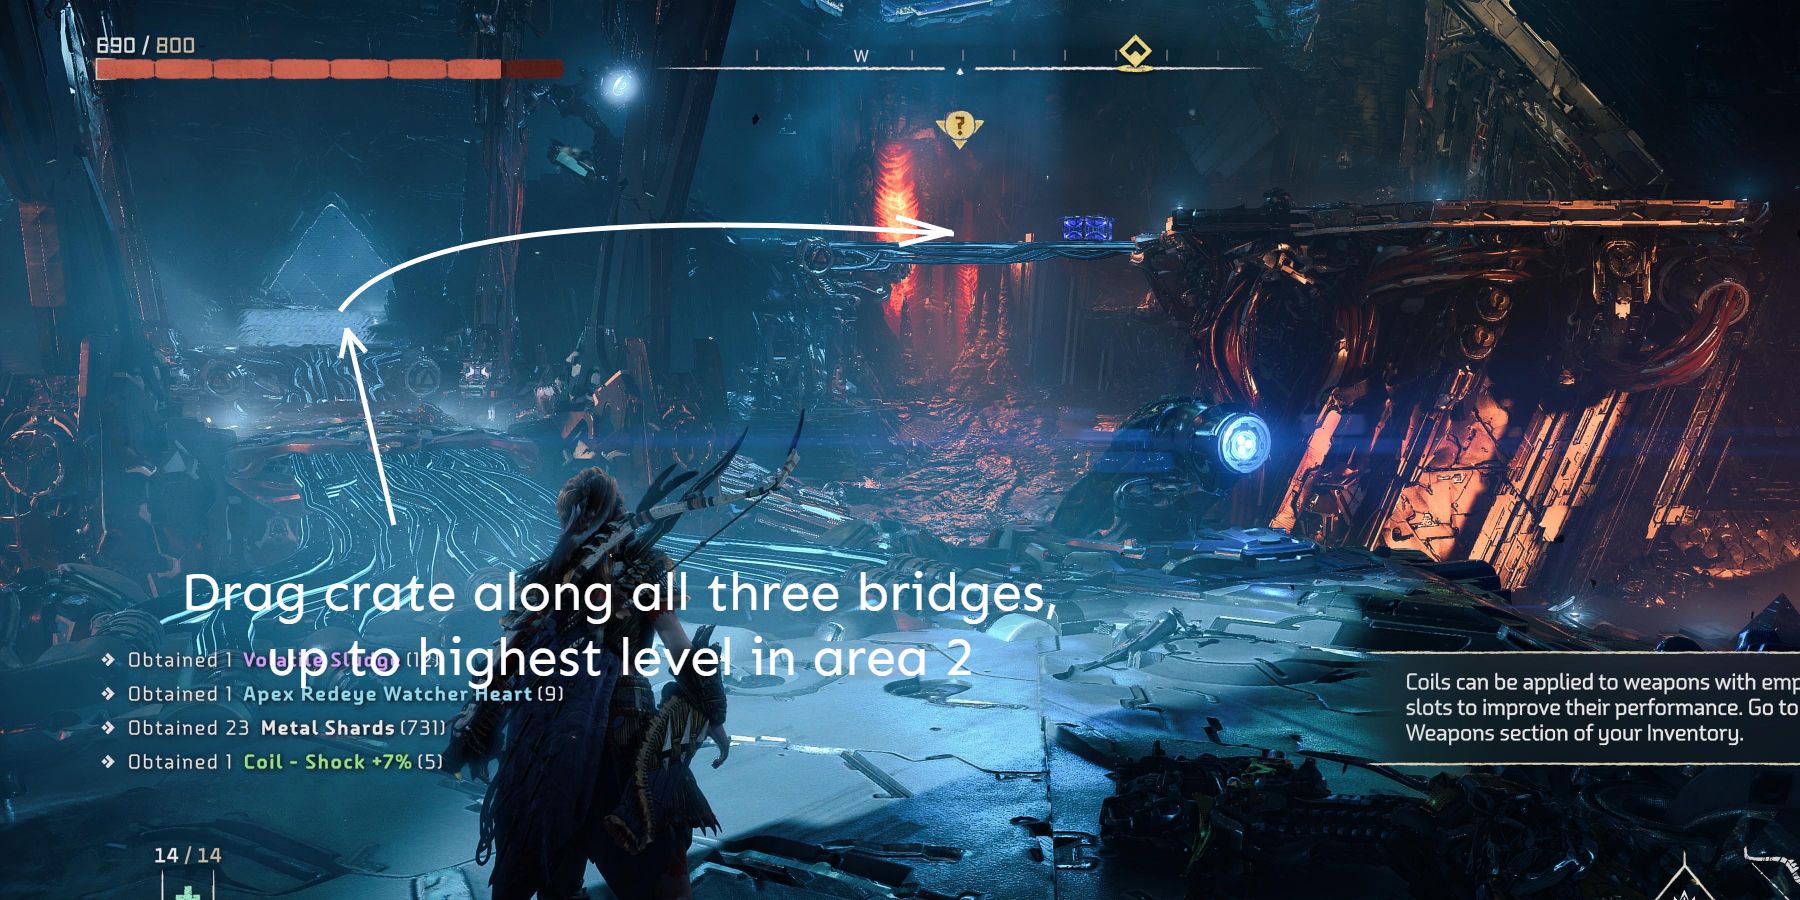
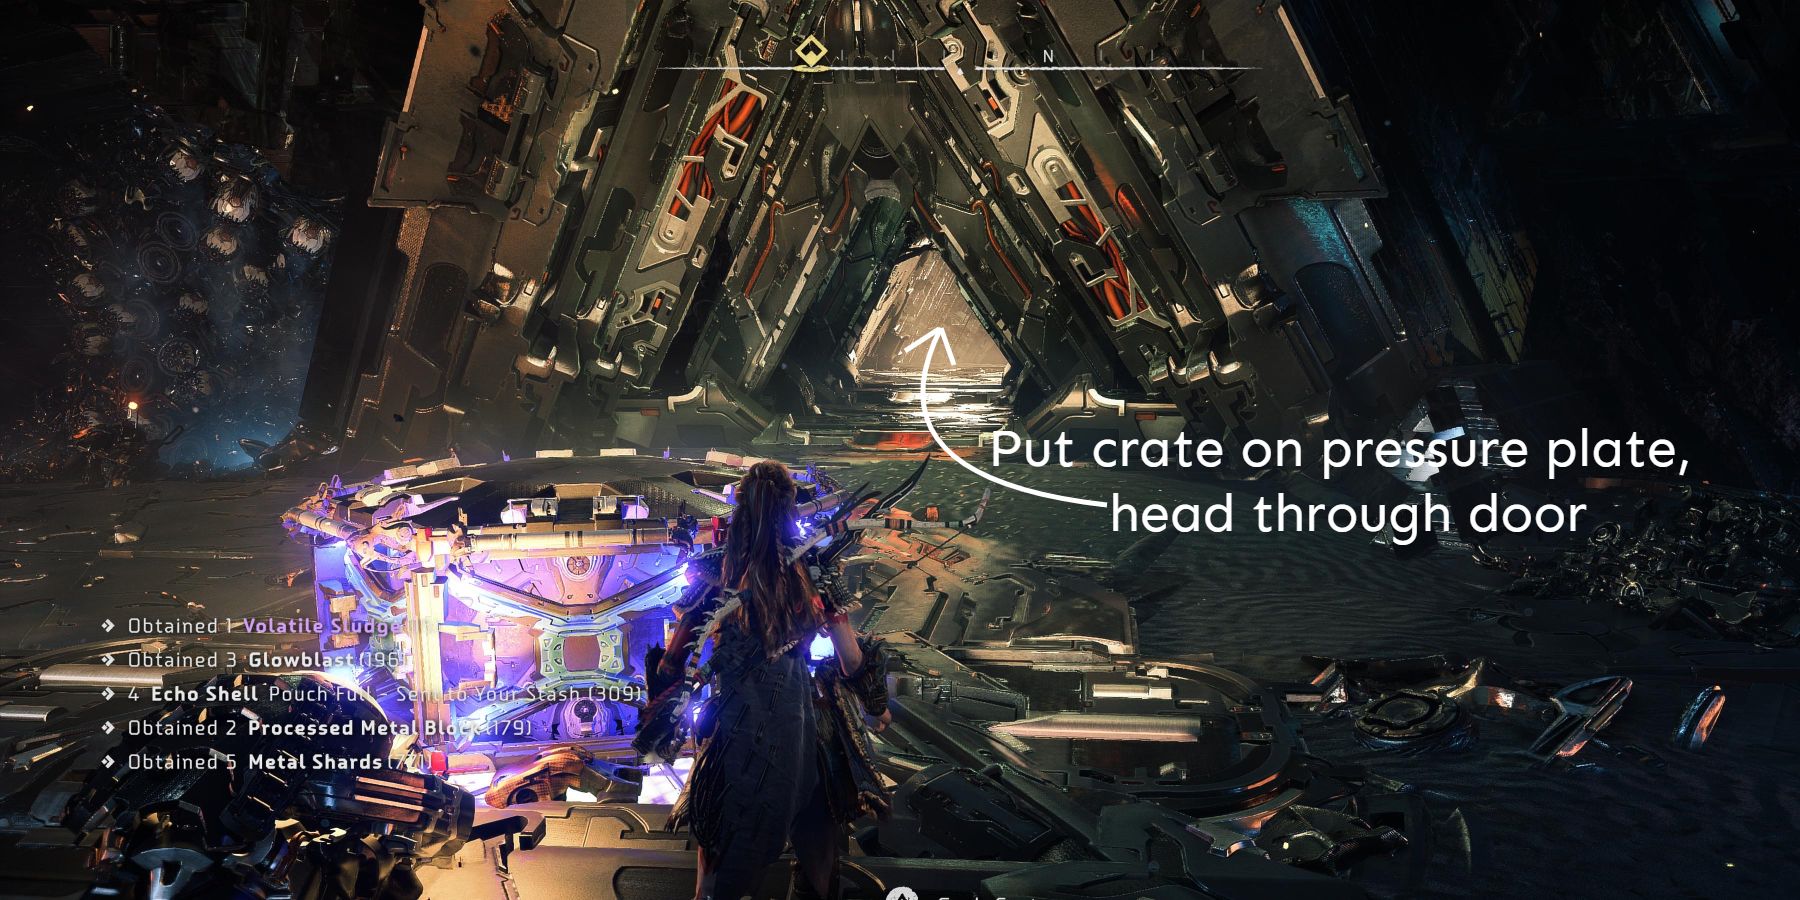
When Aloy places the crate on the pressure plate, a small door will open directly behind the plate, up on the same level. Before leaving, Aloy can check several scrap piles for materials. Once complete, head through the small triangle chamber until a small gap is found. Aloy will see a Bilegut jump across down to the right. There is also a grapple point straight ahead that leads to another stockpile. Head down to the right to move on.
At the end of the path, Aloy will find a large piece of scrap with a lit cable going down. Use the cable like a zipline to reach the bottom.
Walkthrough - Area 3:
When Aloy dismounts from the zipline she'll find herself in a chamber filled with volcanic rock and lava. Grapple onto the floating platform that sits not far ahead from where she lands. Notice that the top of the platform has several plates that allow Aloy to steer. The platform will move in the direction of the plate Aloy steps on.

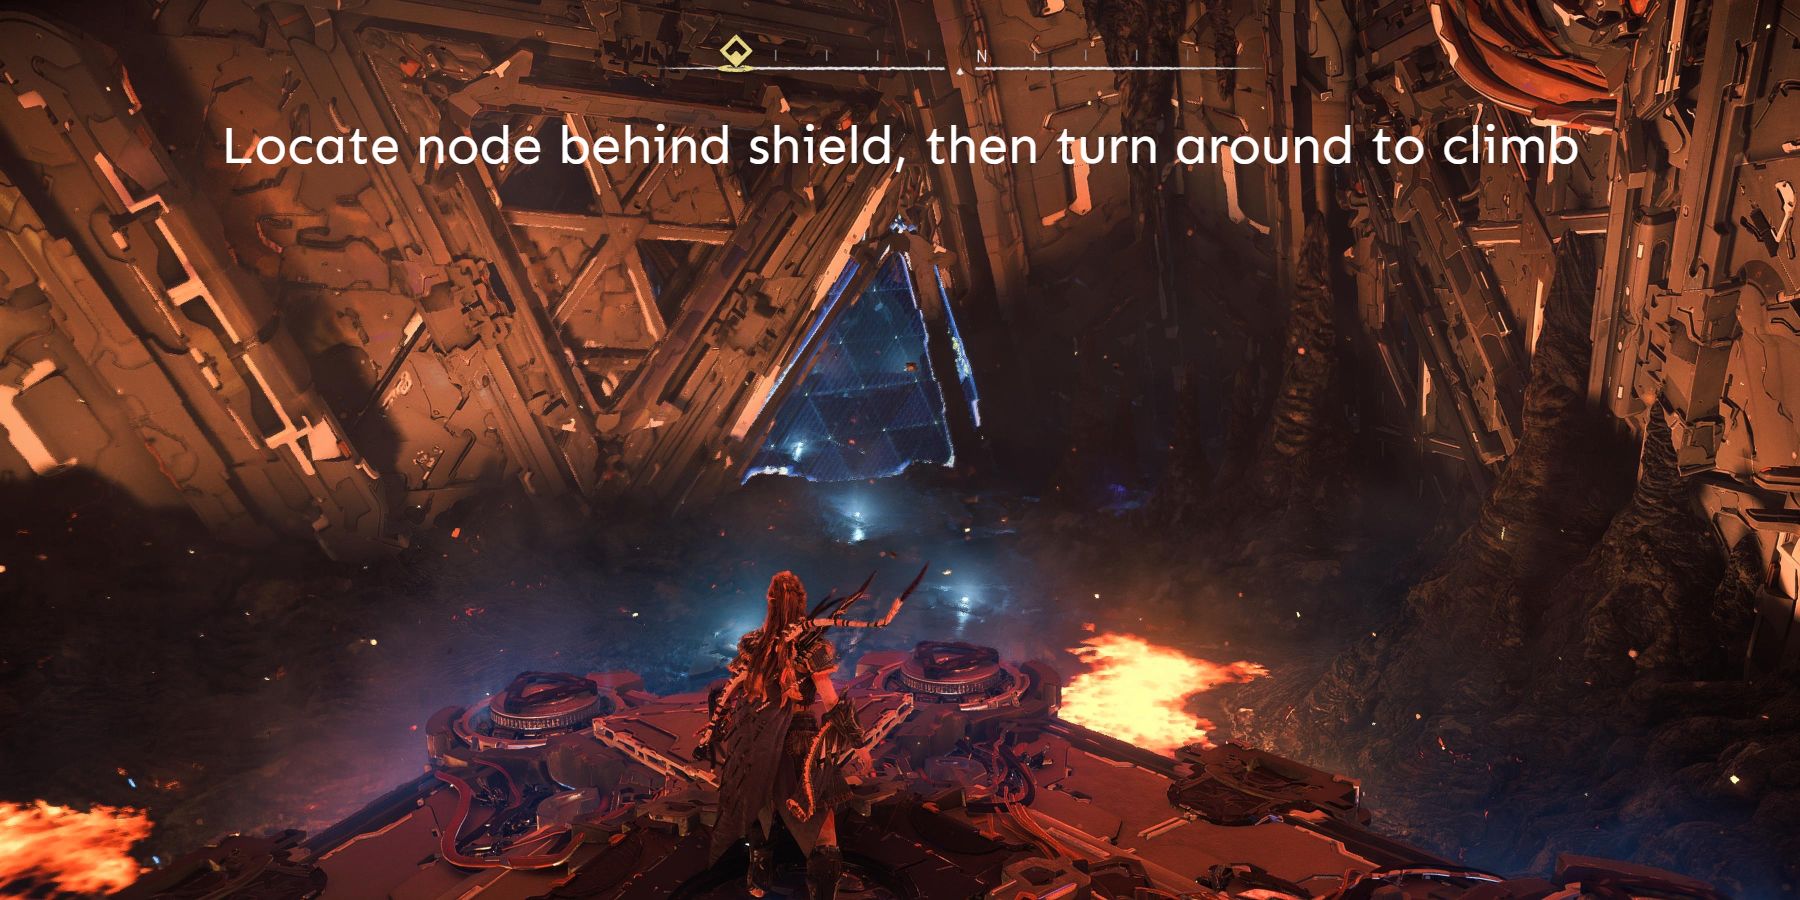
Down at the far end of the chamber, Aloy will notice another node behind a large triangle shield. She can't access it from the ground, so she must continue to search the chamber for the path that leads around the shield.
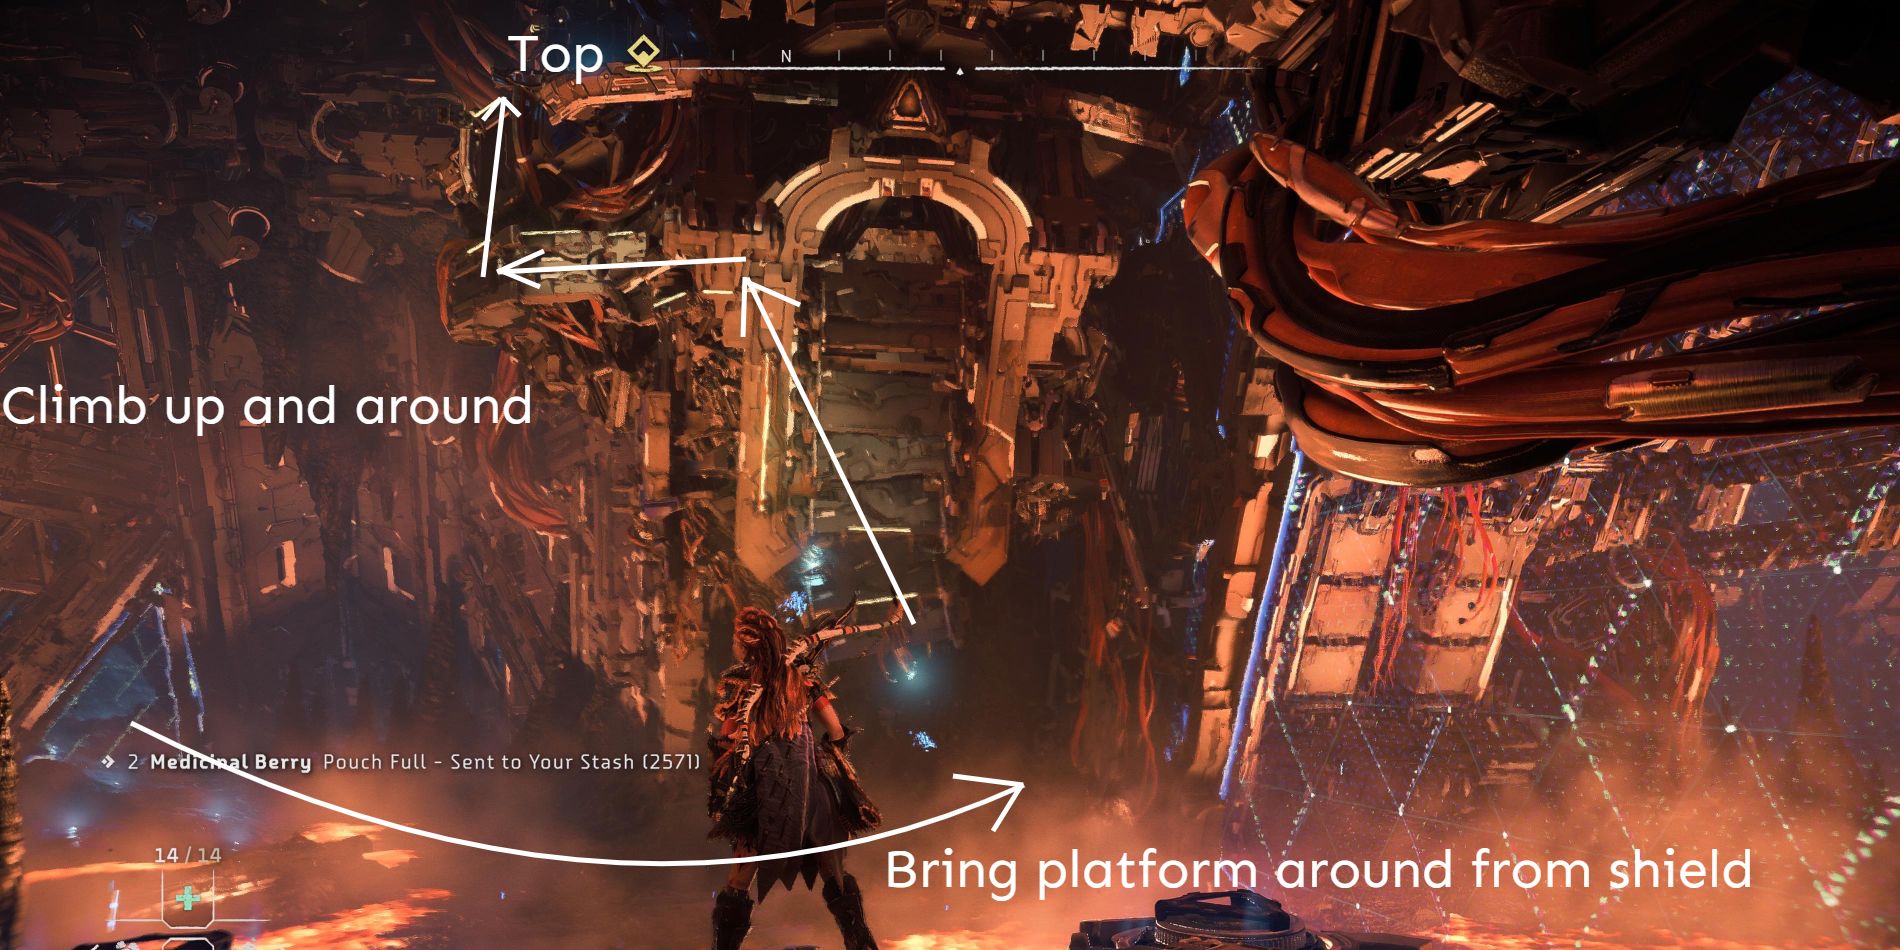

From the corner with the shield, Aloy can see a ledge much higher up in the chamber, which clearly has climbing holds when scanned with the Focus. If she searches the area at its base, she'll find more holds that she can climb. There are other areas in the chamber that lead to supplies, but this is the correct path to move toward the core.
Use the broken vent to climb up to the high ledge, then look for the yellow knobs and continue climbing up. From the very top, Aloy will see another floating platform that she can hitch a ride on. It moves quickly, so make sure to get on, run across, and make the jump to the next platform in a hurry. Head through the next triangle opening.

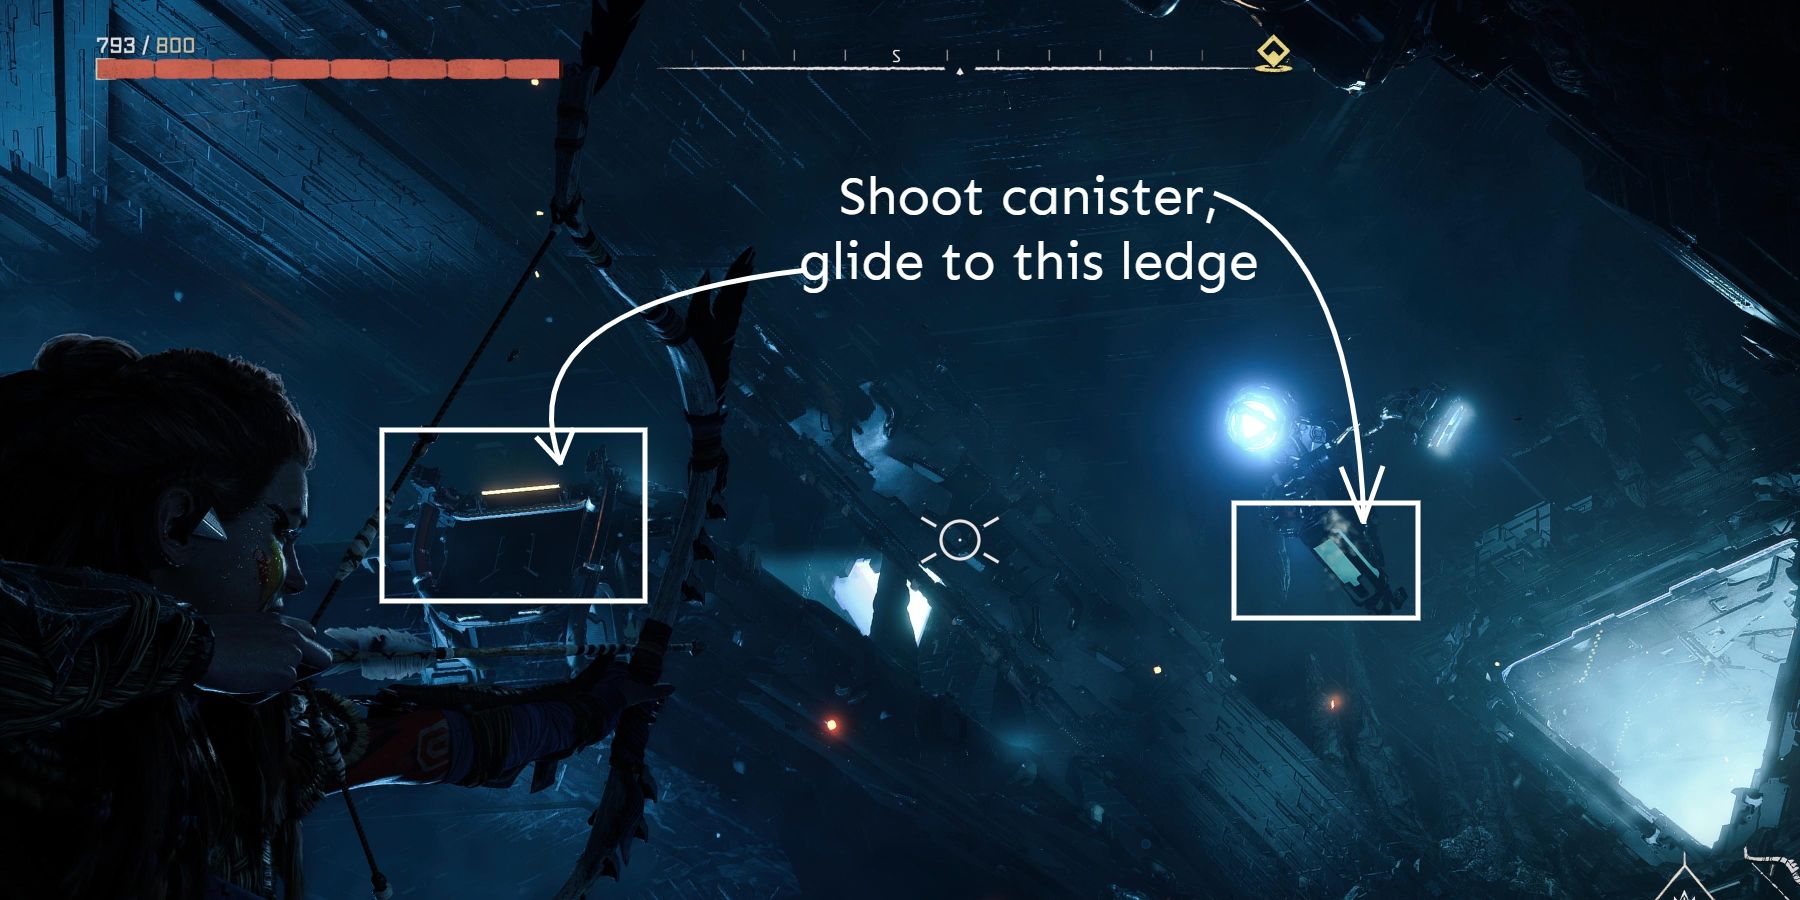
The triangle door will lead to a room that appears to be all hot, volcanic ground. Sure enough, another chillwater drone pops in. Looking up, there is a ledge that looks out of reach, but the steam will send Aloy higher in this room. Once on the first ledge, look across the gap to see a grapple point. Head across and then override the door to continue.
The next chamber will be filled with Stingspawn eggs, but only a small amount will activate at first. There is another small triangle corridor near the chamber entrance that leads to a stockpile. Head in the opposite direction down the path to continue towards the node.
Stay along the left wall until arriving at a small triangle door with a red node. As Aloy gets closer to this door, more and more eggs will begin to hatch. Look for any signs of sparks or electricity, as Aloy can take them out before the eggs fully open. Override and head through the door.
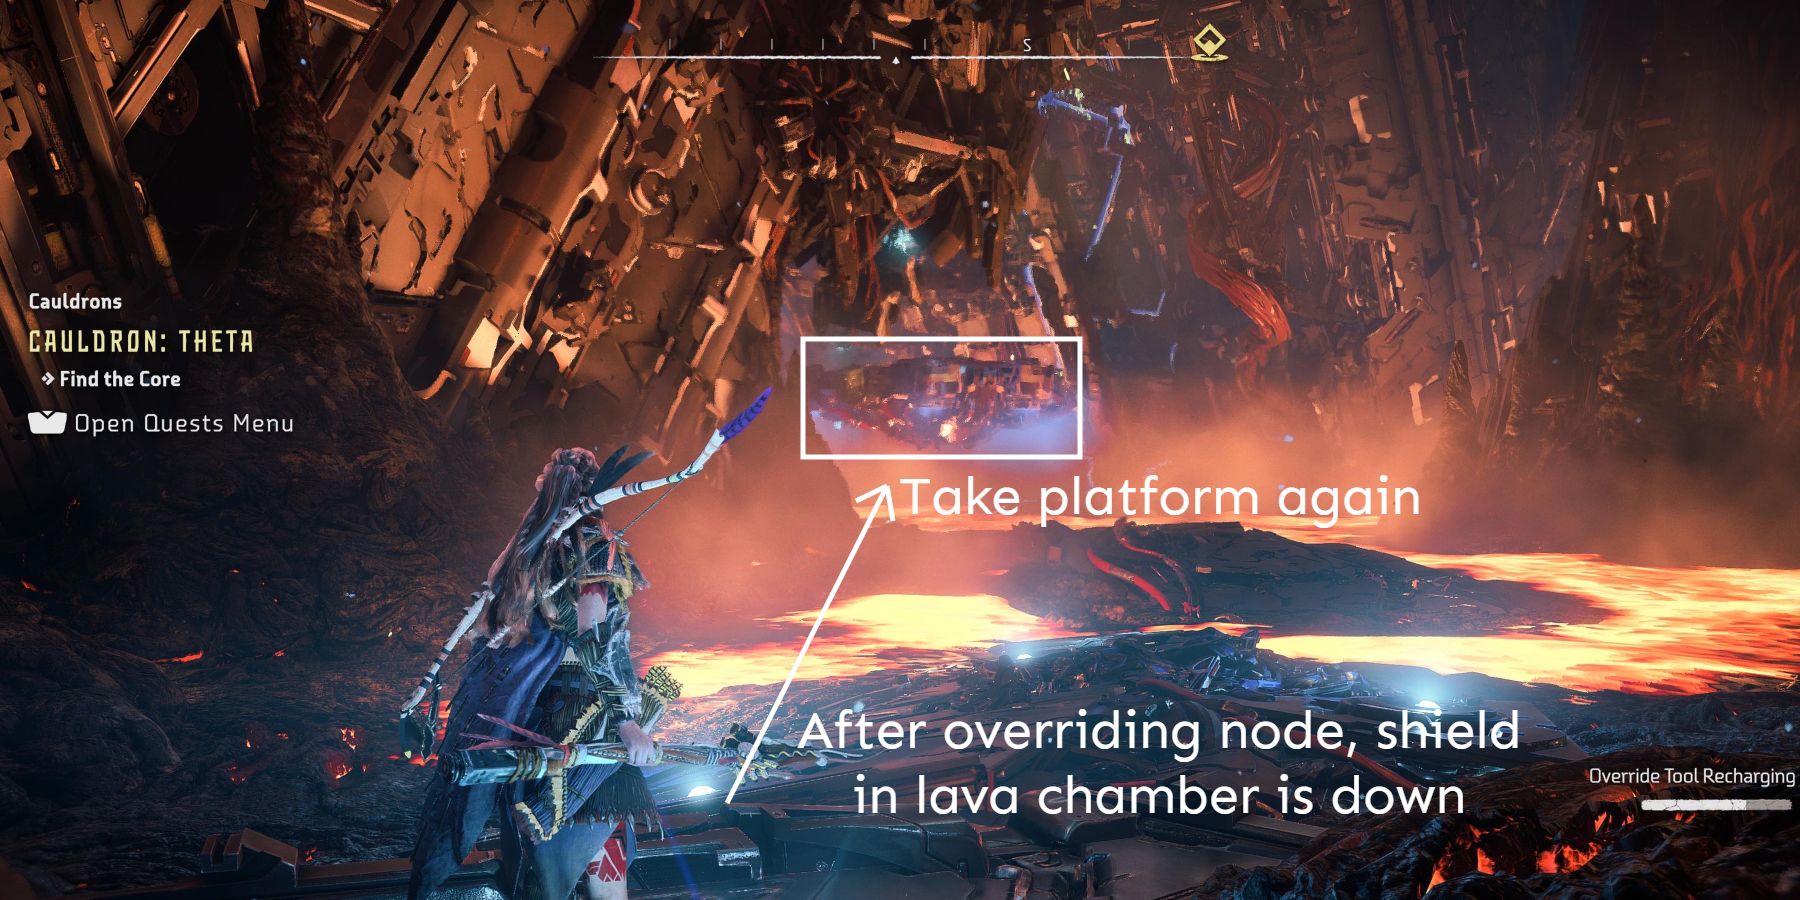
Keep moving along the path until Aloy reaches a rappel point. When at the bottom, head to the edge and look down, the node will be visible at the bottom. Jump down and override it to take the shield down.
Walkthrough - Head for the Core:
With the shield down in the large, lava-filled chamber, Aloy can head through the previously closed-off section. Grapple back to the floating platform and continue down the lava path. The end of the path will be blocked by a crashed platform, Aloy must continue on foot.
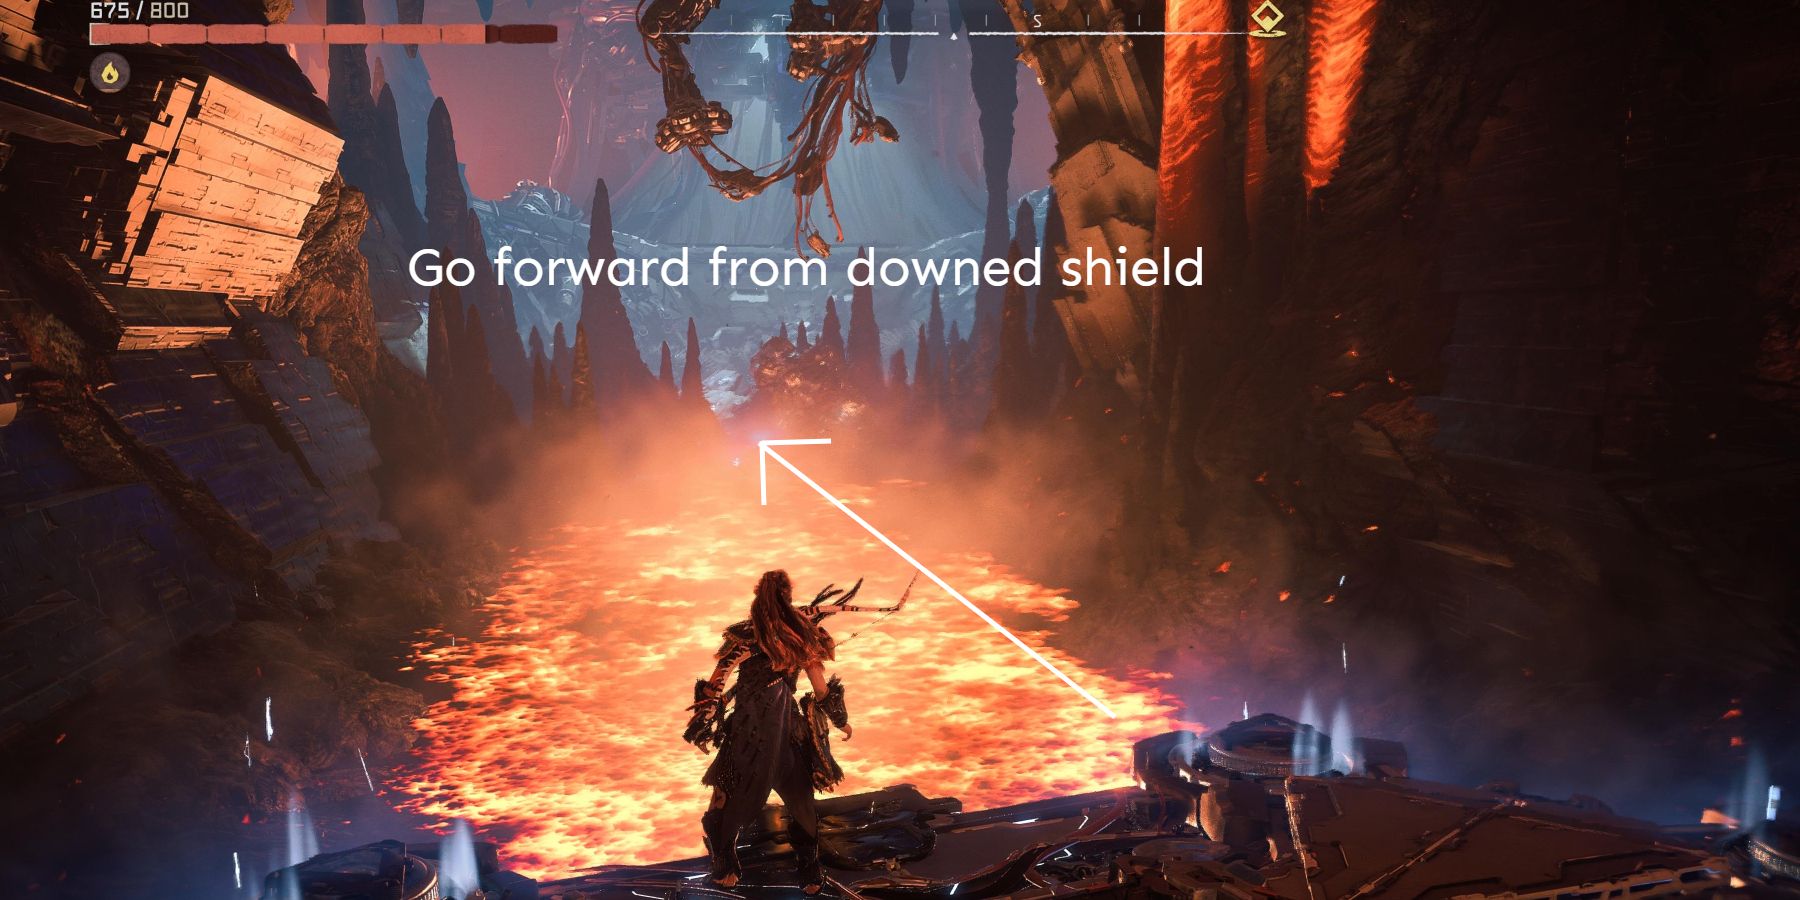

Head past the craft and to the edge of the massive chamber. Across the chasm is a large, upside-down triangle opening. Aloy can glide into it to continue on toward the core.
Defeat the Apex Bilegut and Interact with the Core
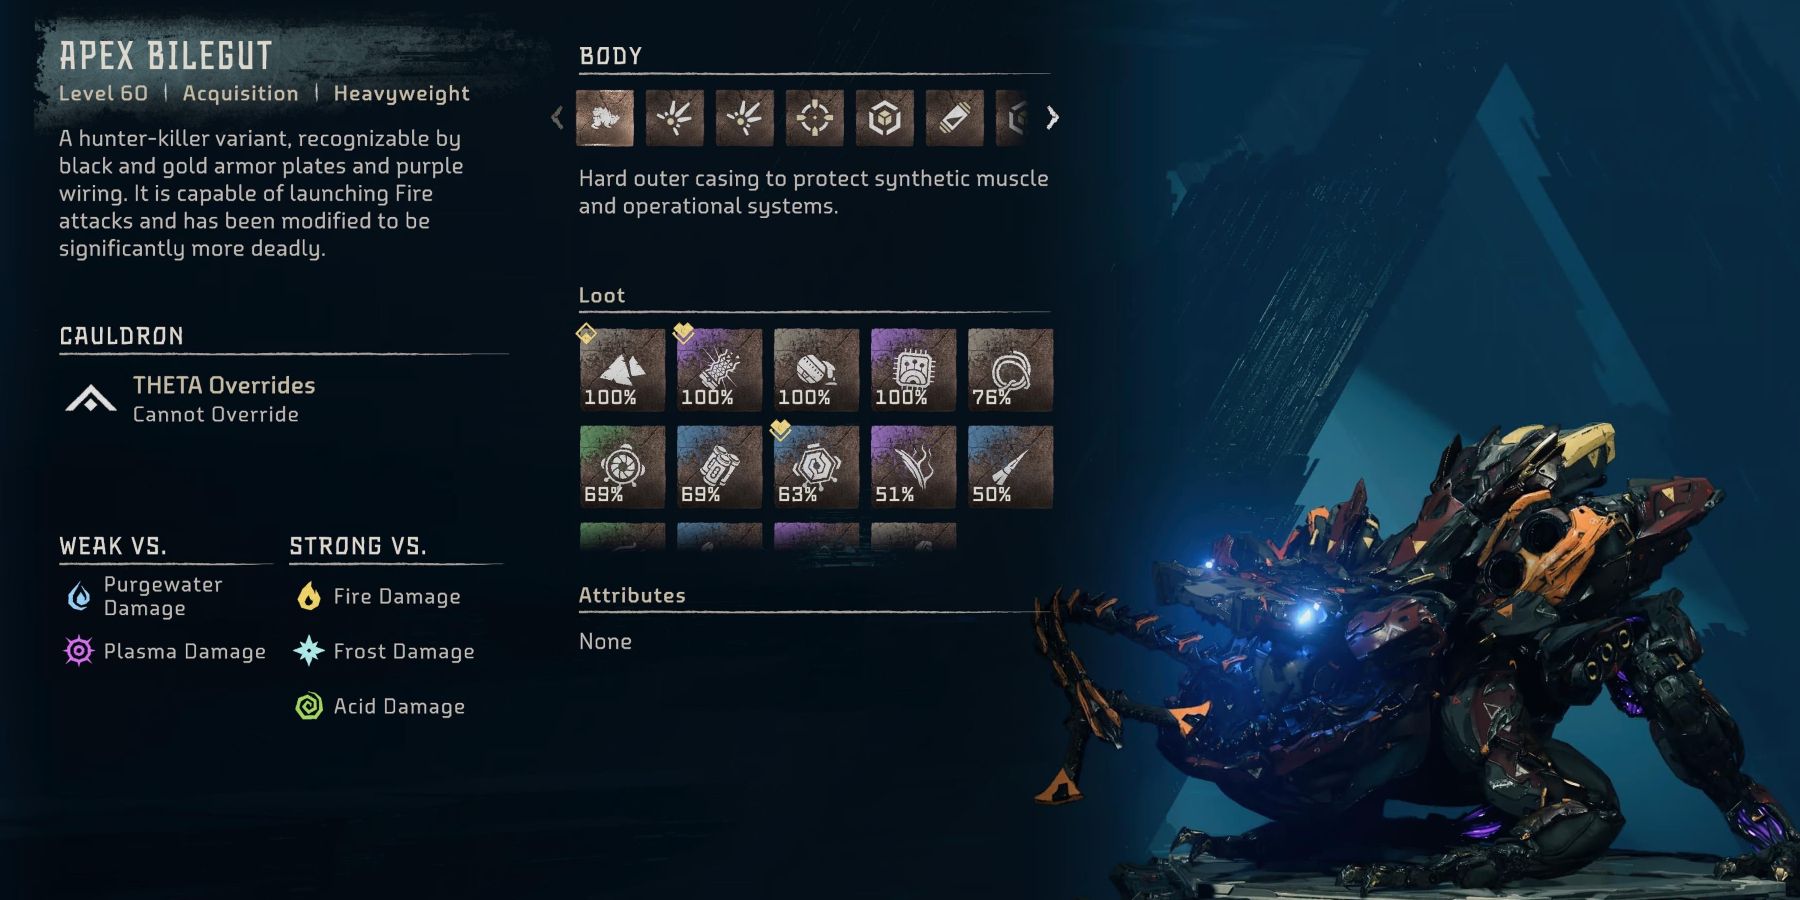
This enemy is incredibly sturdy, so It's good to plan for a long fight. Craft any potions or traps, and collect any needed medicinal berries before interacting with the core. Aloy will be attacked in the middle of the first override attempt.
The Apex Bilegut fight can be a long affair, but there are a few tricks Aloy can use to make the fight a little more manageable. To start with, the Bilegut has two primary weaknesses: Purgewater and Plasma. While both are useful, Purgewater can be massively advantageous in this fight. A great option is the Purgewater Bombs fired from a legendary Blastsling like Skyhammer. Putting the Bilegut into the Drenched state stops it from doing any elemental damage, as well as losing elemental resistance.
Removing components can take large chunks of health, so make sure to use a weapon with high tear stats. Also, the Specter Gauntlet can be used to great effect against all enemies. Make sure to use it correctly, with R1 to plant a target, and R2 to fire projectiles. The railgun upgrade is also extremely powerful.
Because there are several Stingspawn that show up in this fight, consider using the Chain Burst Valor Surge. This special attack will chain damage between closely grouped enemies. With an upgraded Chain Burst, a single Advanced Hunter Arrow can take out a whole group.
Once the fight is done, head back to the core to complete Cauldron THETA. ALoy will be awarded XP, 3 Skill Points, and the Bilegut override ability.
Horizon Forbidden West: Burning Shores is available now exclusively for the PS5.


