Genshin Impact’s recently debuted “Labyrinth Warriors” Event is one players don’t want to miss. Only the first of five installments have been released, and fans are already calling for this plot-driven dungeon-crawler to remain a permanent fixture in Genshin Impact’s expansive world. The event brought back some familiar faces: the canonical combination of Childe and Xinyan has piqued the interest of those uninterested in similar combat challenges like the Spiral Abyss.
Genshin Impact players frustrated by the Spiral Abyss might enjoy the save features and absence of time-based constrictions in Labyrinth Warriors. Besides generous amounts of Primogems and a free Xinyan constellation, Labyrinth Warriors is worth experiencing for the sub-plot, character interactions, and atmosphere. There are quite a few mechanics introduced, however, and its easy to feel overwhelmed navigating the Mystic Onmyou vernacular. This guide will break down the new features comprehensively and provide insight for best practices and those ever-essential loot locations.
Shikifuda
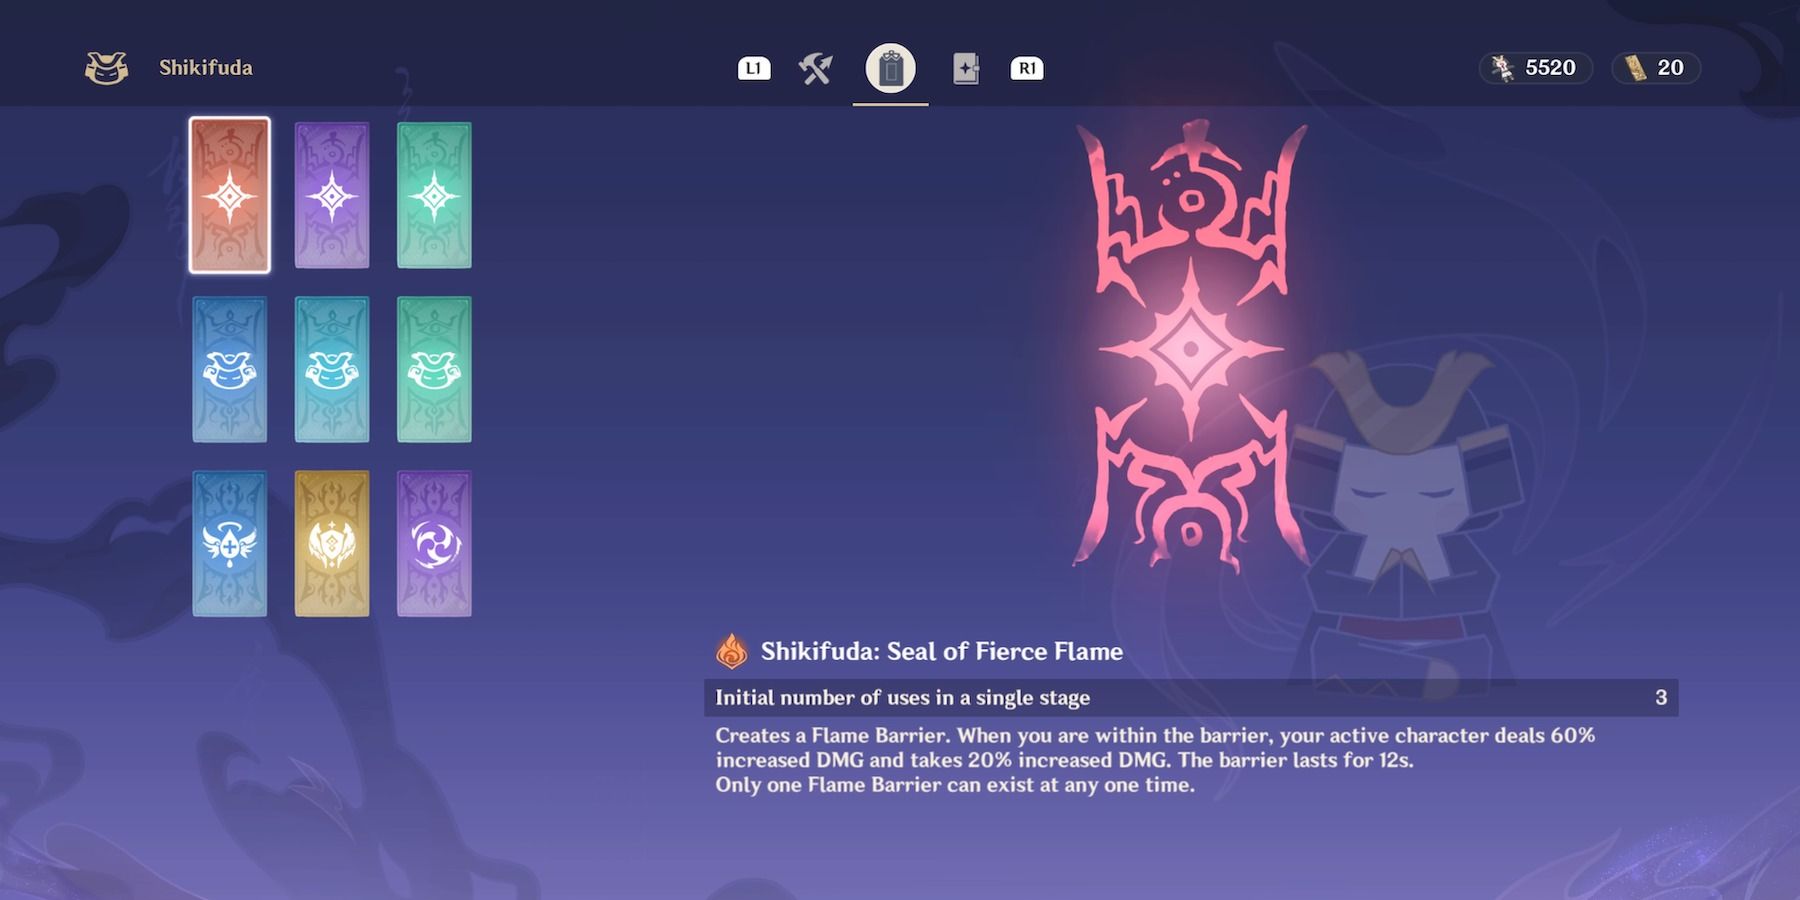
Shikifuda are beneficial talismans that bestow unique properties upon the party. Players select 3 out of 9 Shikifuda before the trial begins, Shikifuda cannot be changed once the trial is initiated. Only one Shikifuda of each type may be summoned at the same time, but two different Shikifudas can simultaneously exist. The Shikifuda options are as follows:
- Seal of Fierce Flame: Active character deals + 60% DMG & takes + 20% DMG inside AoE for 12s.
- Seal of Flashing Lightning: Active character’s Elemental Skill/Burst CD – 10%, party regens 4 Energy every 3s for 12s.
- Seal of Cataclysmic Wind: Active character + 10% bonus ATK SPD, + 10% bonus Movement SPD, & extra jump height in AoE for 12s.
- Streamsurge Summoning: Deals AoE Hydro DMG every 2s for 6s. Deals AoE Hydro DMG & bubble-traps 3 small/medium opponents (decreasing their healing) upon destruction.
- Snowstorm Summoning: Deals AoE Cryo DMG every 2s for 8s. Decreases enemy Physical & Elemental RES by 20% for 10s upon contact.
- Strixwind Summoning: Pulls surrounding opponents for 6s. Deals AoE Anemo DMG & launches opponents upon destruction.
- Ensorcelled Waters: Restores 4,000 HP to current party members, regens 800 HP & 20 Stamina every 1s for 5s.
- Bedrock: Increases active character’s interruption to resistance & decreases DMG taken by 50% for 12s.
- Thunder Orb: Deals AoE Electro DMG. Generates 2 Elemental Particles (max 6 Particles) for every opponent hit.
Unlike Charms, Shikifudas are manually summoned up to 3 times to create the buff. Players should carefully consider how their desired team comps mesh with the Shikifuda effects. Certain Shikifuda combinations foster ideal environments for Elemental Reactions. Here are a few examples:
- Seal of Fierce Flame, Streamsurge Summoning, Bedrock would benefit teams led by a hard-hitting DPS who requires a shield or deals most of their damage via Charged attacks, such as Hu Tao, Ganyu, or Yanfei.
- Seal of Flashing Lightning, Snowstorm Summoning, Thunder Orb is ideal for Physical teams that want constant up-time on their Cryo or Electro output for Superconduct, such as DPS Eula, Kaeya, Rosaria or Lion’s Roar Keqing.
- Seal of Flashing Lightning, Seal of Cataclysmic Wind, and Ensorcelled Waters provides a reliable cushion for Anemo grasshoppers Xiao or Kazuha – swap out Cataclysmic Wind or any element-based Shikifuda to complement almost any reaction-based team.
Emplacements
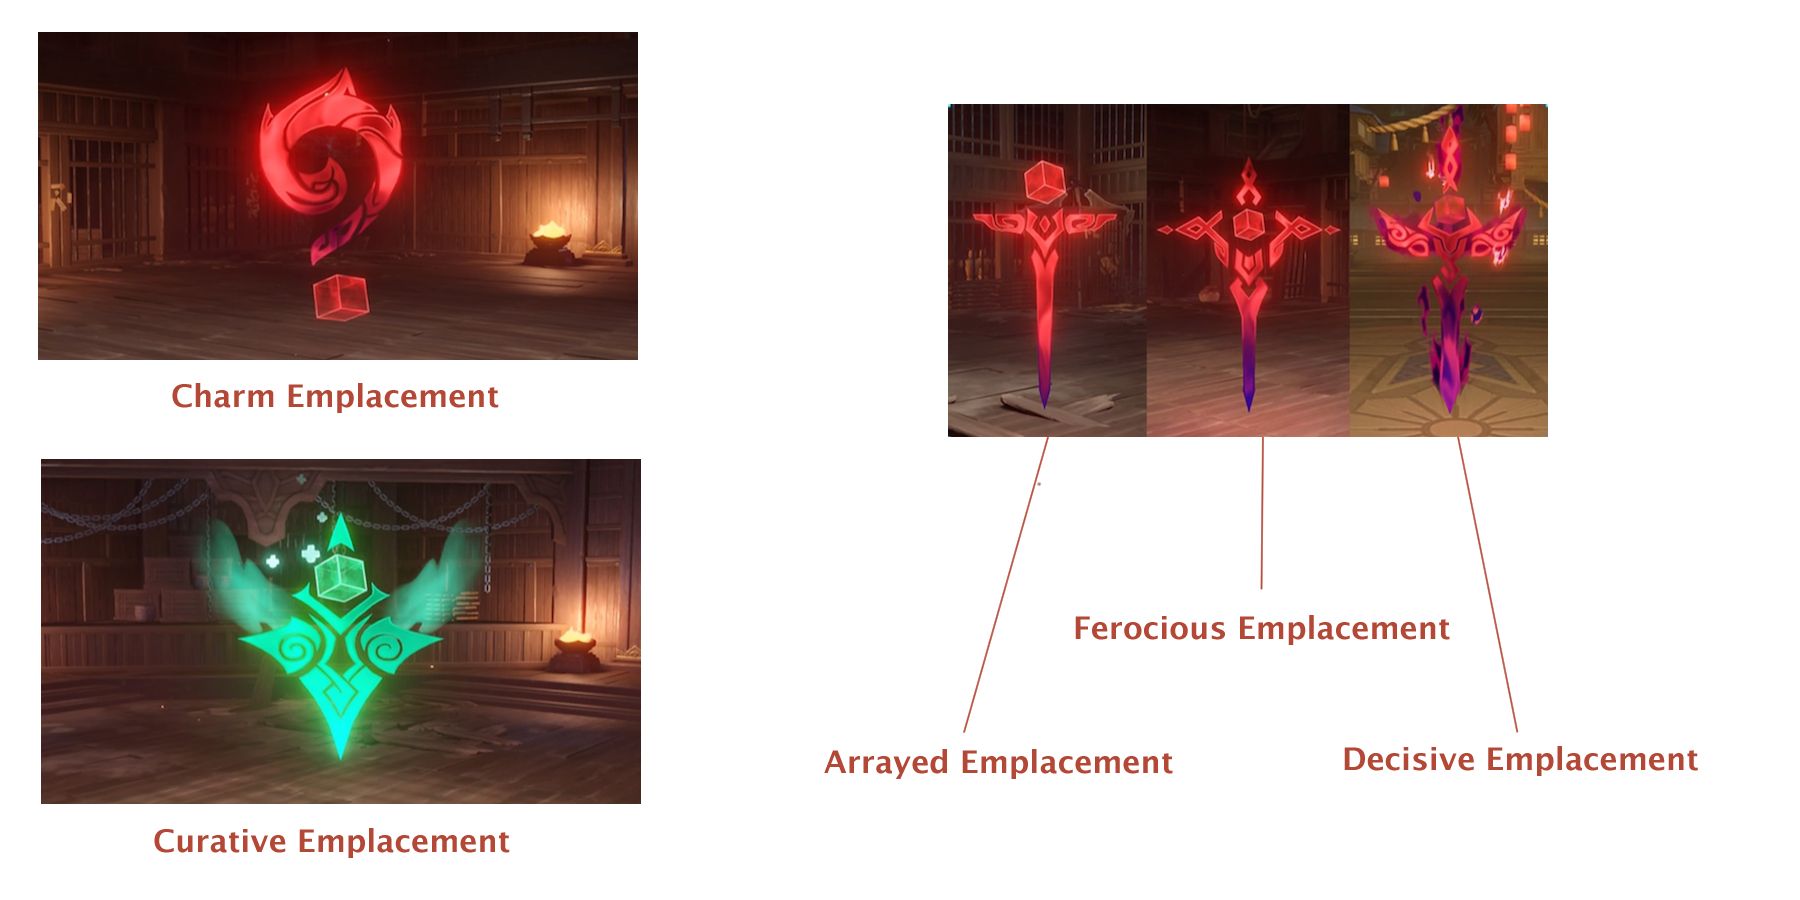
Emplacements are mechanisms activated by the player to battle, update their party, or receive Charms. Every trial room has one Emplacement, each identified by its unique sword pattern. As players progress further into the Domain, the Genshin Impact map will light up with icons indicative of anticipated and discovered Emplacements. Completing an Emplacement interaction darkens their circular emblem on the map. These are the possible Emplacements:
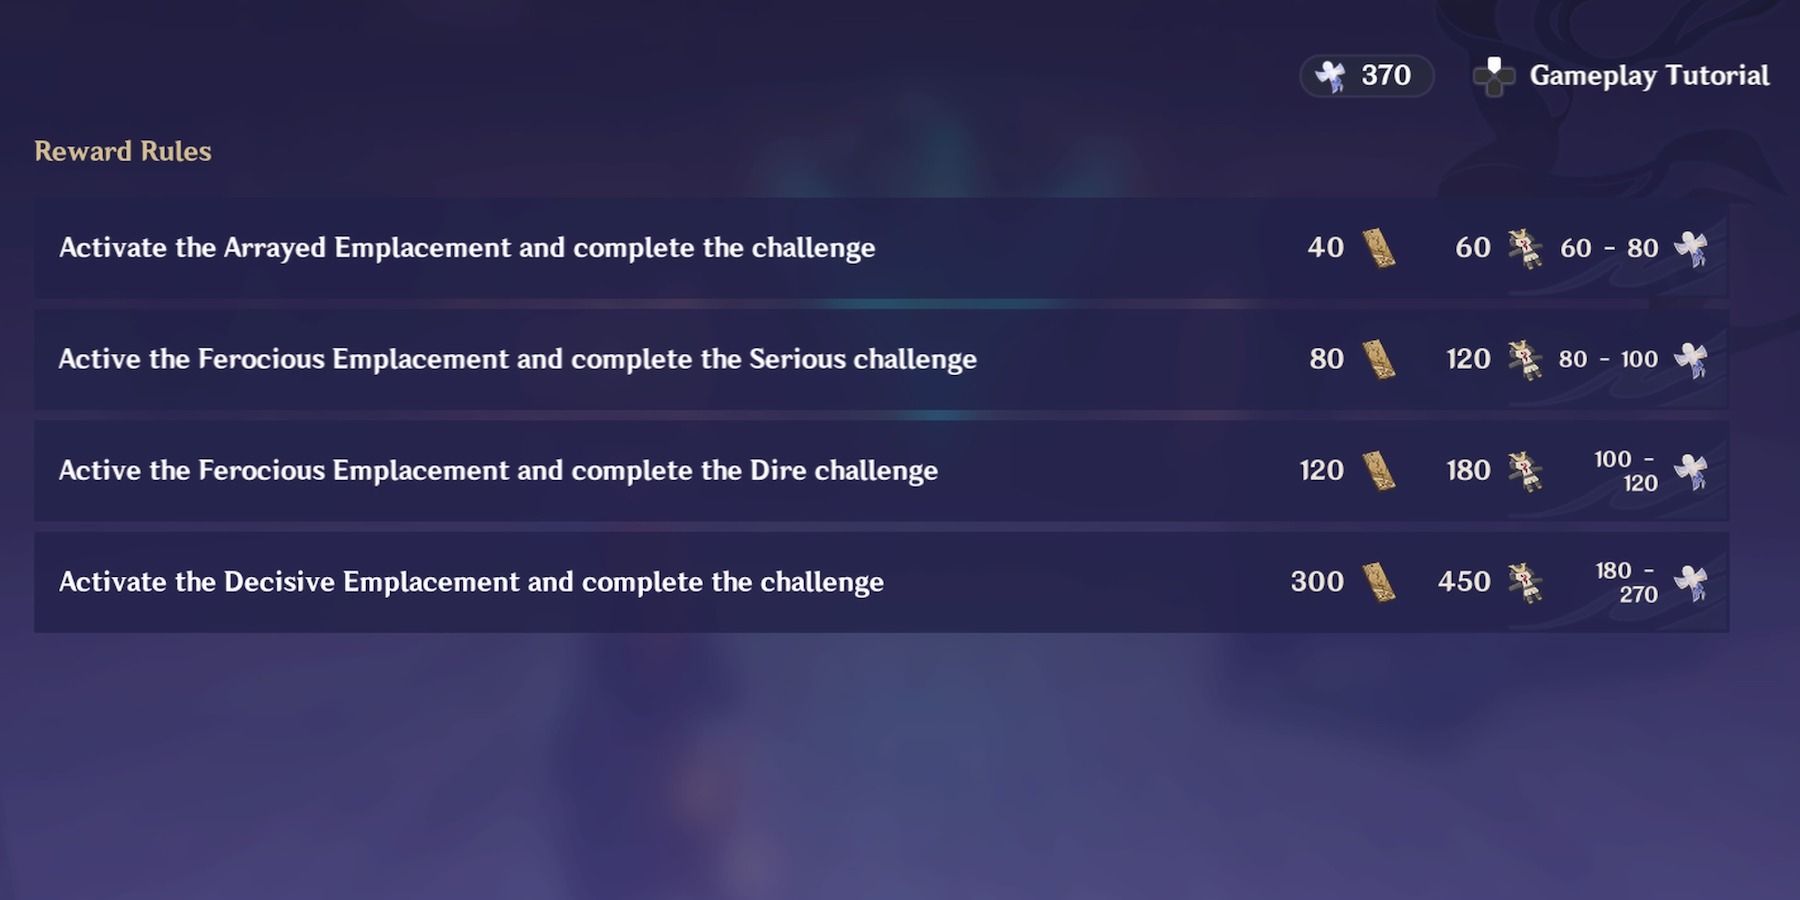
- Arrayed Emplacement: Defeat all opponents and draw a Charm.
- Ferocious Emplacement: Defeat all opponents and draw a Charm.
- Decisive Emplacement: Defeat a boss opponent and draw a Charm.
- Curative Emplacement: Heal/revive all party members in Combat and Support and/or change party configurations (disabled after healing party).
- Charm Emplacement: No battle. Draw a Charm (possibly Cursed).
Traps
There are several traps hidden throughout the Domain, from wall fixtures shooting projectile lightning to loose platforms falling from above. The wall fixtures, along with Electro-imbued floor panels, are pretty easy to spot. Unfortunately, the crushing debris gives little warning, and Cursed Fields – slightly darker ground squares hiding explosives and Cursed Seals – are difficult to perceive in the gloomy halls. This is why a healer or Ensorcelled Waters Shikifuda is recommended to accompany the Combat party.
Charm Magic vs Charms
Charm Magic is a series of long-term buffs innate to Shiki Taishou. These buffs range from environmental effects, such as multiplying Explosive Barrels, to buffing other buffs: such as increasing the chances of pulling high-level trial Charms. Charm Magic is separate from Charms, which are accrued by defeating all opponents in Emplacement challenges and have short-term lifespans. The "Charm Magic" section contains a list of Shiki Taishou's personal Charms and the opportunity to advance them with Damaged Replicas. “Martial Trials” will grant players additional rewards for leveling particular Charm Magic. Charm Magic cannot be changed or upgraded during a trial. A bit about Charms:
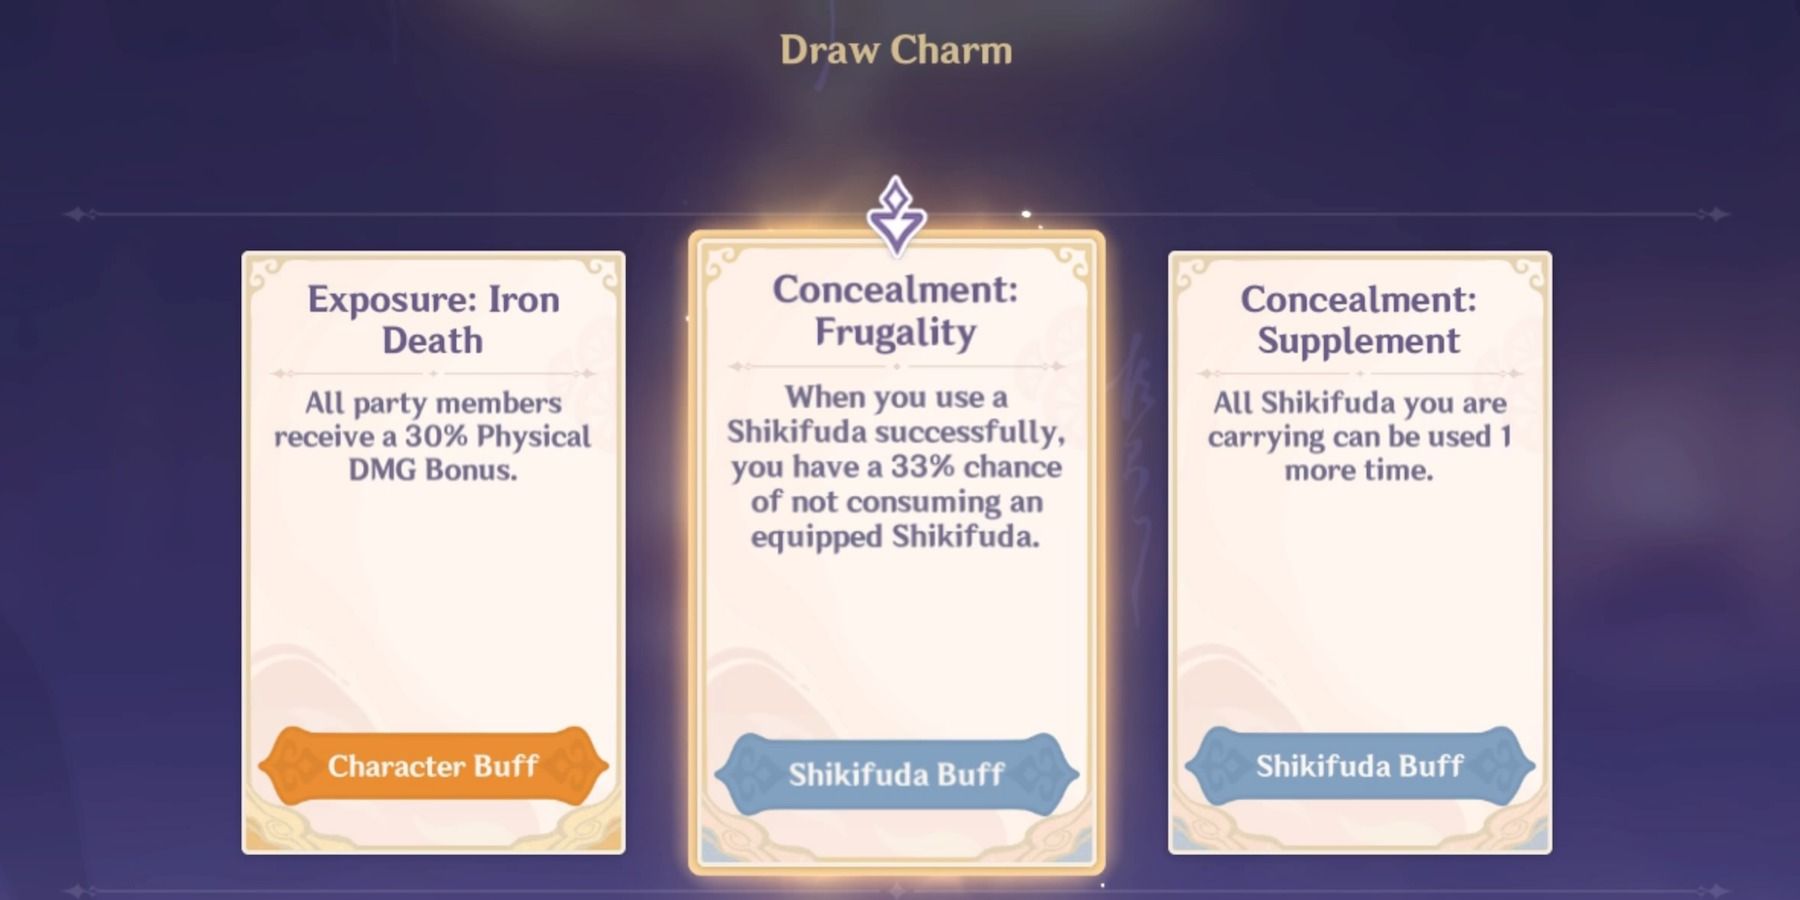
- Completing Arrayed, Ferocious, or Decisive Emplacements allows players to draw a Charm. Charm Emplacements give them away for free – but might inflict negative consequences on the party via Cursed Seals instead.
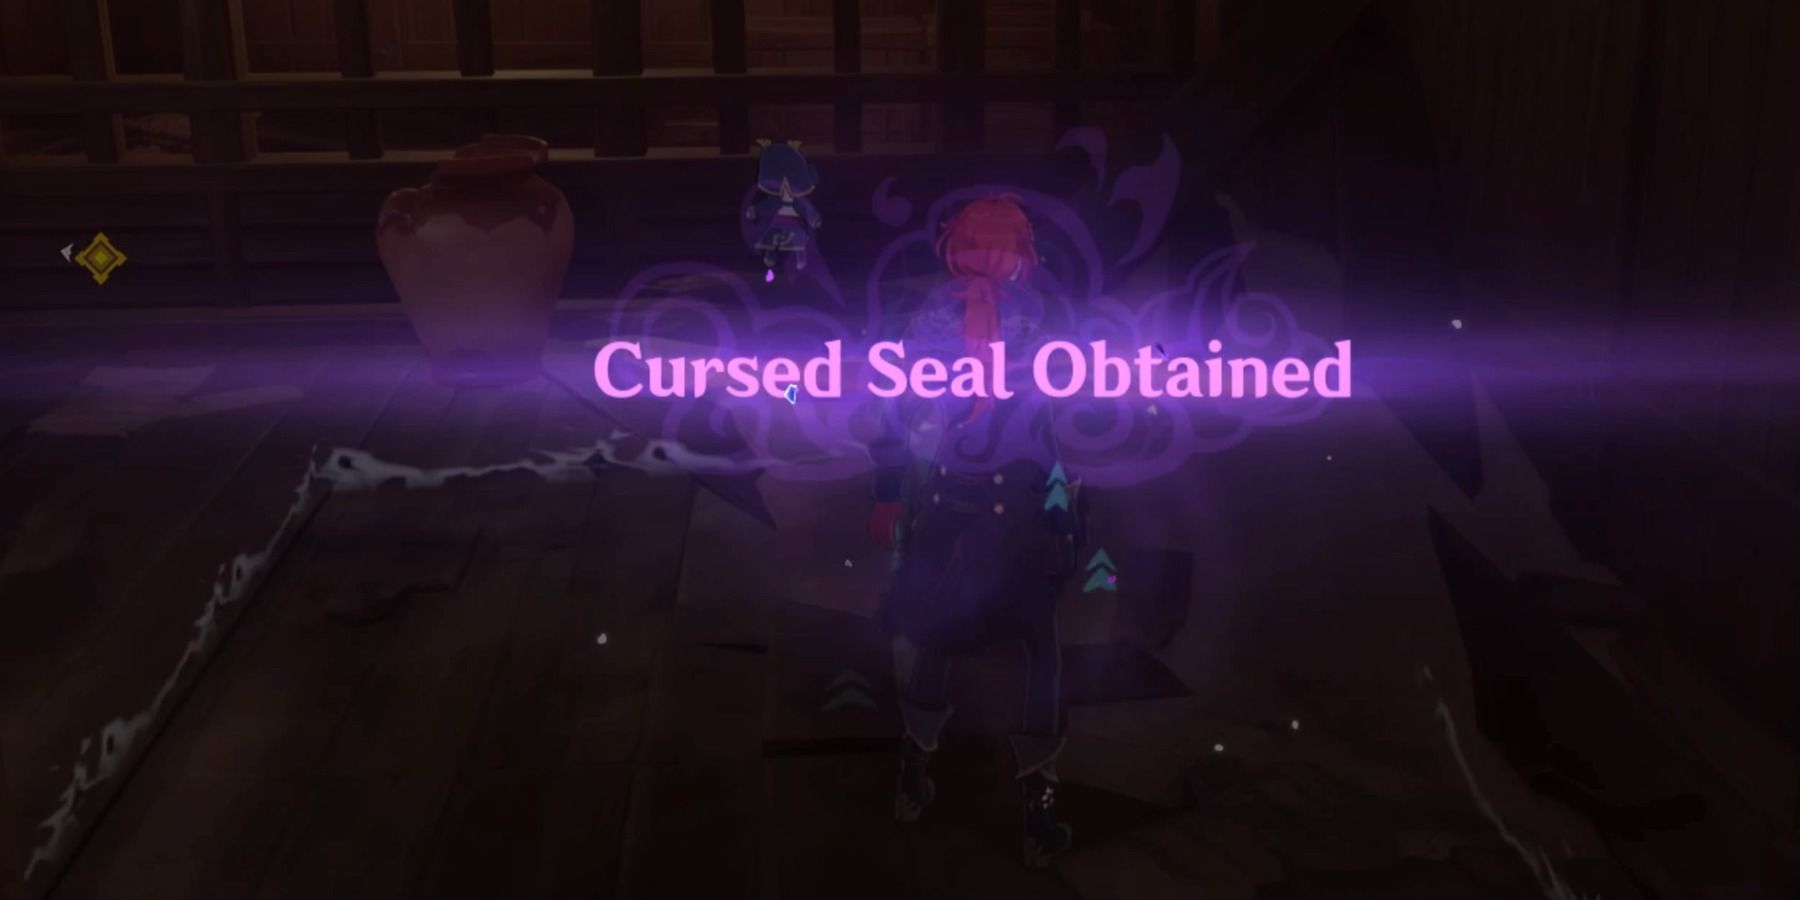
- Cursed Seals sometimes replace drawn Charms, or afflict certain party members after stumbling over a trap. The Cursed Seal duration extends for the entirety of the trial unless a counteractive Blessed Charm dismisses the effect.
- Charms have three different catetogires: Exploration Buff, Character Buff, or Shikifuda Buff with color-coded Common (Purple), Uncommon (Blue), or Rare (Gold) identifiers.
- Charms are contained to each run-through of a trial and are erased once the trial is completed or restarted.
Currency
Item | Purpose | Acquired By |
Aged Tokens | Exchanged for prizes in the Event Shop | Completing each Trial & Trial Reward Challenges |
Damaged Replicas | Exchanged for Charm Magic Upgrades | Investigate, Completing Emplacement Challenges |
Battered Shikifuda | Exchanged for Charm Re-draws | Completing the Trial Objective & Emplacement Challenges |
Teams
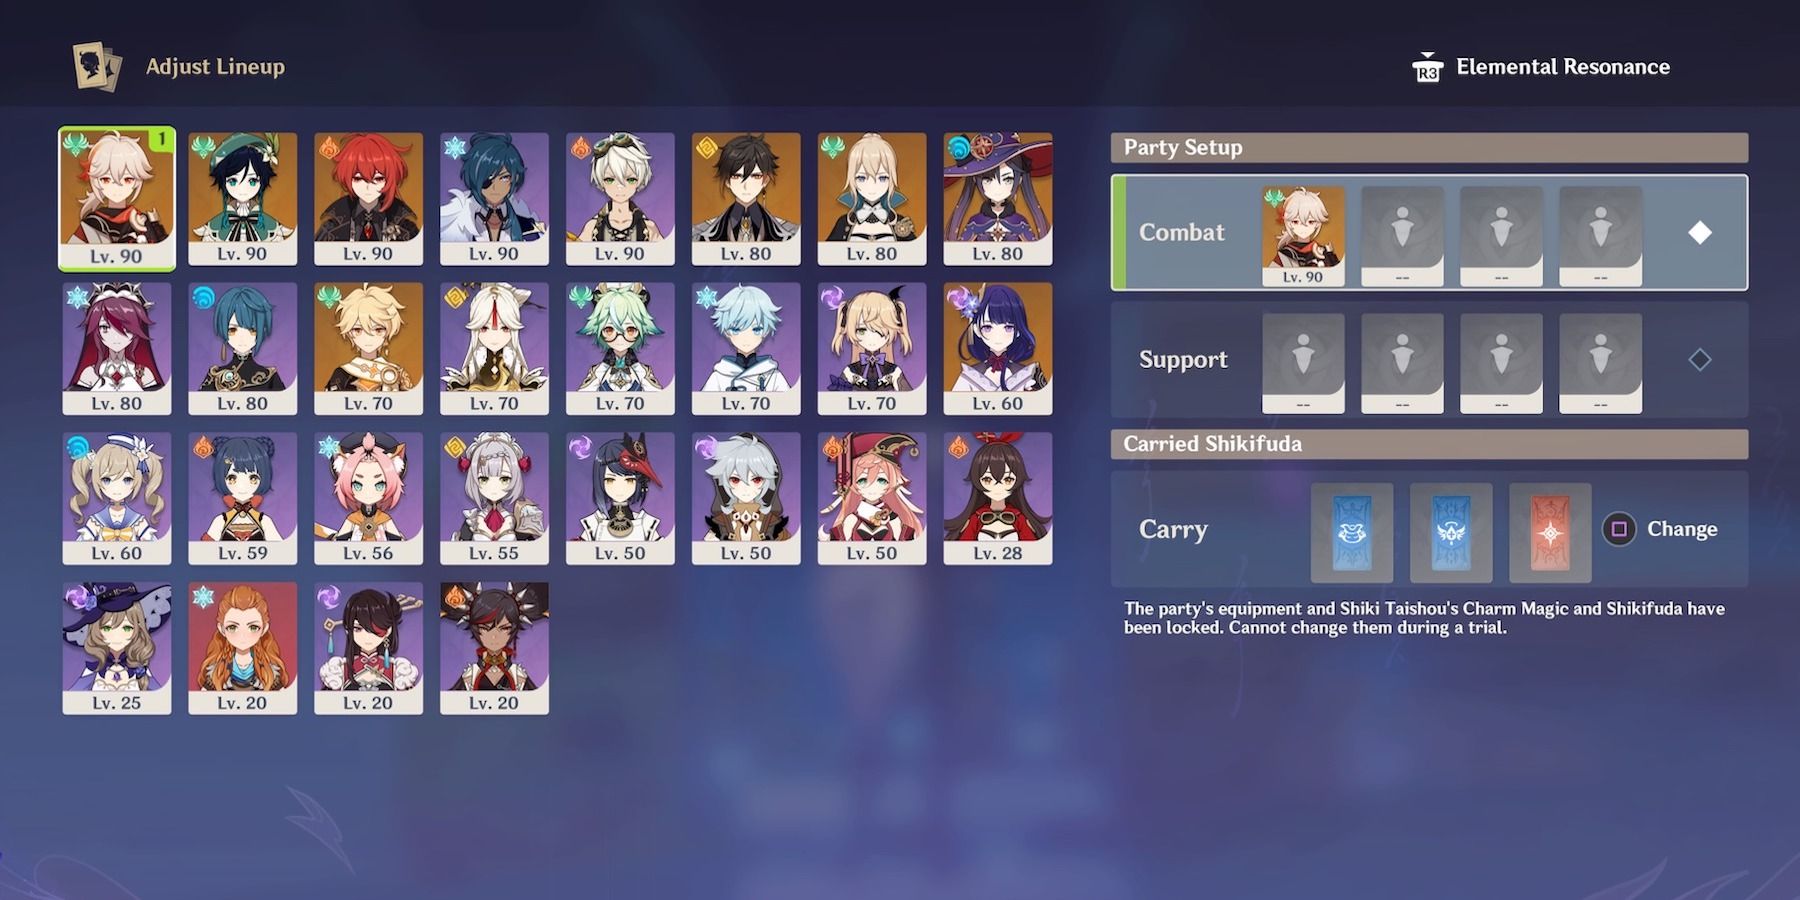
Labyrinth Warriors allows players to select two 4-person parties: the first is “Combat” and the second “Support.” The characters cannot overlap. The Combat team remains on the trial field until encountering a Curative Emplacement, which is a pit stop for character swapping and a full party heal. Some important notes regarding teams:
- Labyrinth Warriors isn’t like the Spiral Abyss. There are achievements for surviving without using Curative Emplacements or clearing the trial with no character deaths – speed isn’t necessary and the goal is endurance over swiftness. Emplacements aren’t the only damage-dealing situations, and the environment is full of traps capable of one-shotting slightly weakened characters. Players might want to change up their Spiral Abyss go-tos and approach this challenge with exploration in mind and a healer like Noelle in tow.
- There is no food in Labyrinth Warriors and Curative Emplacements only heal once. Occasionally, a Cursed Seal will prevent healing at the Curative altogether. It’s a good idea to include a healer or shield support on the Combat team (ideally, a combative healer like Jean or Bennet or micro-healer like Xingqiu or Black Sword Kaeya).
- For those confident in their dodging abilities and reluctant to fill a potential stat-boosting support slot with a healer, instead bring the Ensorcelled Waters Shikifuda for emergencies: it restores HP and stamina (up to 3 times per trial).
- Players should consider both their Combat and Support teams in terms of Shikifuda for the most effective buffs. For example, a Combat team with Pyro and Cryo characters would benefit from the Streamsurge Summoning Shikifuda, as it applies Wet to enemies and enables Vaporize/Frozen reactions without needing a Hydro representative on the team.
- Potential enemies are varied and random, from predictable Treasure Hoarders to the corrosive new Rifthounds. Prepping a few possible Elemental Reactions and a crowd control component (Venti, Kazuha, Sucrose, Zhongli) will establish a strong foundation for the unexpected.
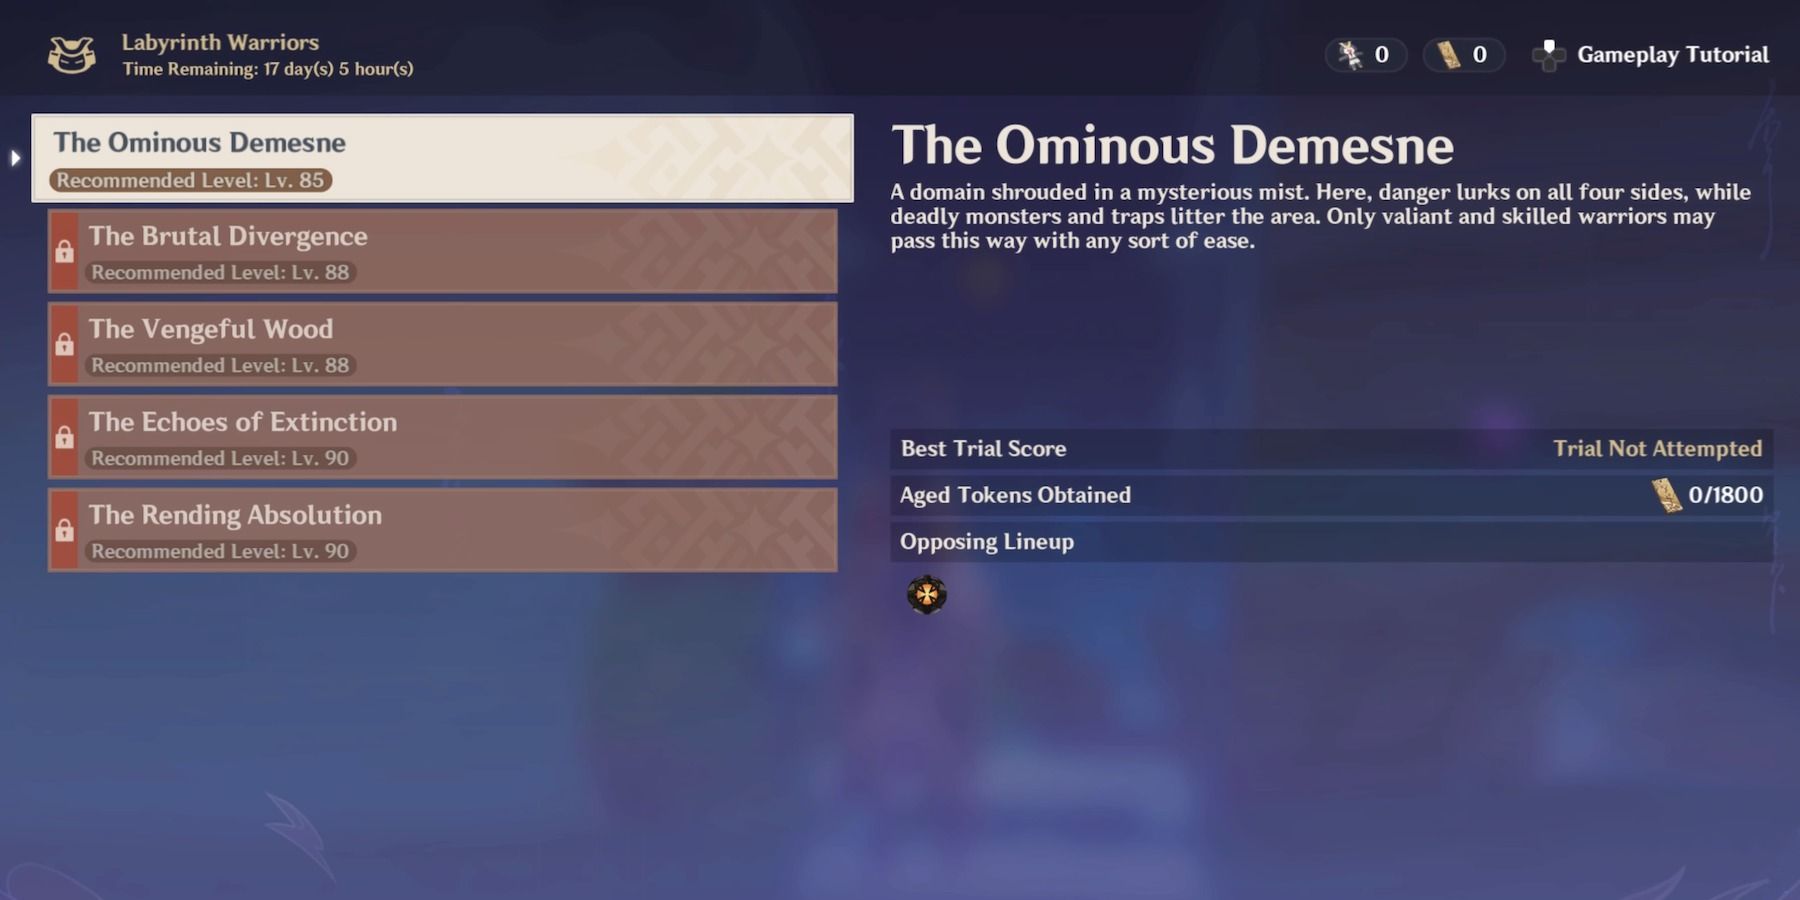
Trial 1: The Ominous Demesne
- Floors: 2
- Recommended Level: 85
- Aged Tokens: 1800
- First Clear Reward: Hero’s Wit x 3, Mora x 30,000
Gameplay Notes:
- Labyrinth Warriors in Genshin Impact has no co-op mode.
- The only requirement to clear a floor is completing the Decisive Emplacement boss fight. This means other Emplacement rooms may be skipped, unless they’re blocking the path to the Decisive Emplacement.
- A new room will not unlock until the Emplacement challenge has been completed and a Charm drawn.
- Room Emplacements are random except for Treasure Emplacements and Decisive Emplacements.
- Combative Emplacement enemies are random except for Decisive Emplacement bosses.
- Treasure Emplacements, Common Chests, and Damaged Replicas are finite and fixed. They do not replenish with additional playthroughs, and their locations do not change.
- Players may return to previous rooms before the trial has ended, but not after the final boss is defeated.
- To revisit any skipped rooms post-Decisive Emplacement, the trial must be restarted. Repeating a trial won't duplicate any treasure already found, but the treasure can still be obtained for the first time on the retry.
Recommended Teams
- Kaeya, Rosaria, Xingqiu, Venti – This Permafreeze team has Cryo Resonance, boosting the party’s CRIT Rate against Frozen enemies along with Rosaria’s CRIT-boosting Talents. Chongyun is a great sub for any re-arrangement of this team with a Cryo DPS. Xingqiu can carry Noblesse Oblige to further strengthen the team, and Venti will clump opponents for crowd control. Xingqiu’s Rain Swords provide minor healing/shielding power but this comp would benefit from the Ensorcelled Waters, Snowstorm Summoning, and Streamsurge Summoning Shikifuda. Substitute Sucrose for a full 4* team, and upgrade Kaeya or Rosaria to Ayaka or Ganyu if available. Mona, Kokomi, and Barbara can apply Hydro instead of Xingqiu, or hang out on the Support team to swap before the next battle. The Decisive Emplacement Ruin Graders will freeze but are too heavy for Venti - Kazuha is a better fit before that final battle.
- Tartaglia, Xiangling, Sucrose, Bennet – Tartaglia and Sucrose both provide crowd control, with Sucrose buffing the team’s Elemental Mastery for Tartaglia’s demolishing Vaporize Burst. Xiangling is the best Pyro applicator and boosts the entire party’s attack when paired with Bennet, courtesy of Pyro Resonance. Bennet has his own formidable buffing capabilities further capitalized with Noblesse Oblige. Mona/Xingqiu or Barbara/Kokomi can chill out in Support until Childe needs a break, buffing Sub-DPS Xiangling or refreshing the party. The Seal of Flashing Lightning, Seal of Fierce Flame, and Bedrock Shikifuda would supplement this team nicely. Players who want extra protection against Decisive Emplacement Ruin Graders could replace Sucrose or Bennet with Zhongli or Noelle.
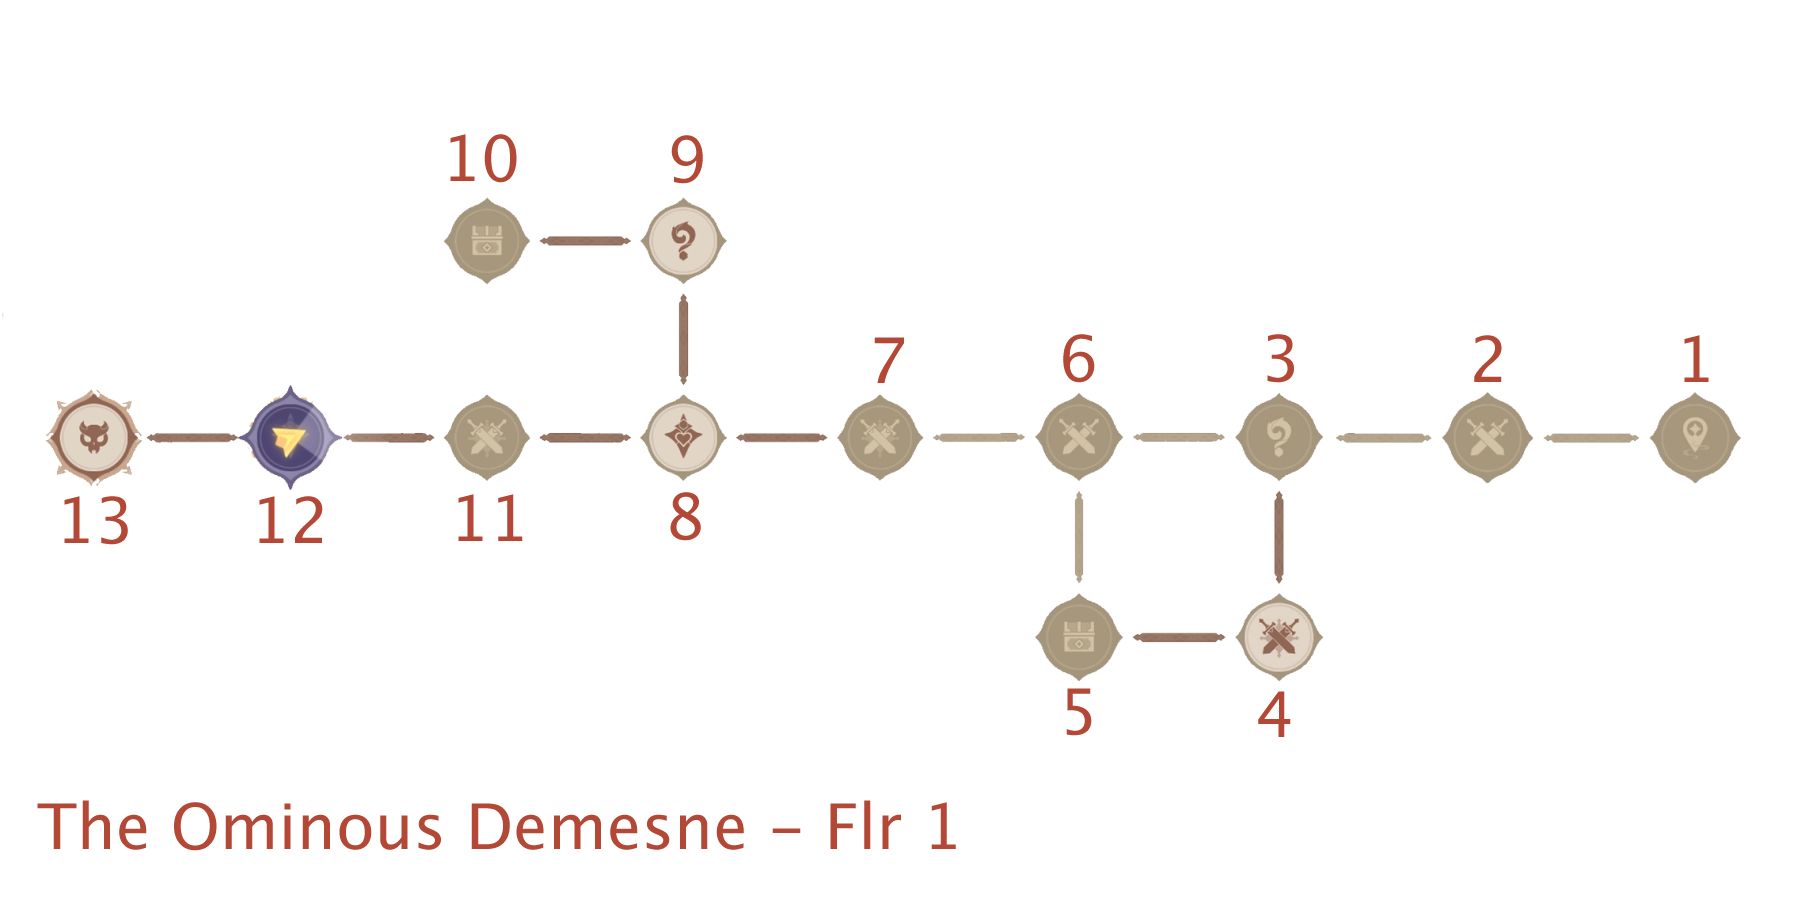
The Ominous Demesne - Floor 1
Enemy Buff:
Enemy Leaders are buffed by Attendants. Each Attendant increases the Leader’s Elemental RES & Physical RES by 10% and restores the Leader’s HP every 12s (5% per Attendant). Destroying Attendants destroys their effects.
Treasure Chests:
- 1-2 Hallway: Common Chest.
- 2-3 Hallway: Damaged Replica x 30
- 3-4 Hallway: Damaged Replica x 30
- Room 5: Treasure Emplacement. Damaged Replica x 30 [2]. The Exquisite Chest is hidden in a pile of clay pots on a platform with a ladder.
- 5-6 Hallway: Common Chest.
- 6-7 Hallway: Damaged Replica x 30
- 8-9 Hallway: Damaged Replica x 30
- Room 10: Treasure Emplacement. The Exquisite Chest is behind the screen to the left. The middle screen contains Damaged Replica x 30. The right screen hides an explosive.
- 12-13 Hallway: Common Chest.
- Room 13: Decisive Emplacement. Defeat 3 Opponents (Ruin Grader x 1, Ruin Sentinel x 2)
- Exit through the Abyssal Gate Mechanism to proceed to Floor 2 (Floor 1 progress is saved).
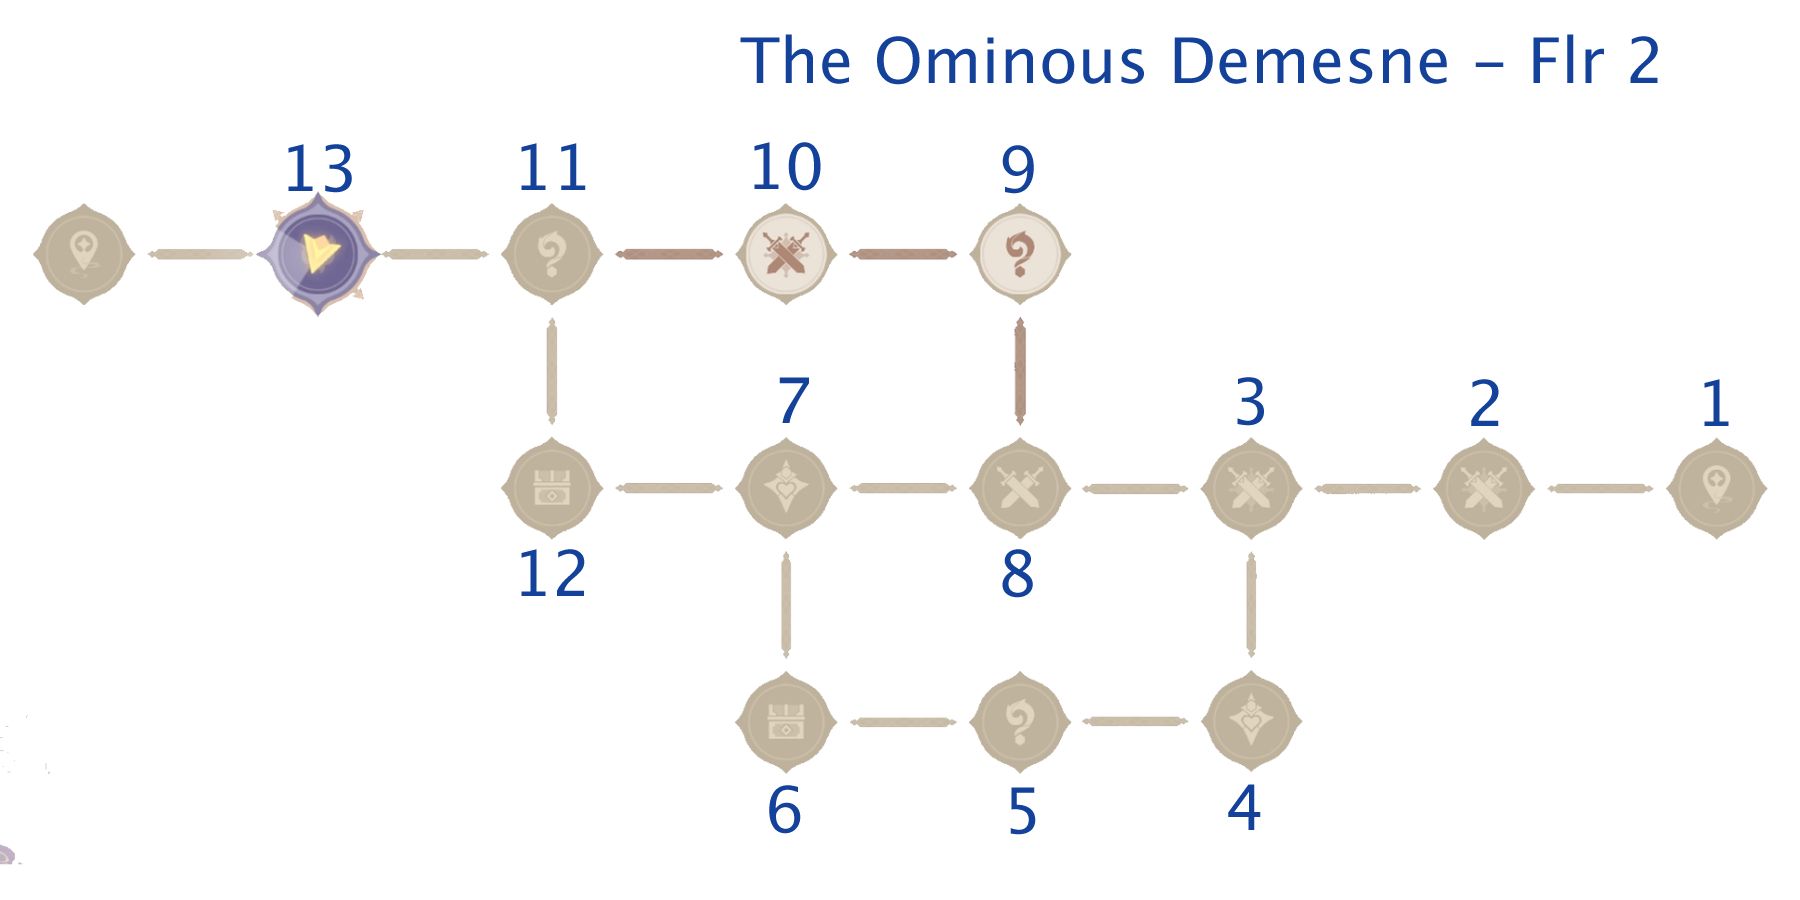
The Ominous Demesne - Floor 2
Enemy Buffs:
Ruin Graders will recover an "immense" amount of HP when their HP drops below 30% unless defeated in the next 10s. This effect occurs once per Ruin Grader.
Treasure Chests:
- 2-3 Hallway: Common Chest.
- 4-5 Hallway: Common Chest. Damaged Replica x 30.
- Room 6: Treasure Emplacement. Damaged Replica x 30. The Exquisite Chest is located on a clay pot-filled platform, accessible by ladder.
- 6-7 Hallway: Damaged Replica x 30 (beneath the broken floorboards – watch out for electrified panels).
- 7-8 Hallway: Damaged Replica x 30 [2]
- 8-9 Hallway: Damaged Replica x 30
- 10-11 Hallway: Common Chest
- Room 12: Treasure Emplacement. The Exquisite Chest is in plain sight, but an explosive barrel is disguised behind a screen to trick instinctive demolishers. A multitude of Electro projectiles borders the room.
- 11-13 Hallway: Damaged Replica x 30 [2 – one is beneath the broken floorboards].
- Room 13: Decisive Emplacement. Defeat 2 Opponents (Ruin Grader x 2). Watch out for Electro projectiles.
- Room 14: Initiates cutscene & completes the trial.
Rewards
Summon Xinyan
- Complete "Path of the Taishou"
- Accumulate 4,000 Aged Tokens
- Exchange 1,000 Aged Tokens in the Blazing Unison Event Page section
Martial Trials
- Receive Primogems, Hero's Wit, and Mora for completing trials with specific parameters. The Defeat X Opponents, Destroy X Objects/Barrels, and Draw X Charms are cumulative across multiple playthroughs (the rewards are given once for the entire Mystic Onmyou Chamber).
Event Shop
- Exchange Aged Tokens for a Crown of Insight, Primogems, Mora, Hero's Wit, Mystic Enhancement Ore, Talent Books, and Ascension Materials.
The Event Shop will expand and more rewards will become available in the Martial Trials as the event continues on its staggered released schedule.
Genshin Impact is available on mobile devices, PC, PS4, and PS5.

