Quick Links
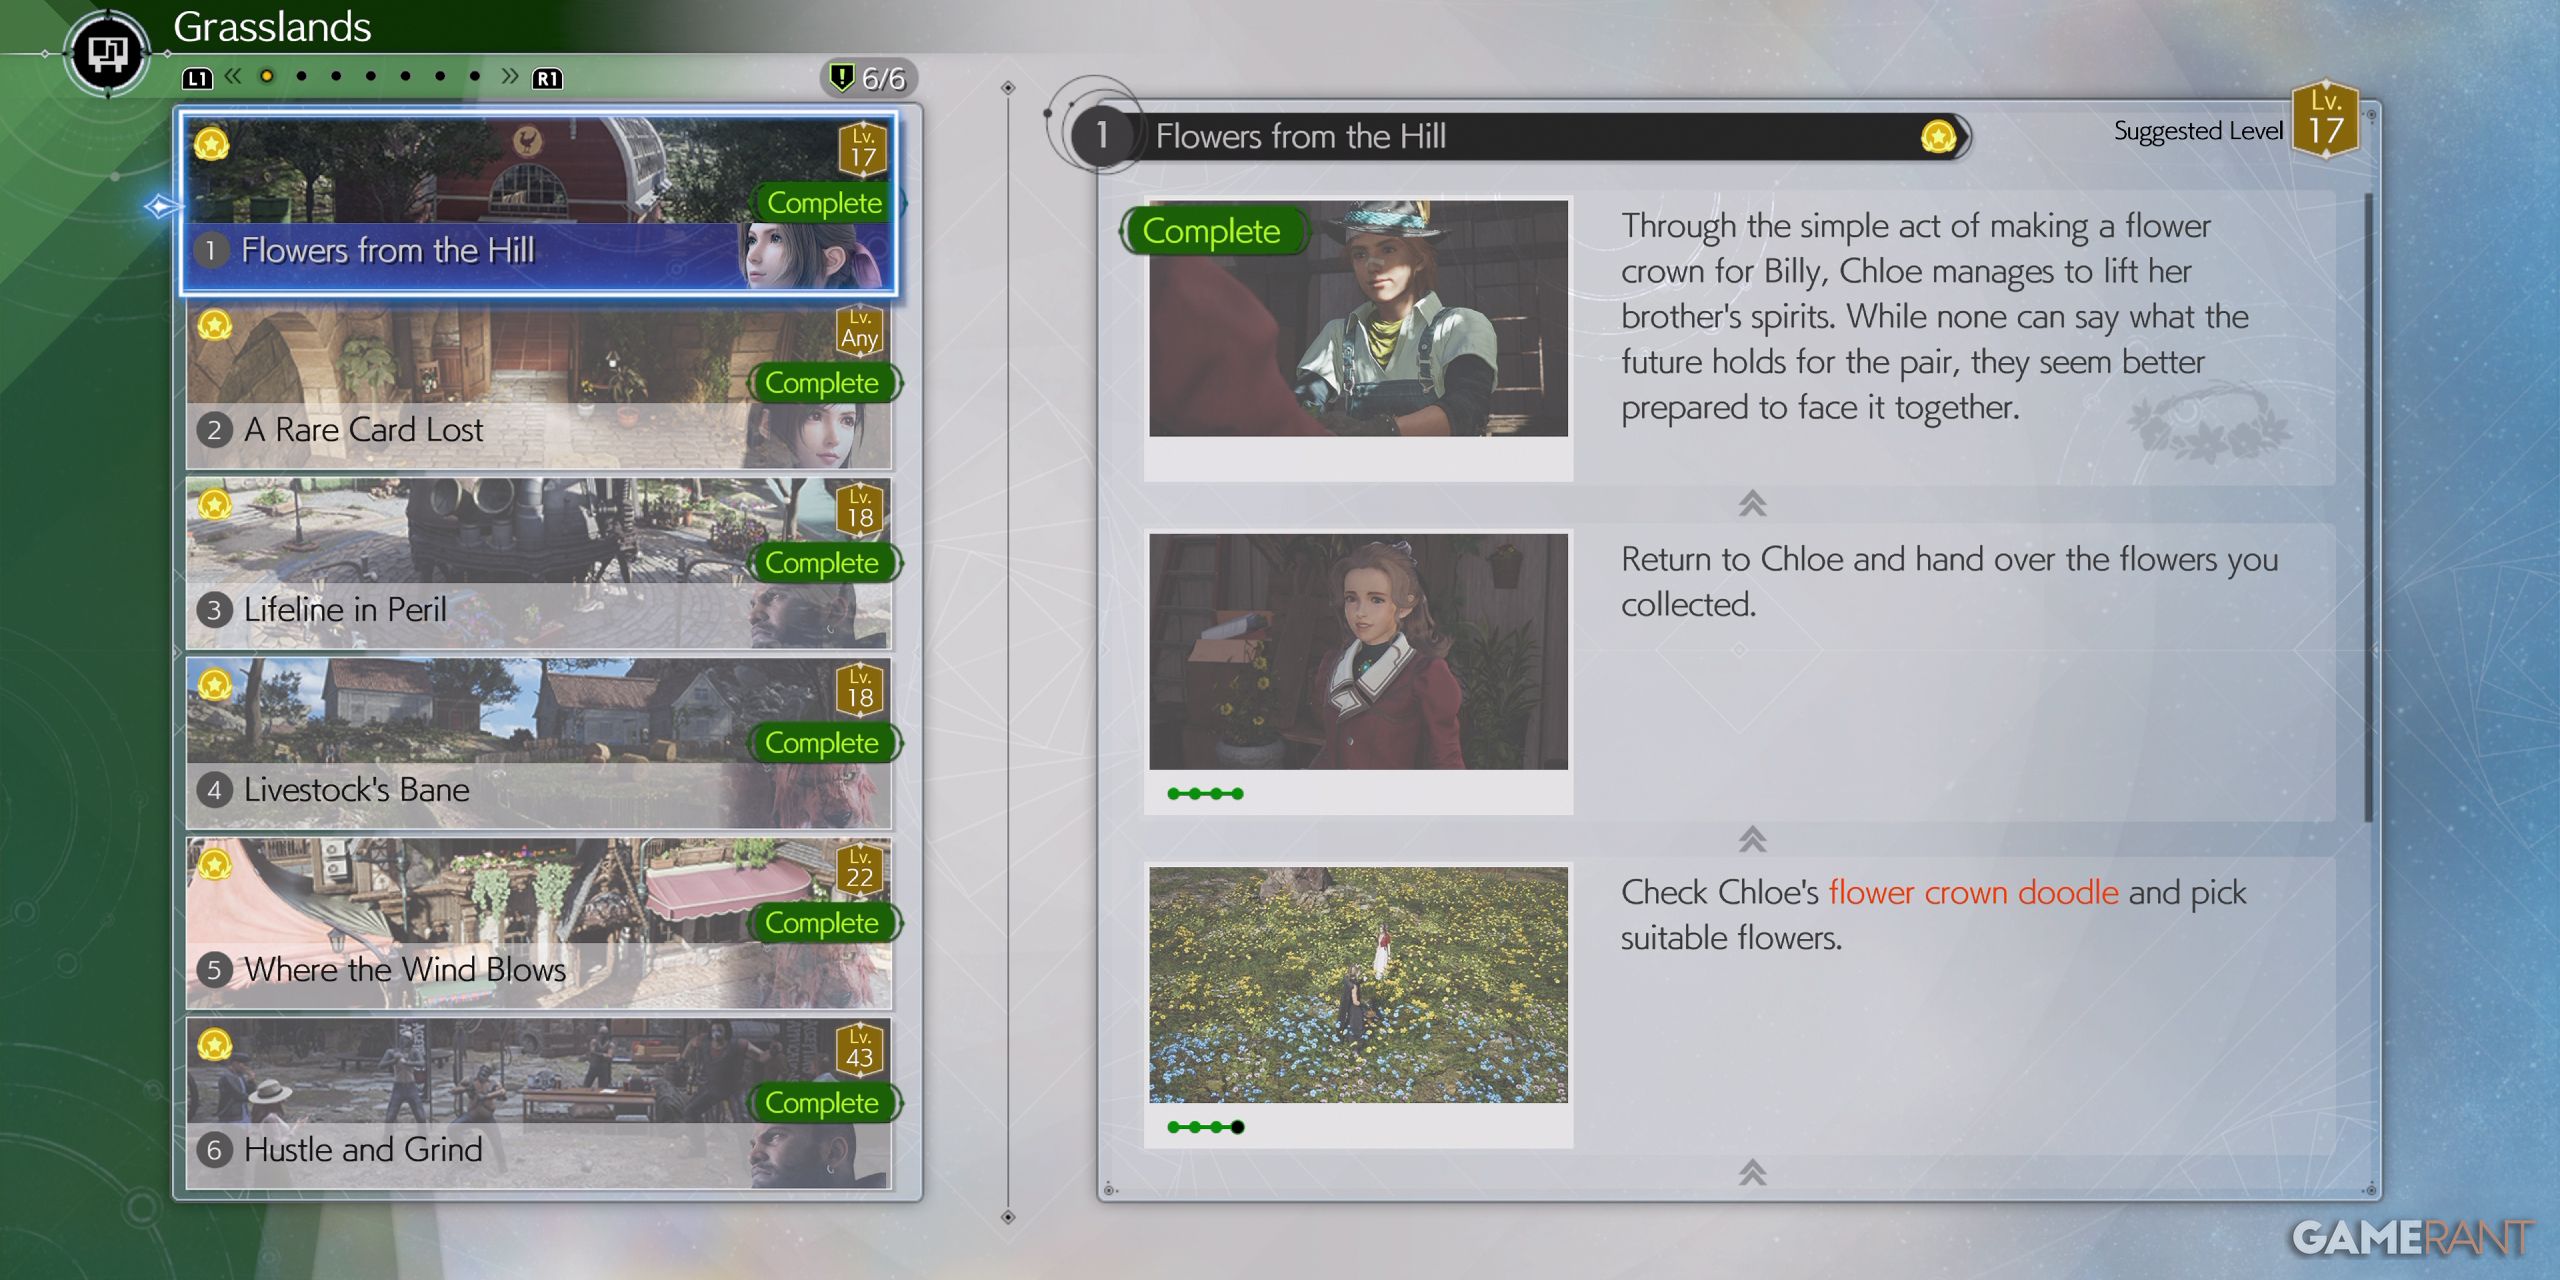
There are 36 side quests in Final Fantasy 7 Rebirth, five of which can be found in the game's Grasslands region during the game's second chapter. This sprawling and serene setting is the first semi-open-world area that players will visit and is home to several iconic Final Fantasy 7 locations, including the town of Kalm and Chocobo Bill's ranch.
Every Side Quest in Final Fantasy 7 Rebirth
There are 36 side quests in Final Fantasy 7 Rebirth, though not all of them will be available to players right away.
It's definitely worth completing all of the Grasslands side quests at some point, as they do a pretty good job of explaining some of the key mechanics at play in Final Fantasy 7 Rebirth. However, it's important to note that players will still be able to explore the Grasslands even after completing Chapter 2, so there's no need to finish them all right away.
The following guide contains the objectives for every side quest in Chapter 2 of Final Fantasy 7 Rebirth as well as a video walkthrough for each one. Those looking for more detailed instructions can click on the links beneath the side quests for more in-depth written walkthroughs.
Flowers from the Hill
- Speak with Chloe to hear the details.
- Head to the Wildflower Plateau to pick flowers for Chloe.
- Check Chloe's flower crown doodle and pick suitable flowers.
- Return to Chloe and hand over the flowers you collected.
- Through the simple act of making a flower crown for Billy, Chloe manages to lift her brother's spirits. While none can say what the future holds for the pair, they seem better prepared to face it together.
A Rare Card Lost
- Speak with the bartender to hear the details.
- Defeat Vash in a game of Queen's Blood.
- Find Virgil at the clock tower and win back the Chocobo & Moogle card through a game of Queen's Blood.
- Head to Thorin's Card Shop and win back the Chocobo & Moogle card through a game of Queen's Blood.
- Return to Vash and Hand Over the Chocobo & Moogle card.
- Having been reunited with his beloved Chocobo & Moogle card, Vash treats Cloud and Tifa to a complimentary drink. The cocktail, as it happens, is one that Tifa knows all too well, and hopes she can make again one day when she has another bar of her own.
Lifeline in Peril
- Speak with the mayor of Kalm to hear the details.
- Deliver the mayor's message to the "hotshot mercenary" at the mako pipeline maintenance warehouse.
- Gather the parts needed to repair the mako pipeline.
- 1-3 Slabs of Rusted Sheet Metal
- 2-5 Corroded Nails
- Inspect the mako pipeline with Kyrie and make the necessary repairs.
- Return to the mayor of Kalm and inform him that the repairs are complete.
- The mako pipeline has been restored - no thanks to a certain self-proclaimed merc. The mayor could not care less about Kyrie now that the problem has been resolved, but Cloud cannot shake the feeling that he has not seen the last of the troublemaker.
Livestock's Bane
- Speak with the farmer to hear the details.
- Head to where Oliver's livestock were attacked and look for clues.
- Summon Piko and use him to search for the perpetrator's scent trail.
- Use Piko to follow the perpetrator's scent trail.
- Continue relying upon Piko to follow the perpetrator's scent trail.
- Dispatch the fiend that has been preying on Oliver's livestock.
- Return to Oliver and inform him that the fiend has been dealt with.
- The fiend that preyed upon Oliver's livestock is no more, but Red XIII is nevertheless disappointed in his inability to track down the culprit on his own. Fortunately, all it takes to lift his spirits is a mouthwatering reward from the grateful rancher.
Where the Wind Blows
- Speak with Broden to hear the details.
- Speak with Mildren on Broden's behalf and offer your assistance.
- To craft the component required to repair the windmill, you must first obtain a windmill gear transmuter chip.
- You can ascertain the location of the transmuter chip through lifespring analysis.
- To craft the windmill gear, you must procure the following parts:
- 1 Quetzalcoatl Talon
- 2 Chunks of Iron Ore
- 1 Chunk of Lea Titanium
- 5 Beast Bones
- Use the materials you have procured to transmute a windmill gear and deliver it to Mildred.
- Return to Broden and inform him that the windmill has been repaired.
- The republic windmill is up and running again, and Mildred couldn't be more pleased - unless Broden were there to share in the moment, that is. Alas, while they once had plans to travel the world together, it seems unlikely they'll be able to do so anytime soon.
As they progress further through the main story of Final Fantasy 7 Rebirth , players will gain access to one additional Grasslands side quest. A link to a walkthrough for this quest can be found below:
Hustle and Grind (Chapter 12)
Final Fantasy 7 Rebirth
- Developer(s)
- Square Enix
- Publisher(s)
- Square Enix
- Platform(s)
- PlayStation 5
- Released
- February 29, 2024

